Web: How to use Firebase in FlutLab

FlutLab supports automatic Firebase configuration for Web and Android apps.

In this article, we will go thru step-by-step instruction about Firebase configuration for Web apps, and how will FlutLab help you with this task.


1. Go to https://firebase.google.com/. Sign in or Sign up to your Firebase account. Press the “Create a project” button.

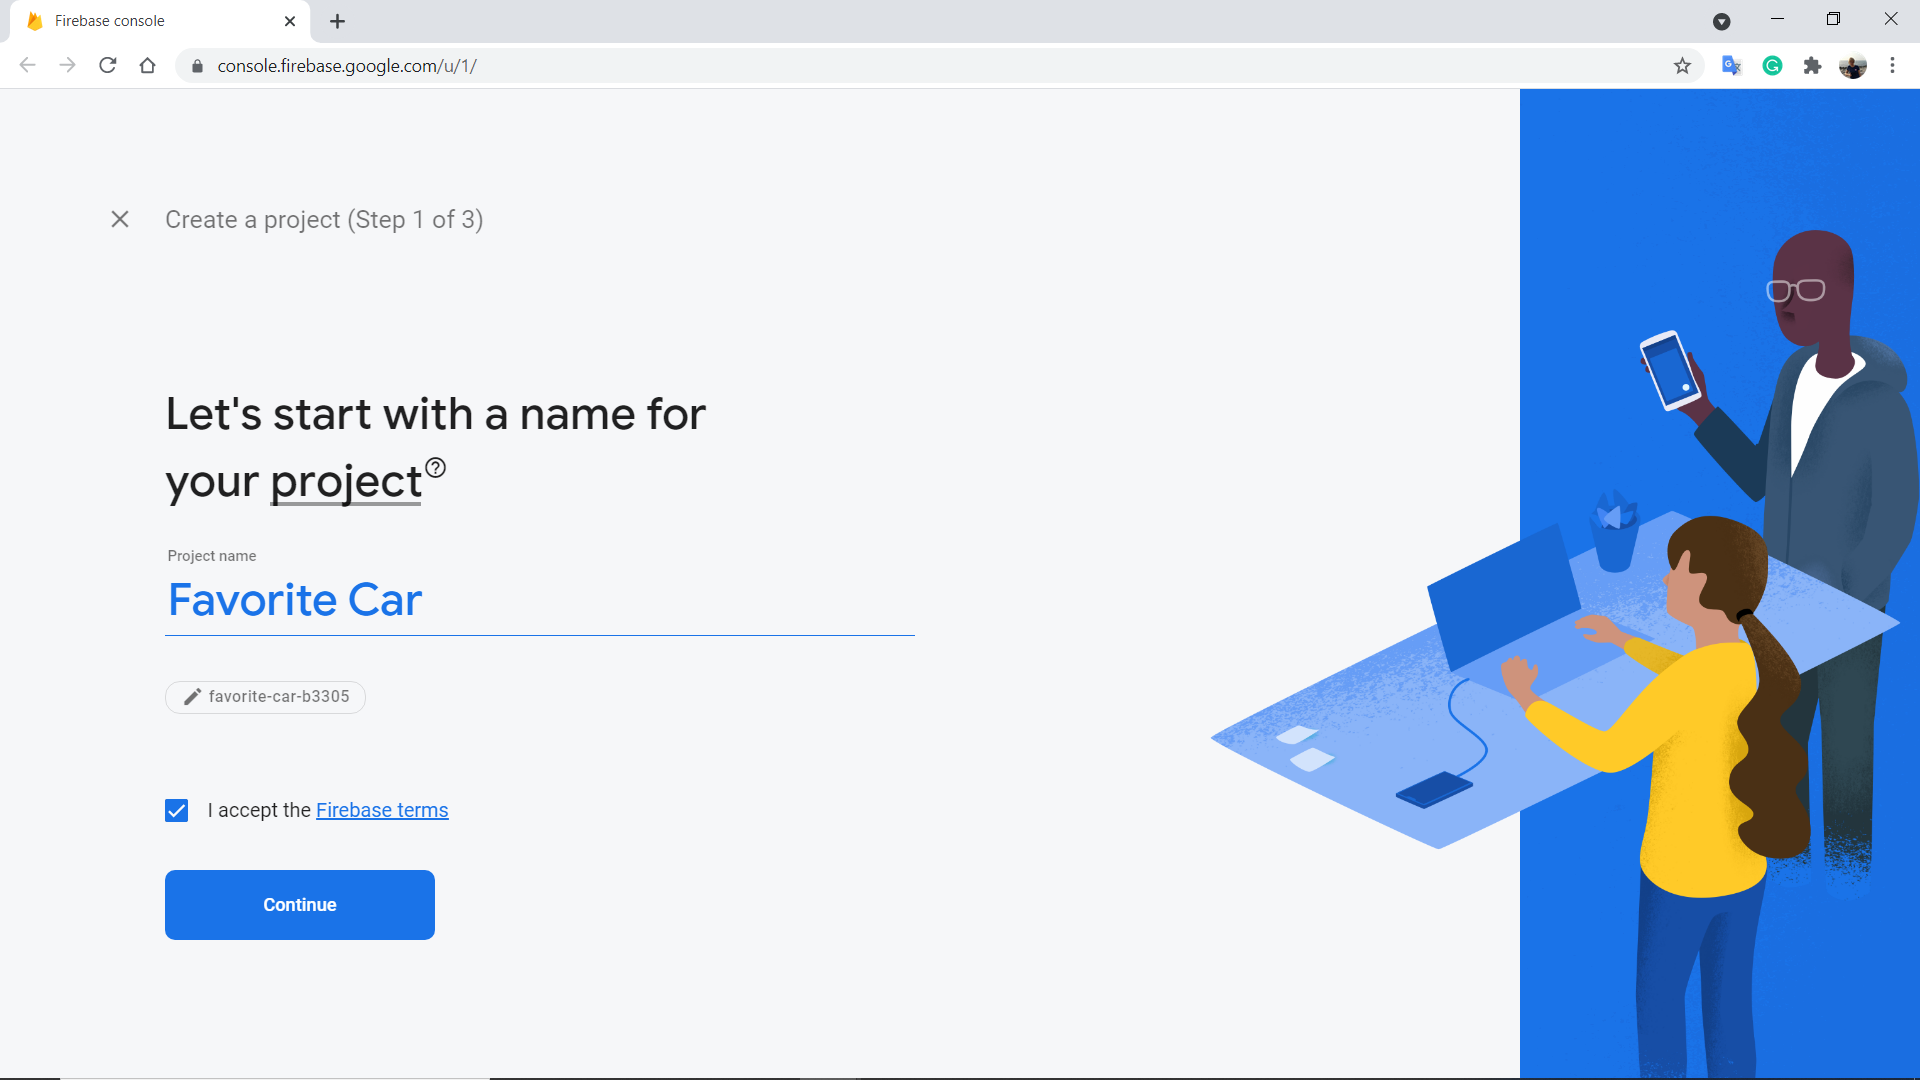
2. Give a name to your Firebase project and click “Continue”.

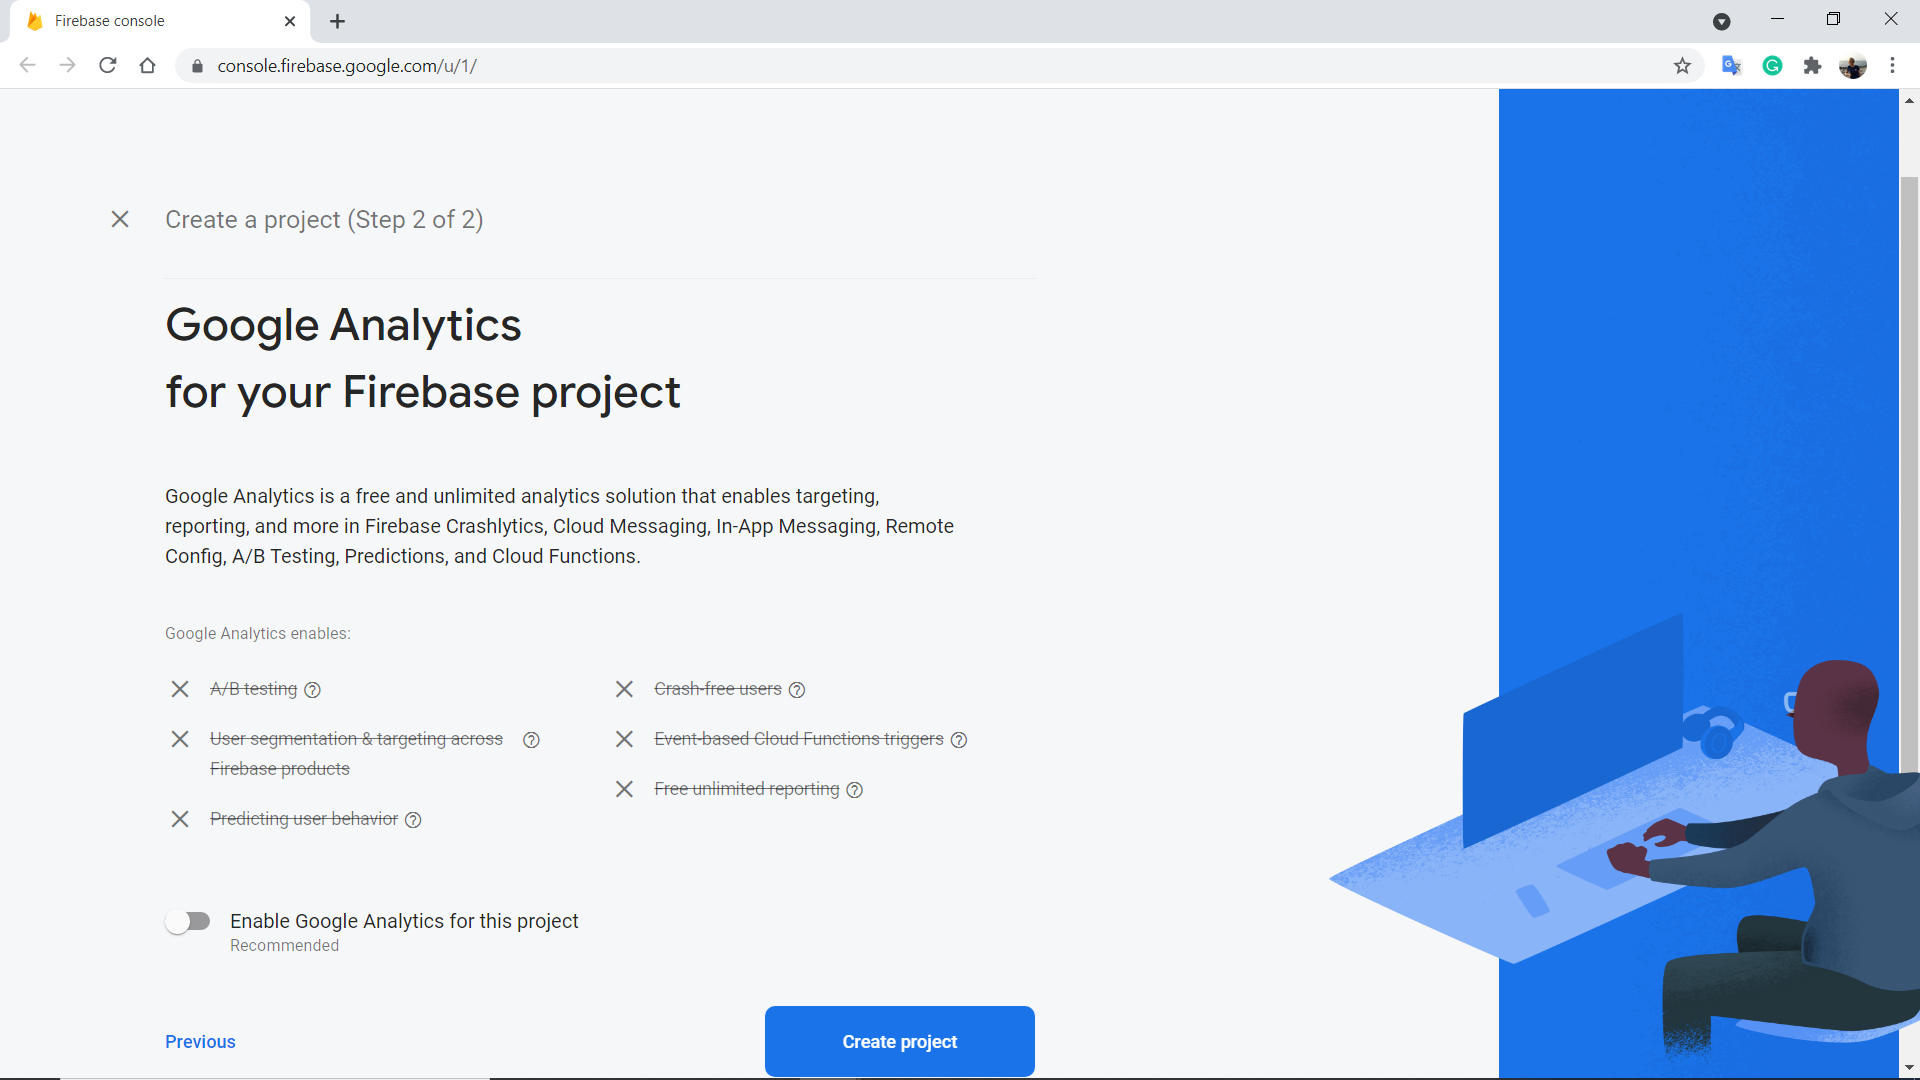
3. We are not planning to use Analytics, so you can turn it off. Click “Create project” then.

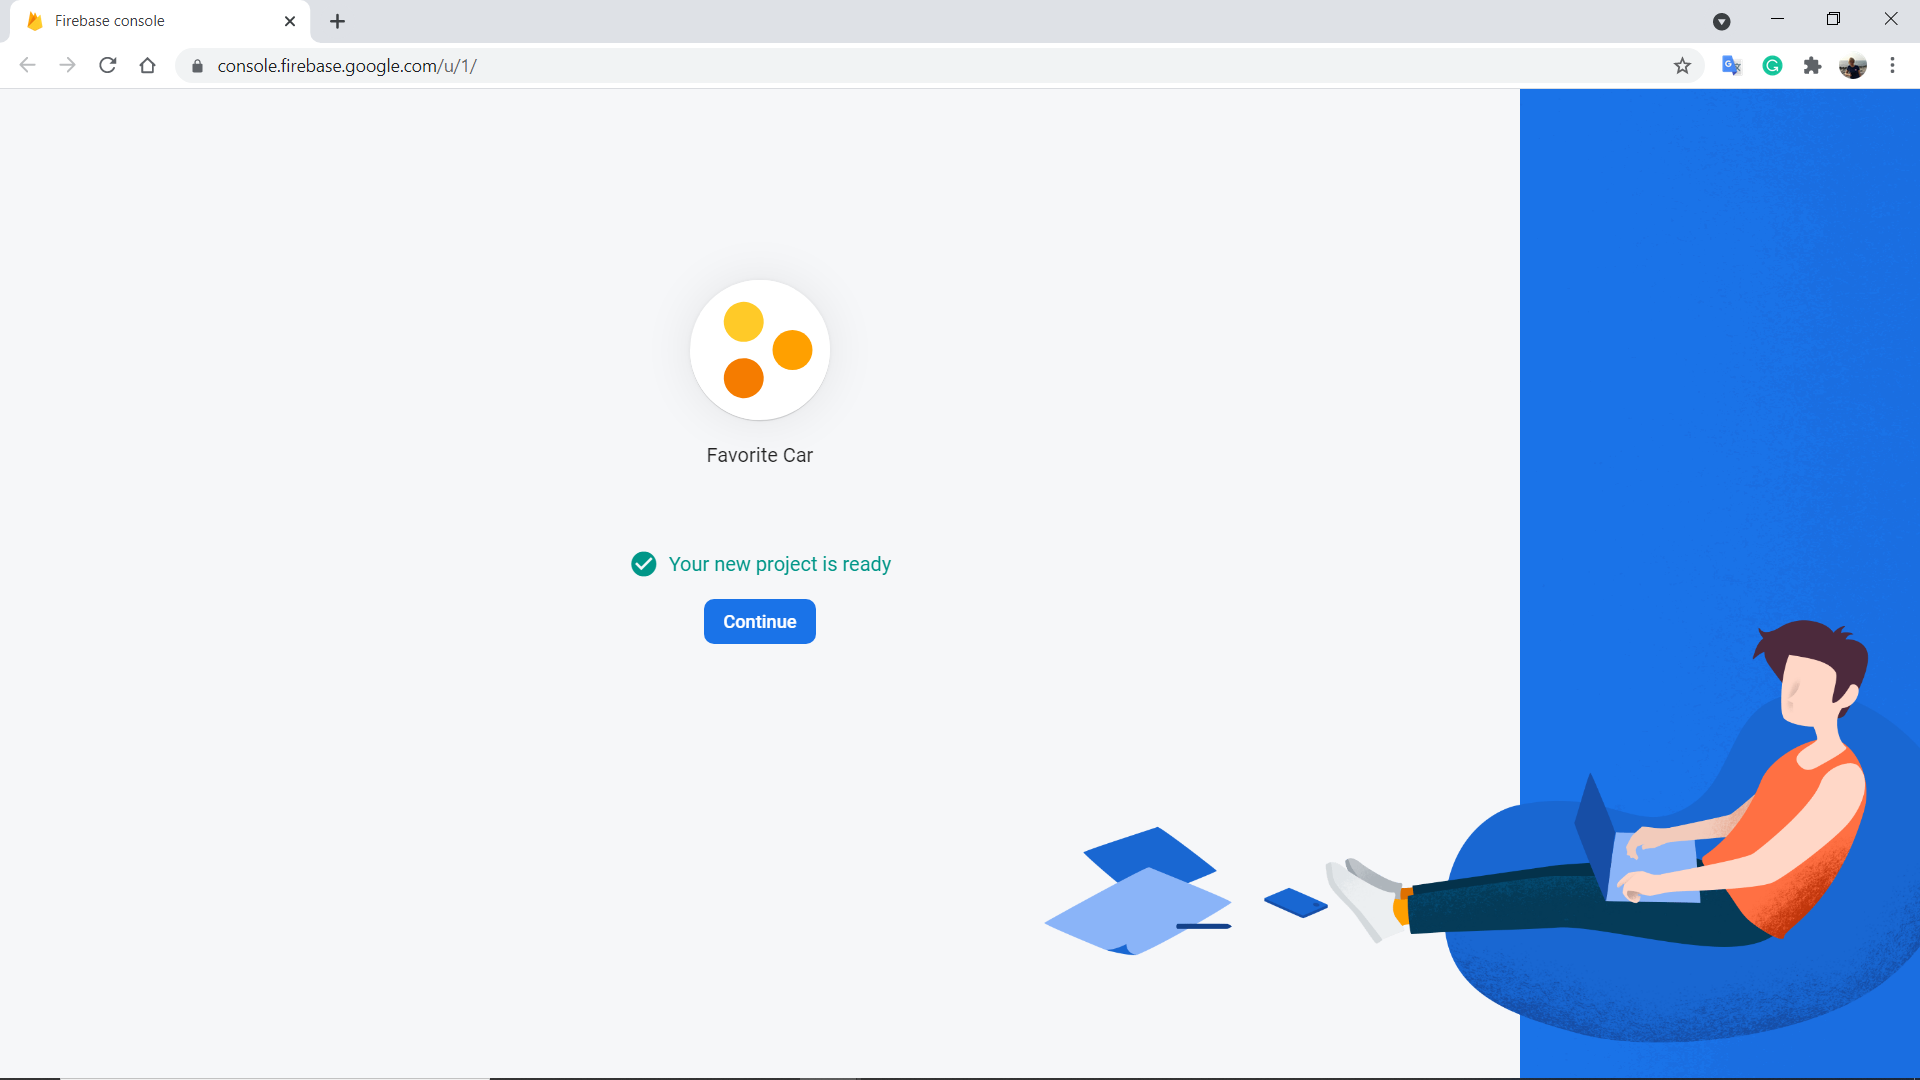
4. Great! Your Firebase project is ready. Click “Continue”.

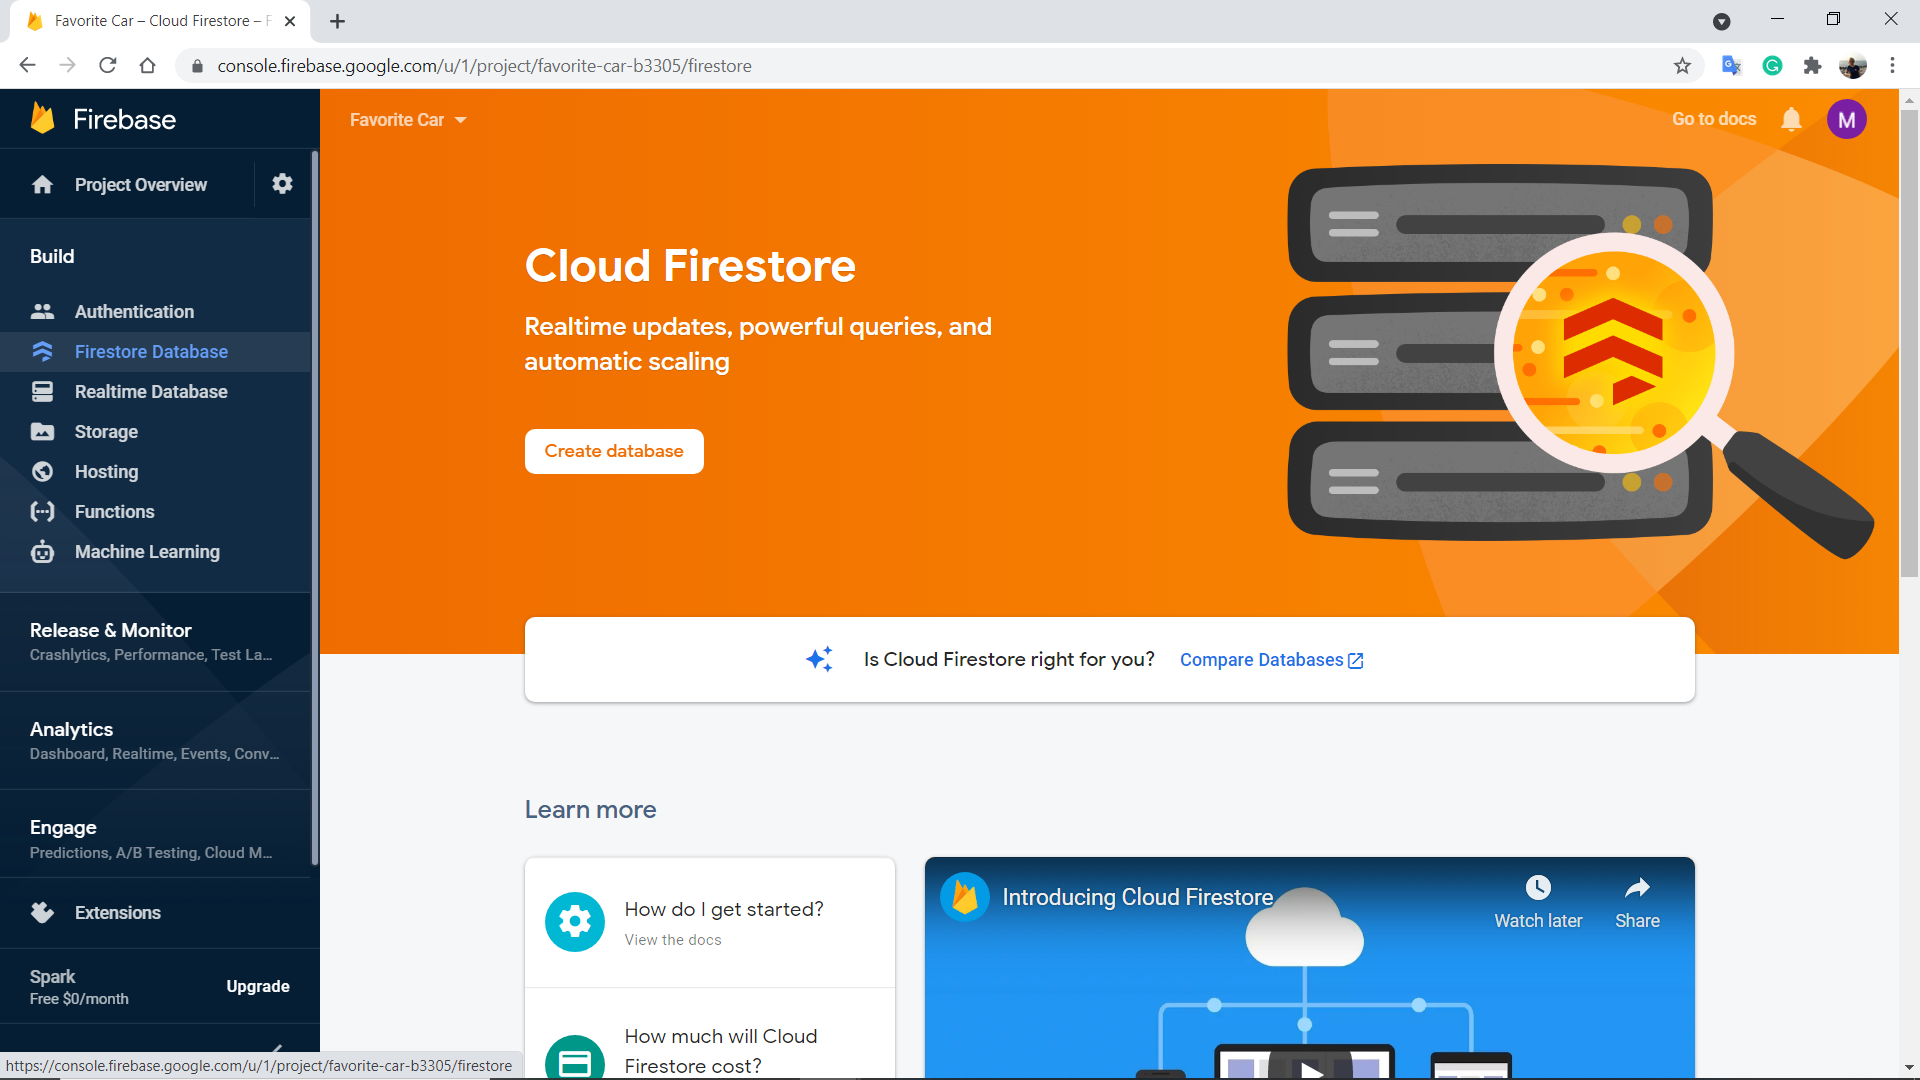
5. Open “Build” section in the left menu.

6. Select “Firestore Database” and click the “Create database” button.

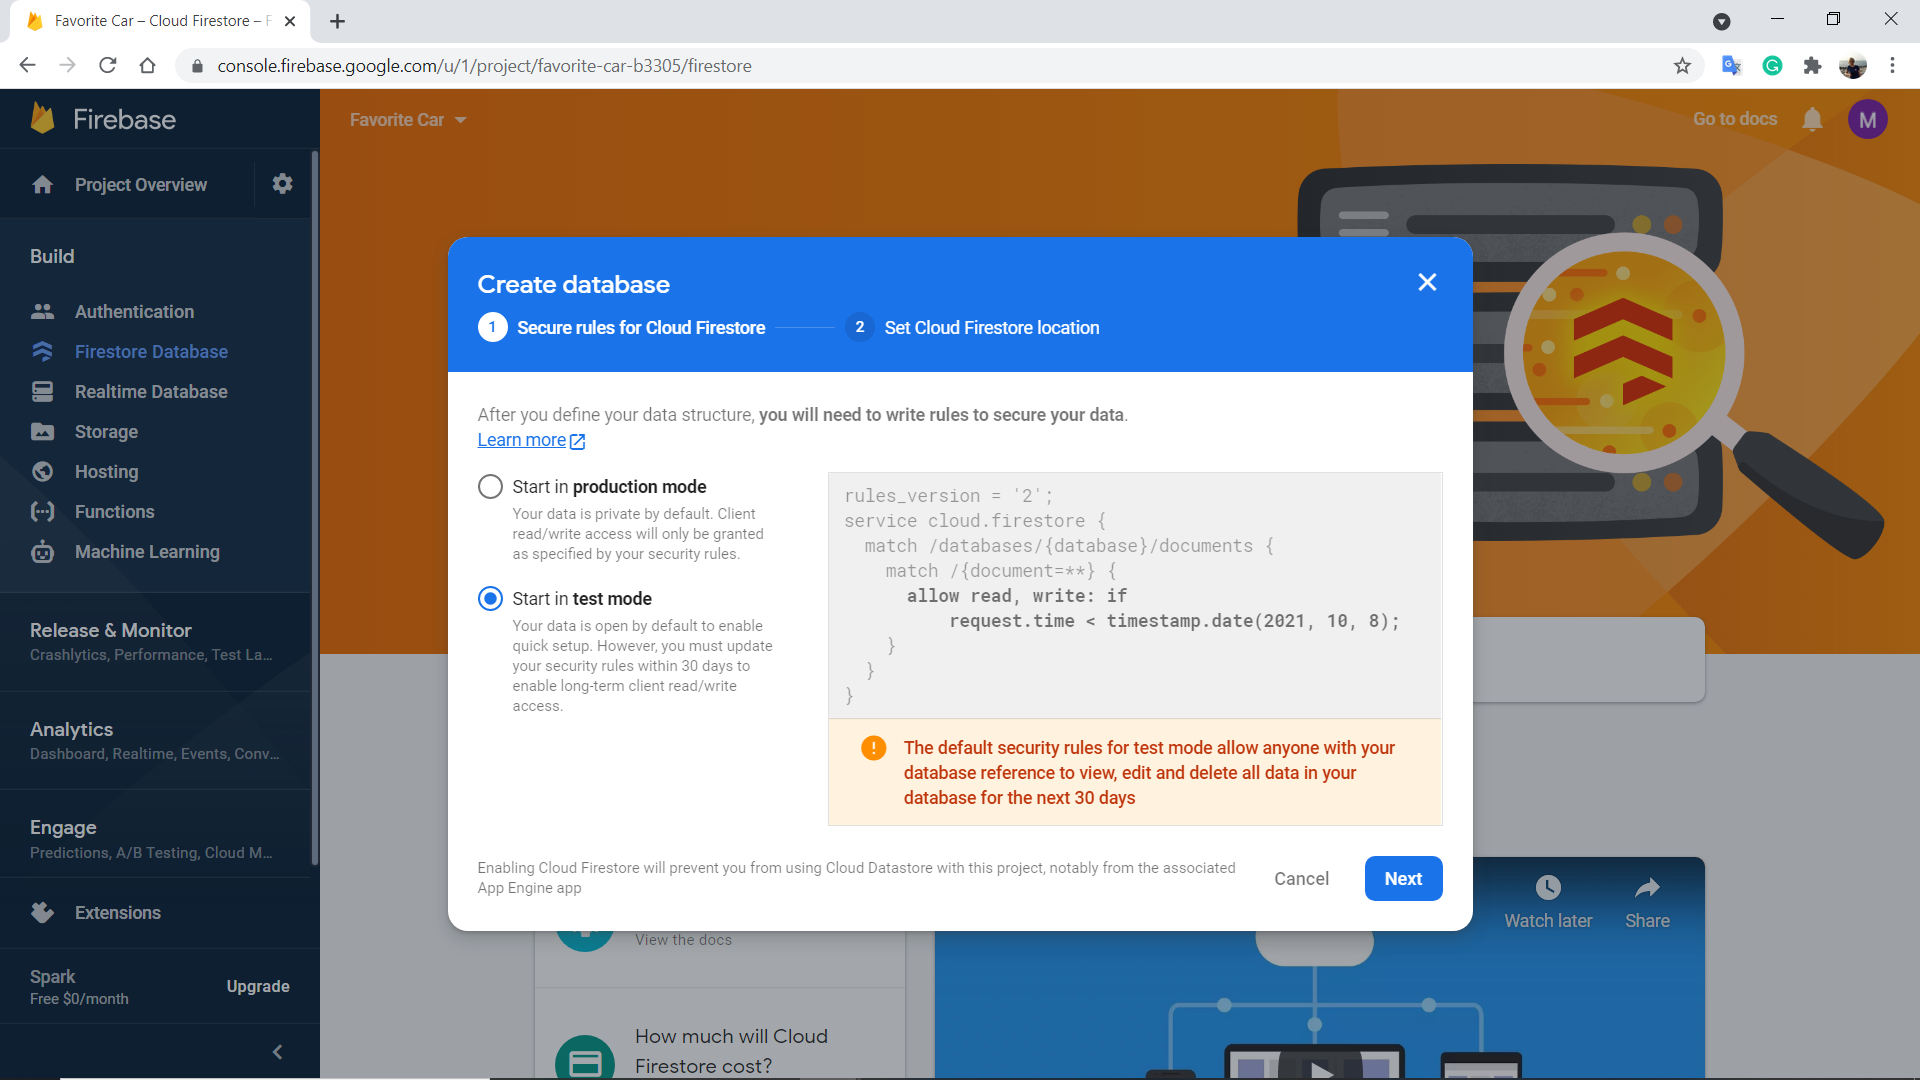
7. In the Secure rules for Firestore Database dialog, select “Start in test mode”, and click Next .

Important: Test mode allows any user to read and write to your database, which is convenient during development. However, this can be a security risk. 

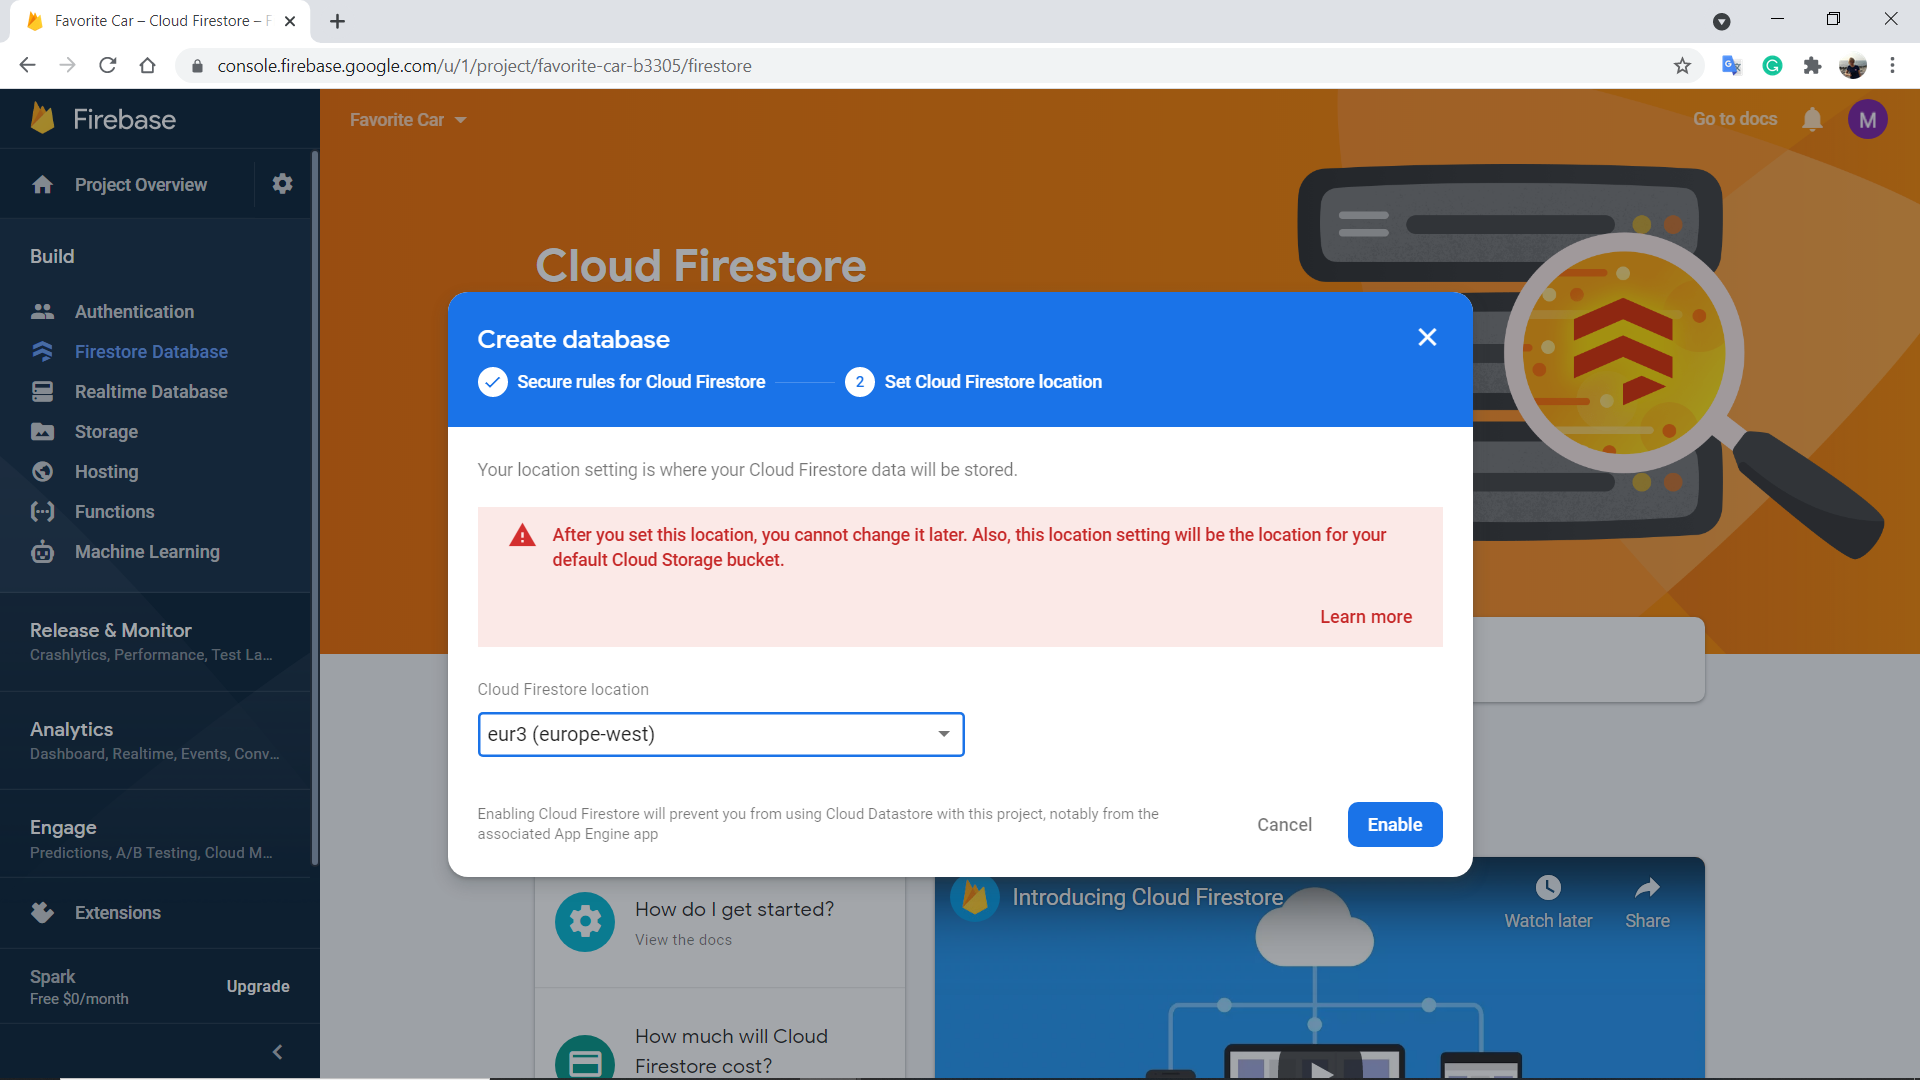
8. Set your location and click “Enable” button.

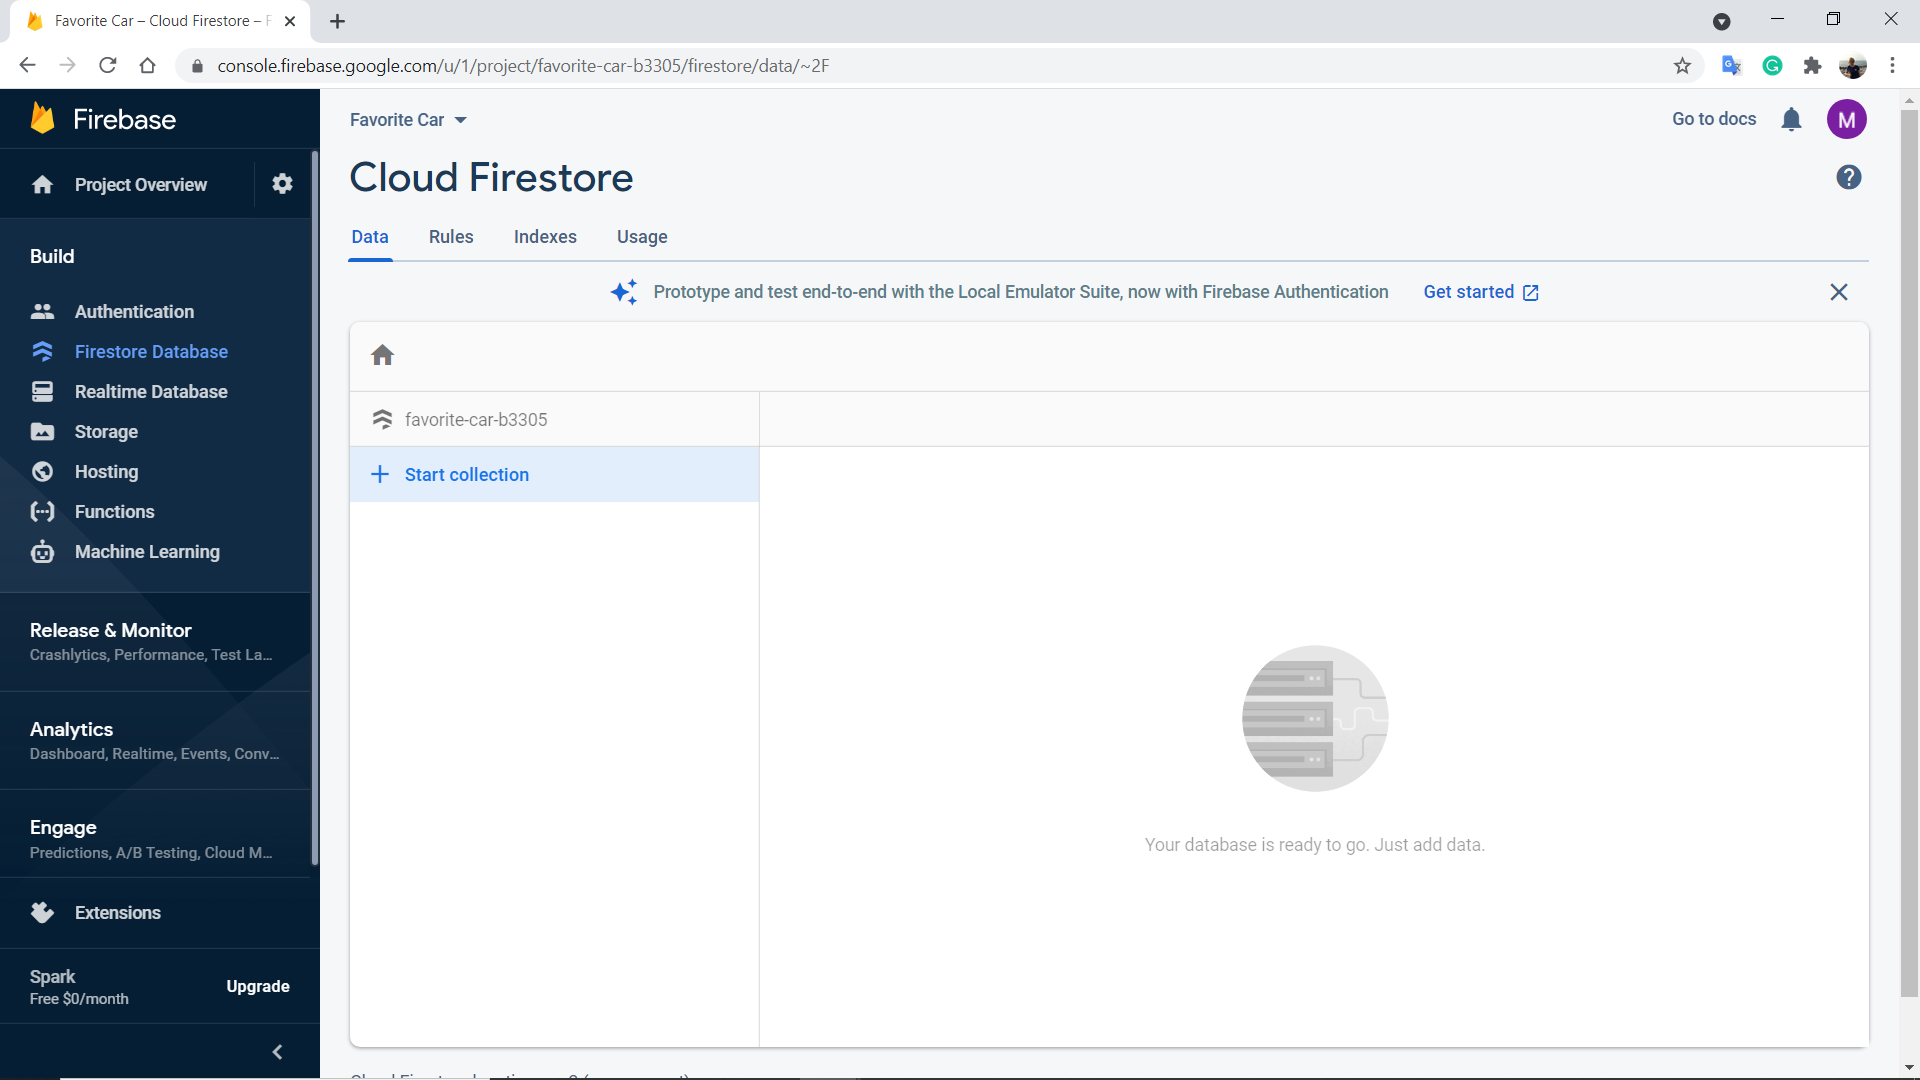
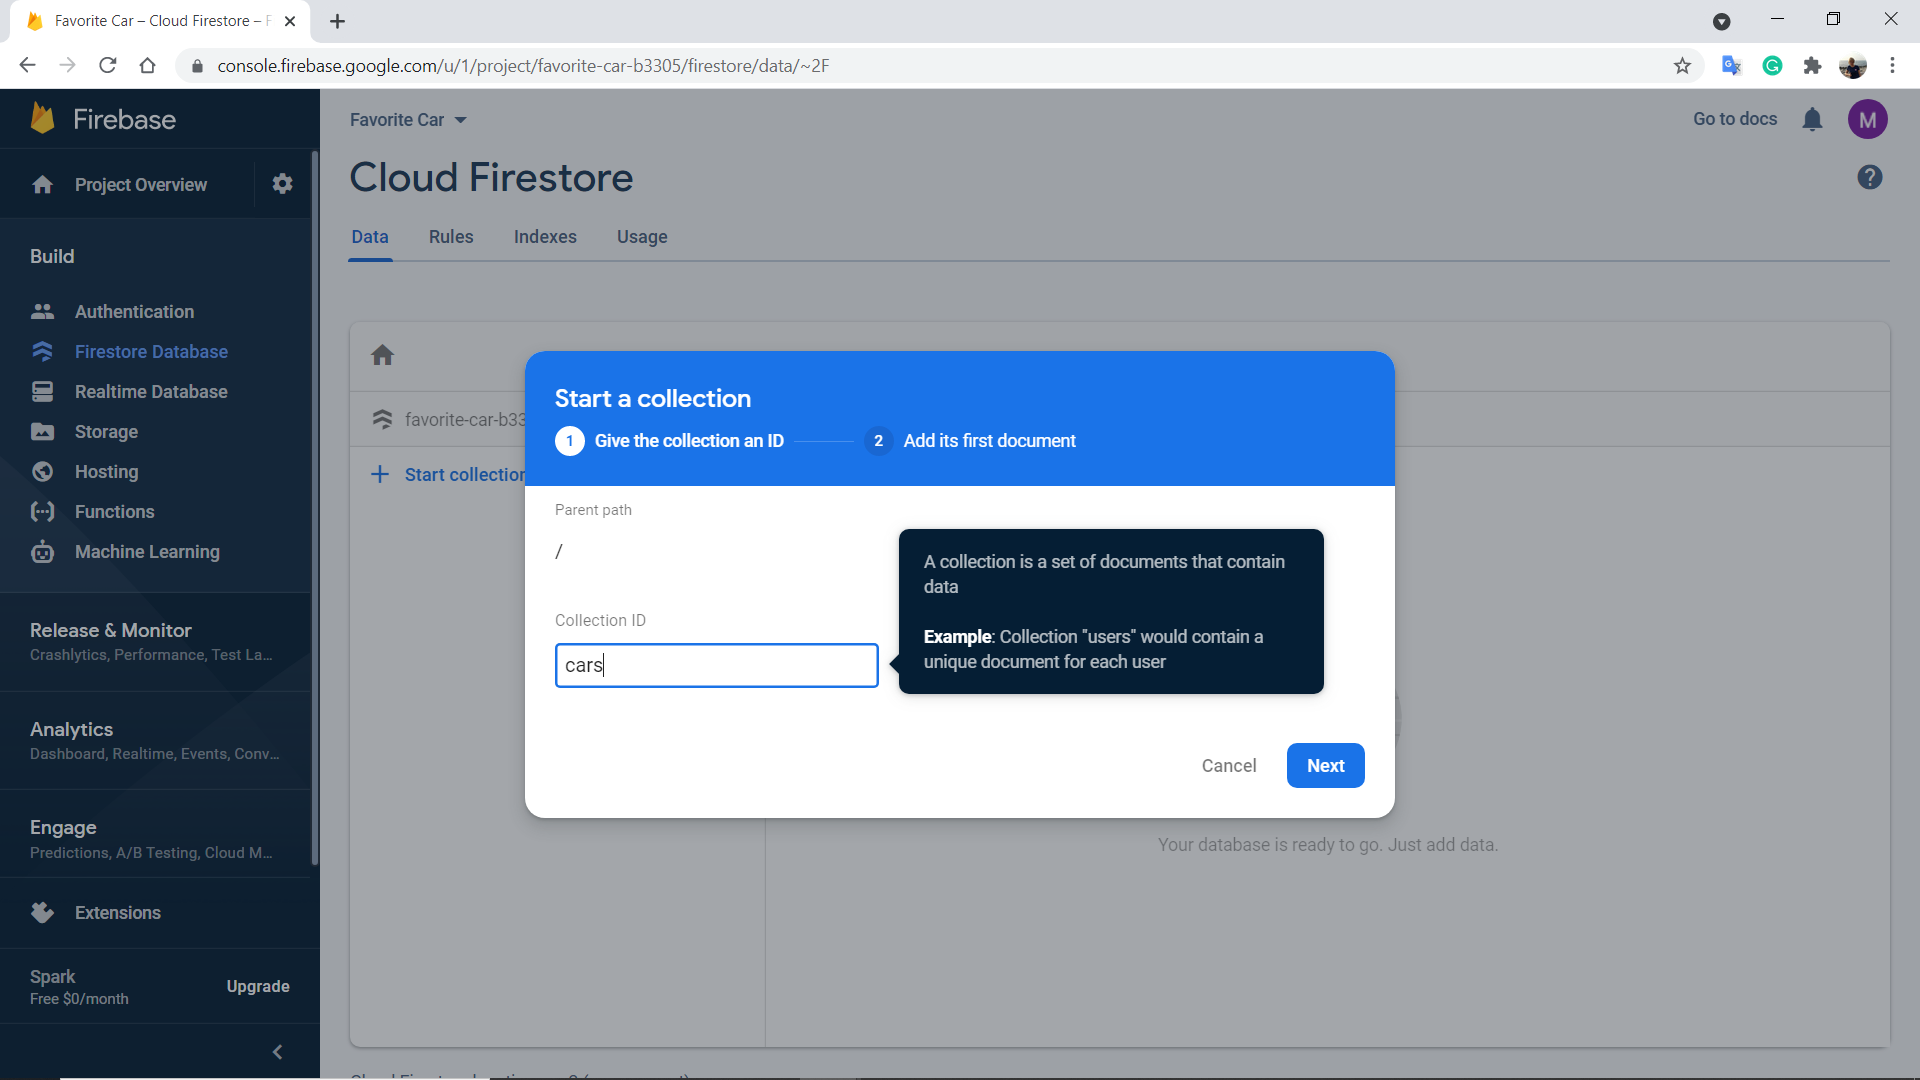
9. Great, you can create a database now. Press the “Start Collection” link.

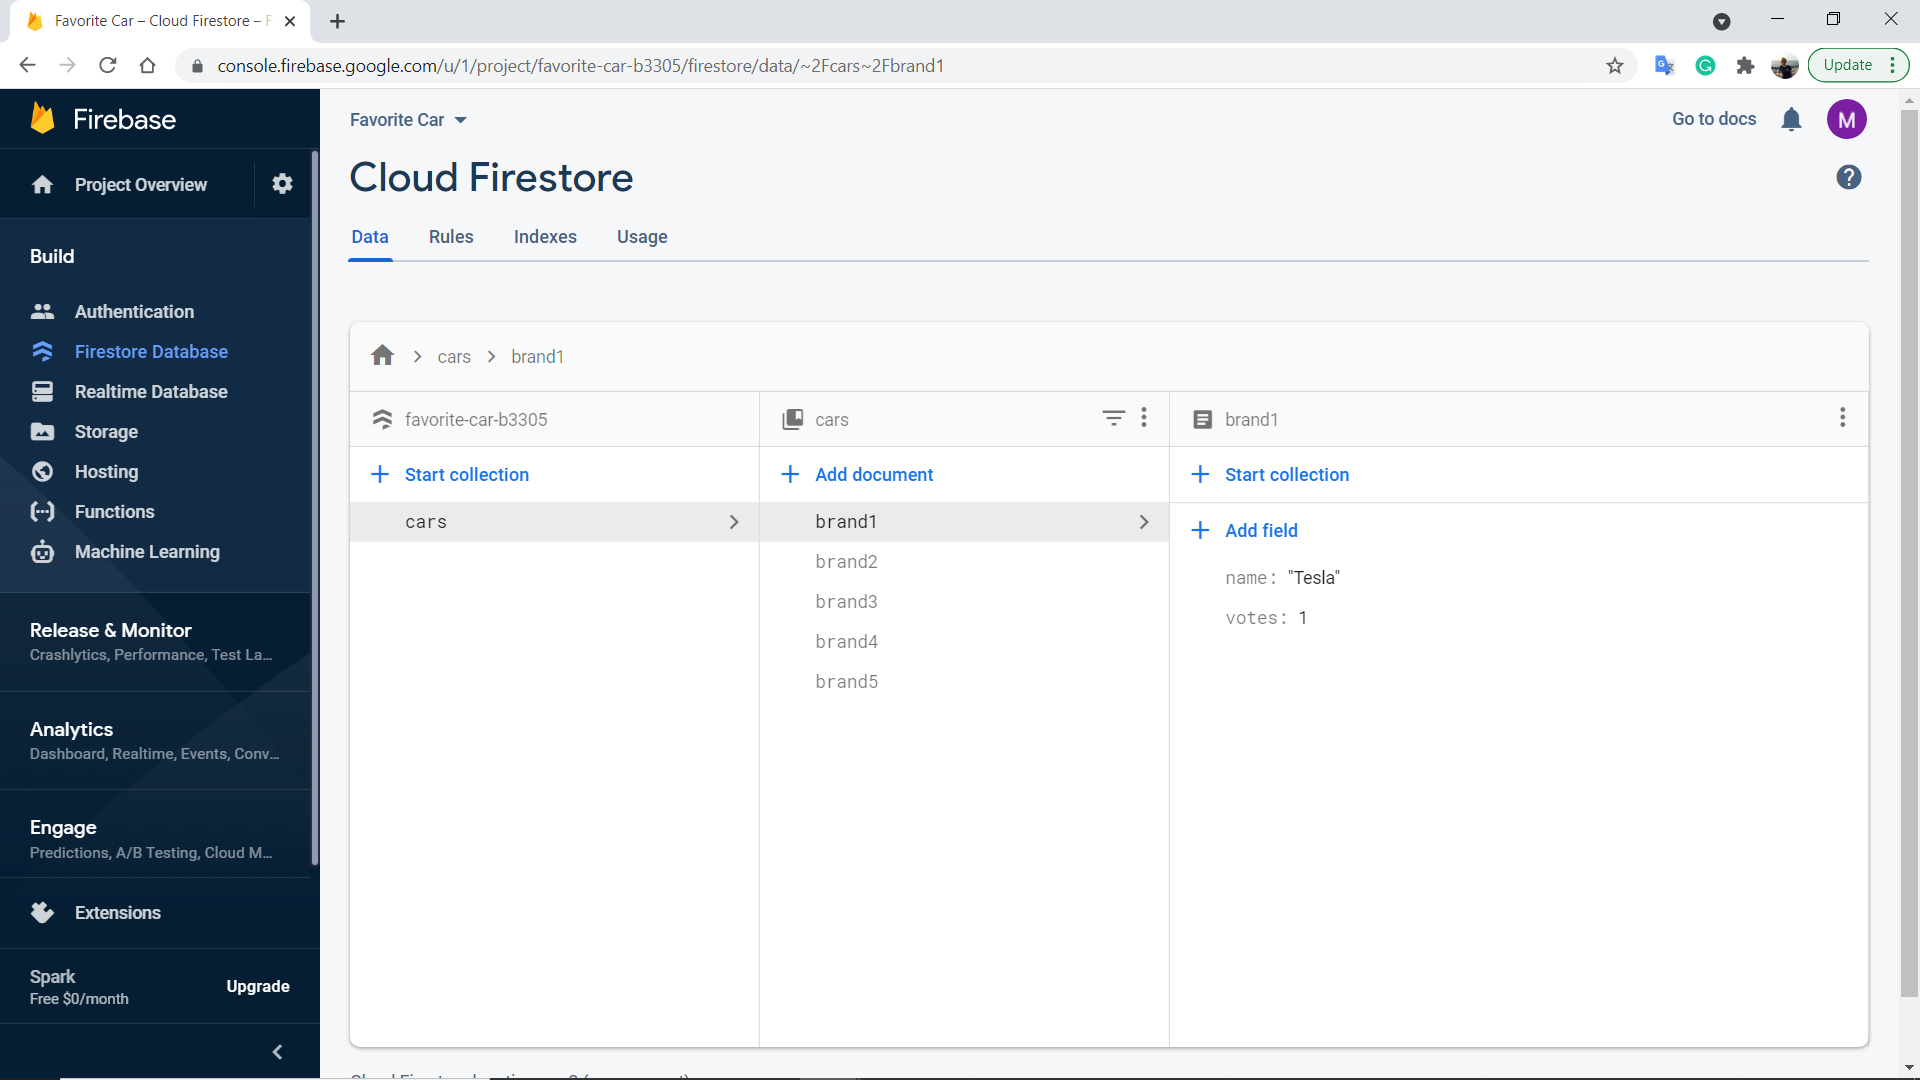
10. Set the collection name to cars and click “Next”.

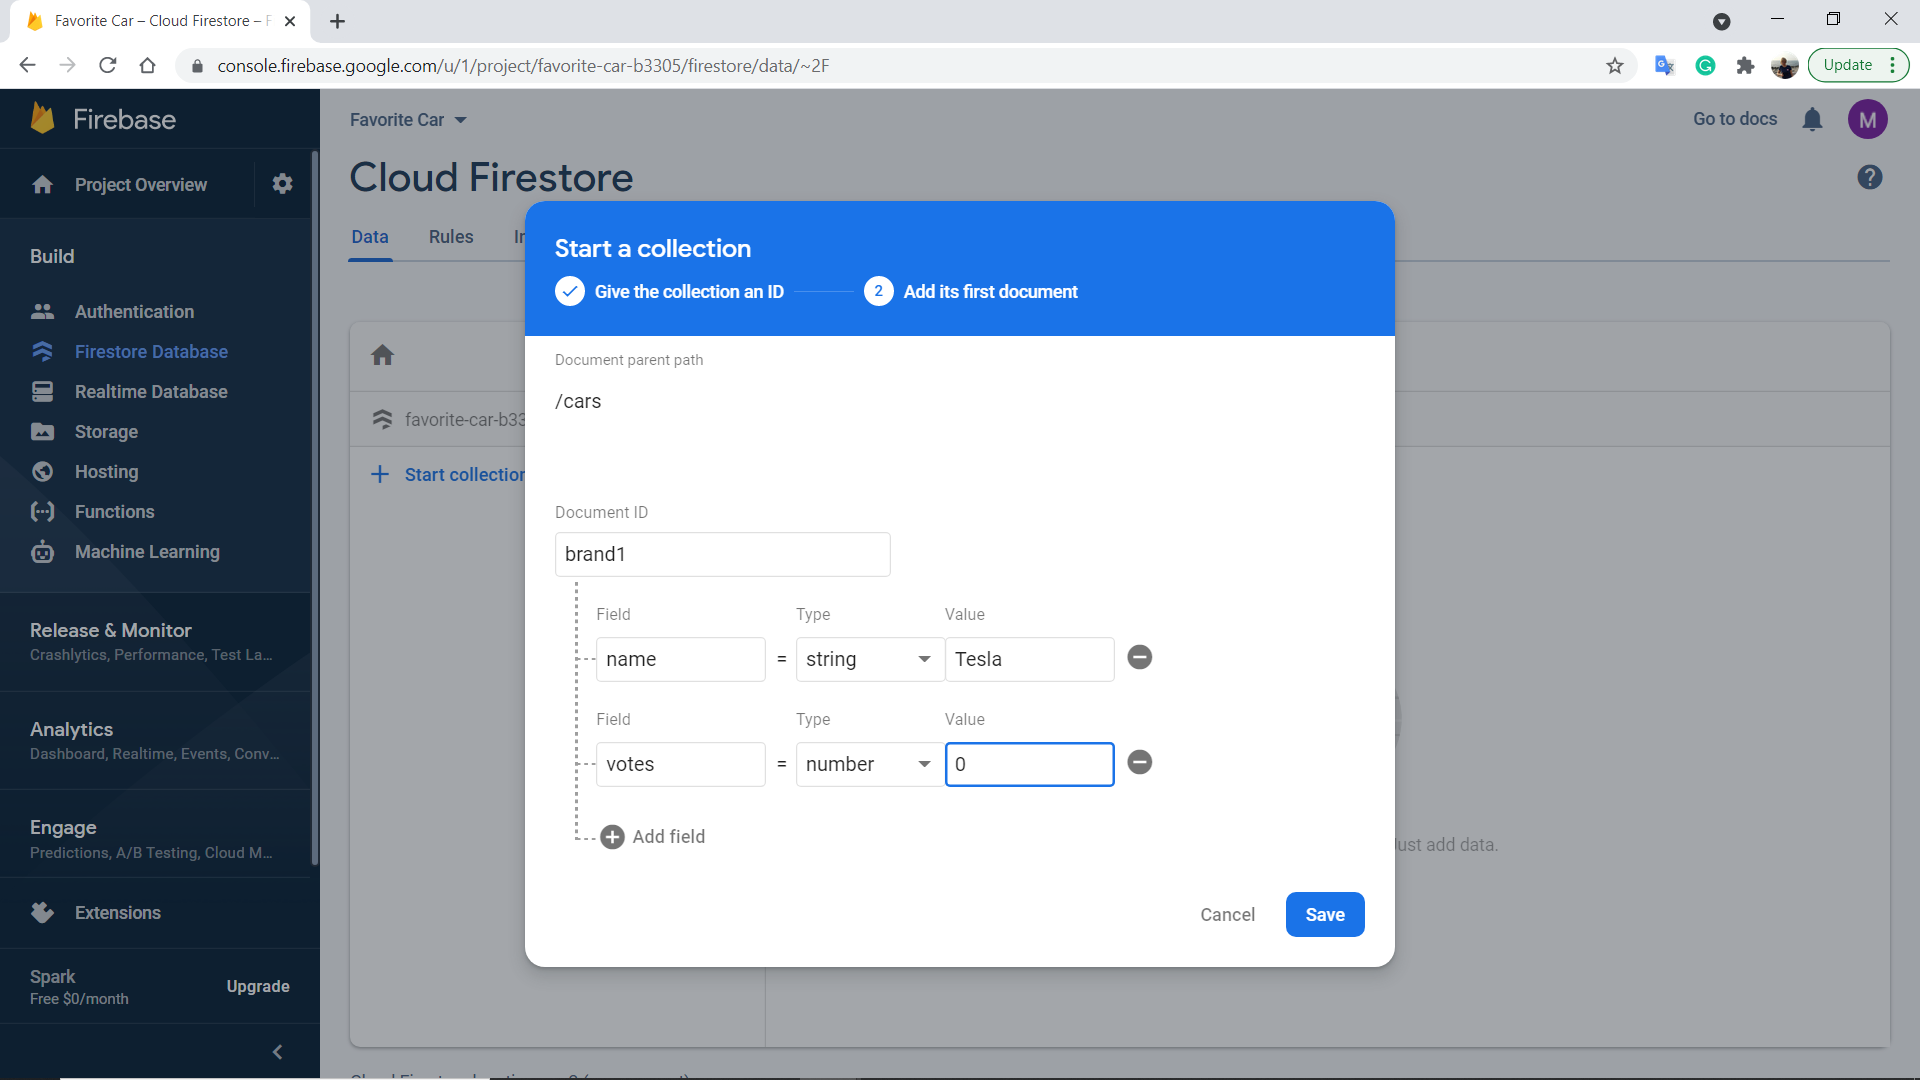
11. Fill in all fields the same way as shown below and click “Save”

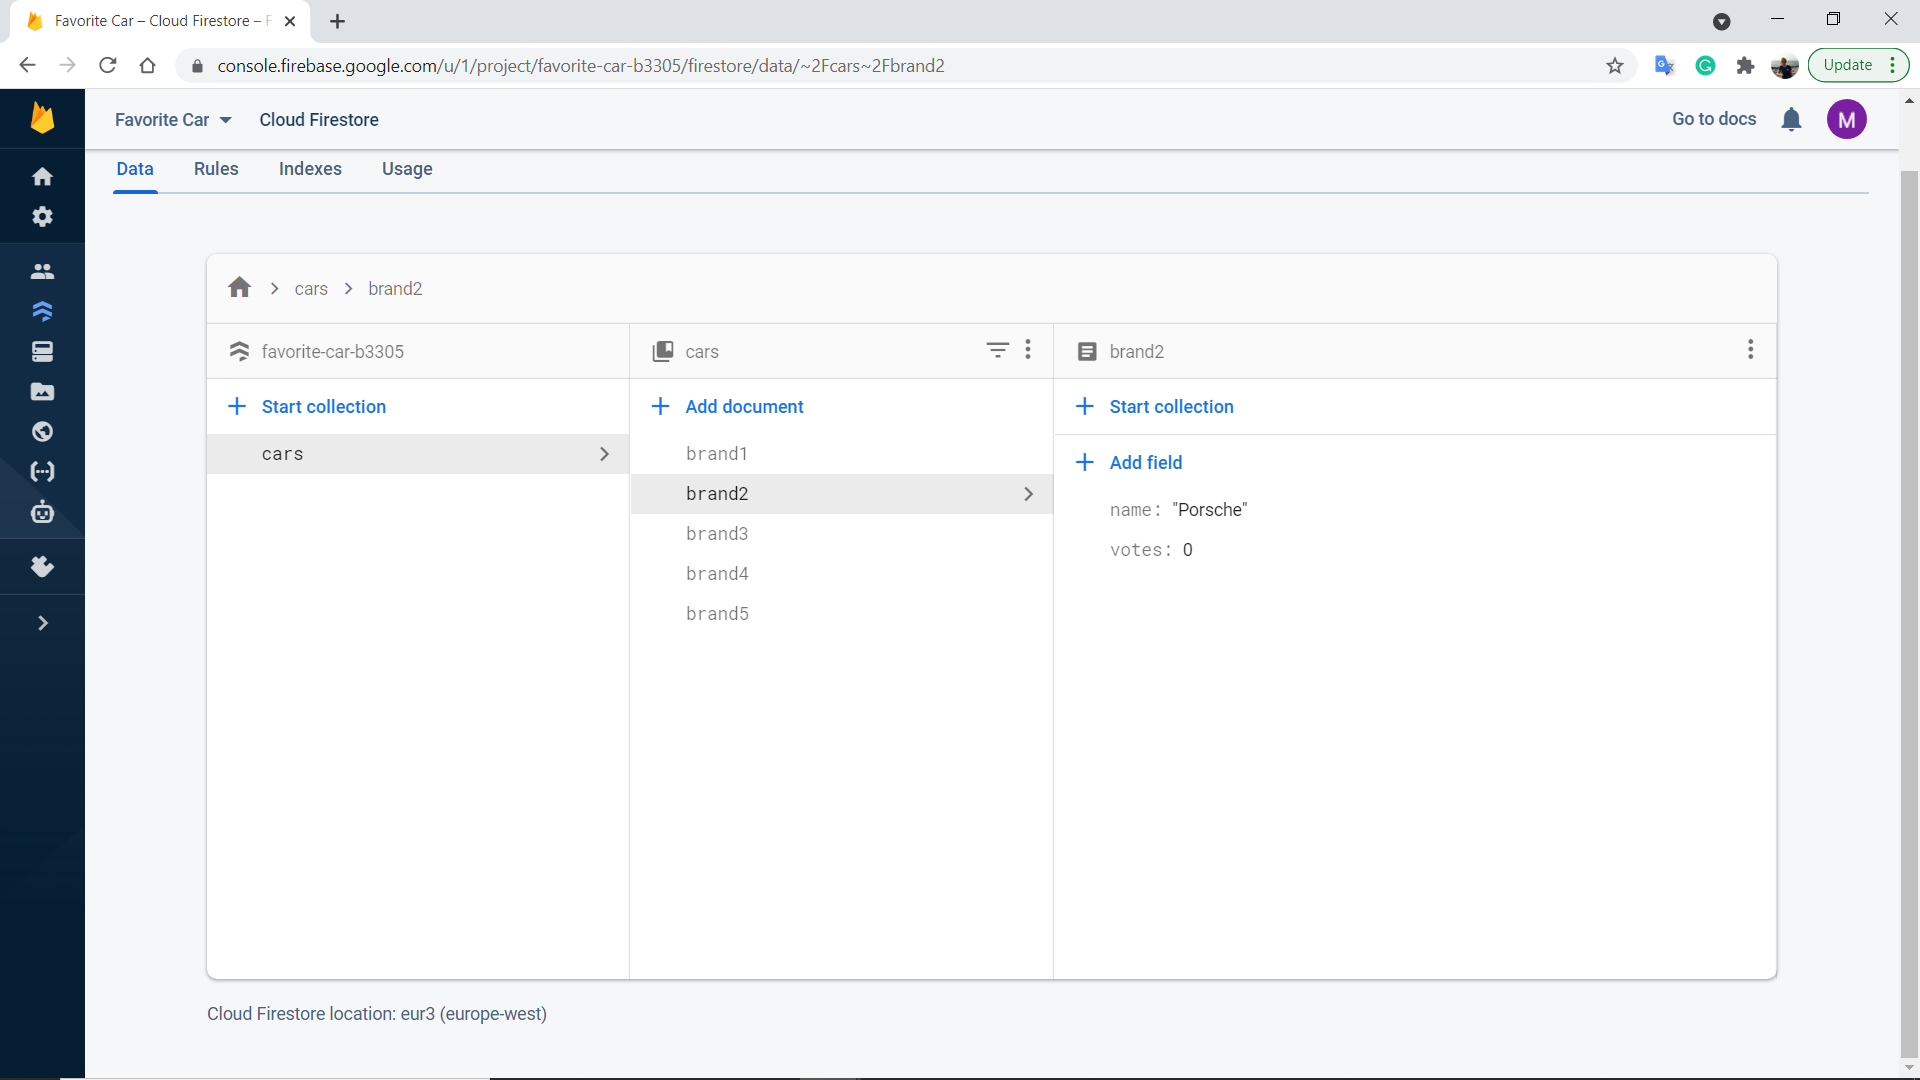
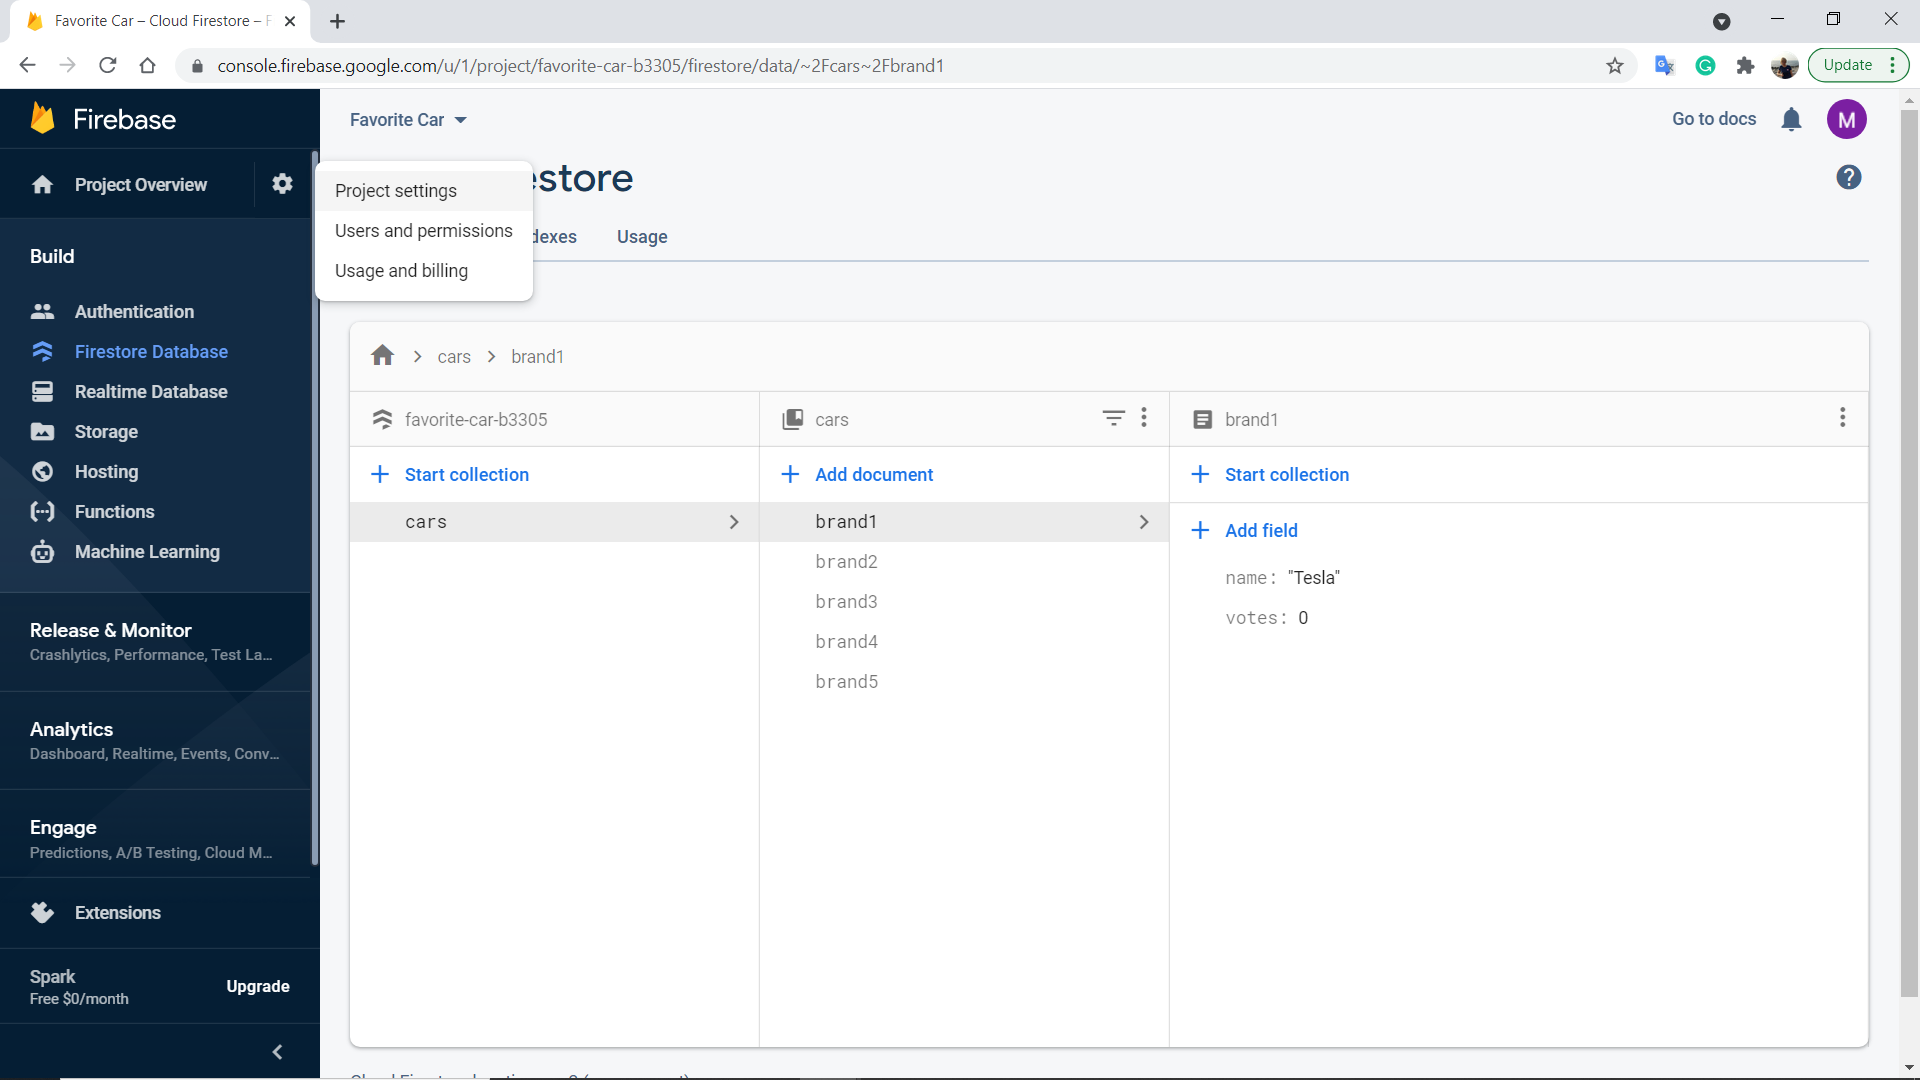
12. Click “Add document” and add a new car brand. Now you are ready to use Storage on the Firestore Database.

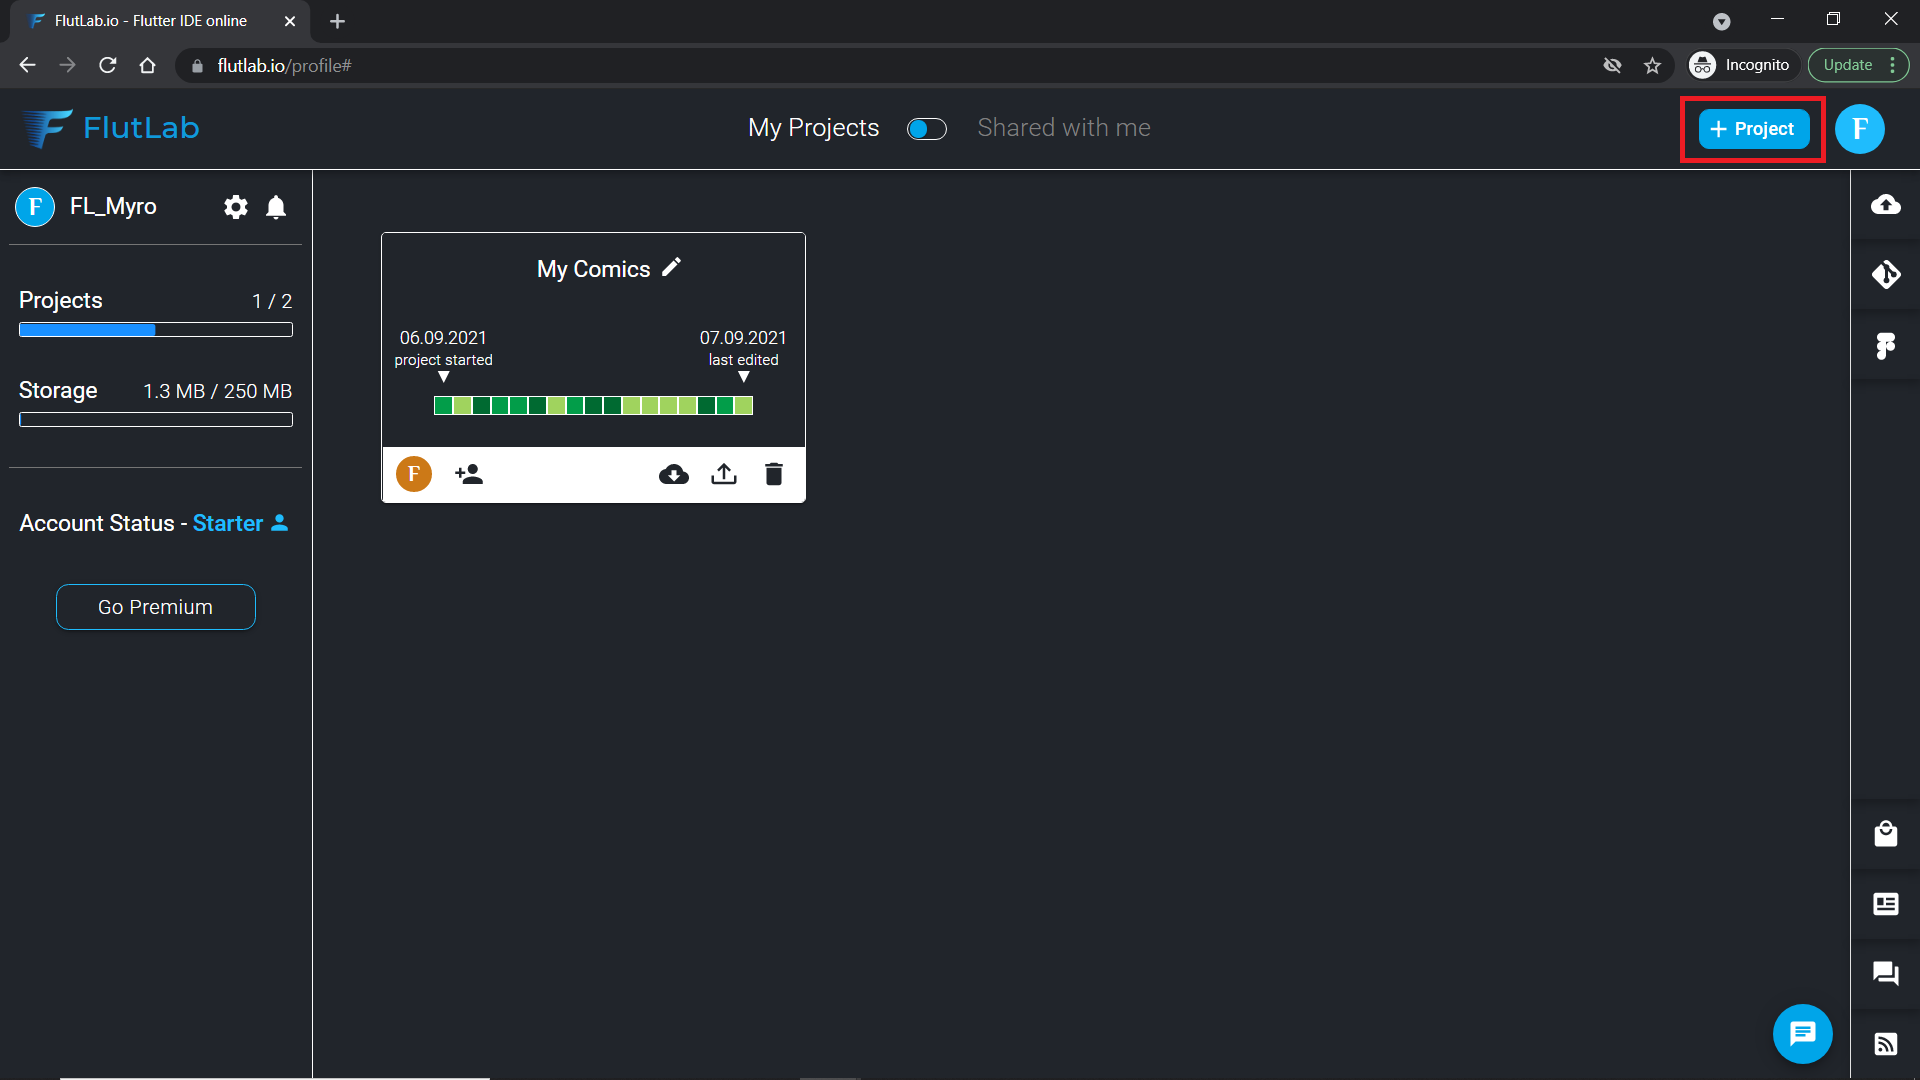
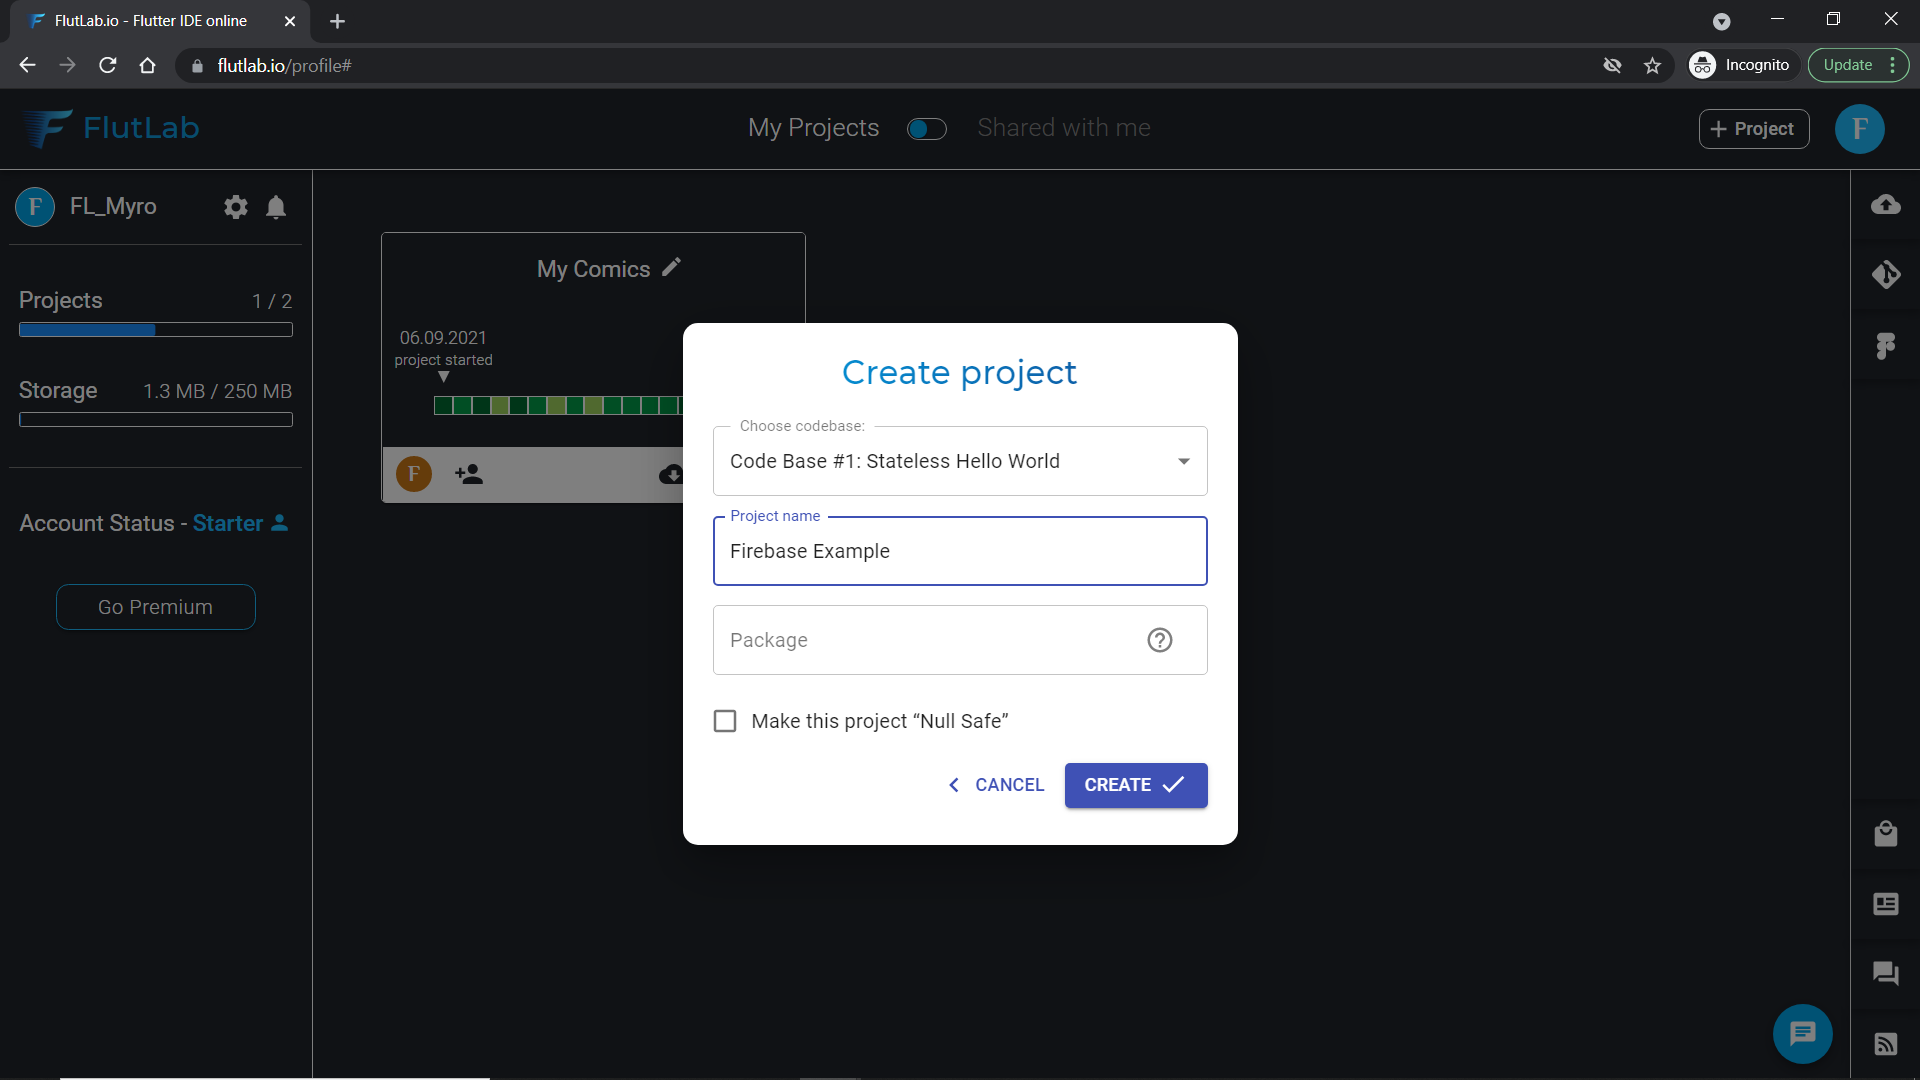
13. Go to your FlutLab Profile and click “+Project” button.

14. Create a new project with the “Stateless Hello World” codebase.

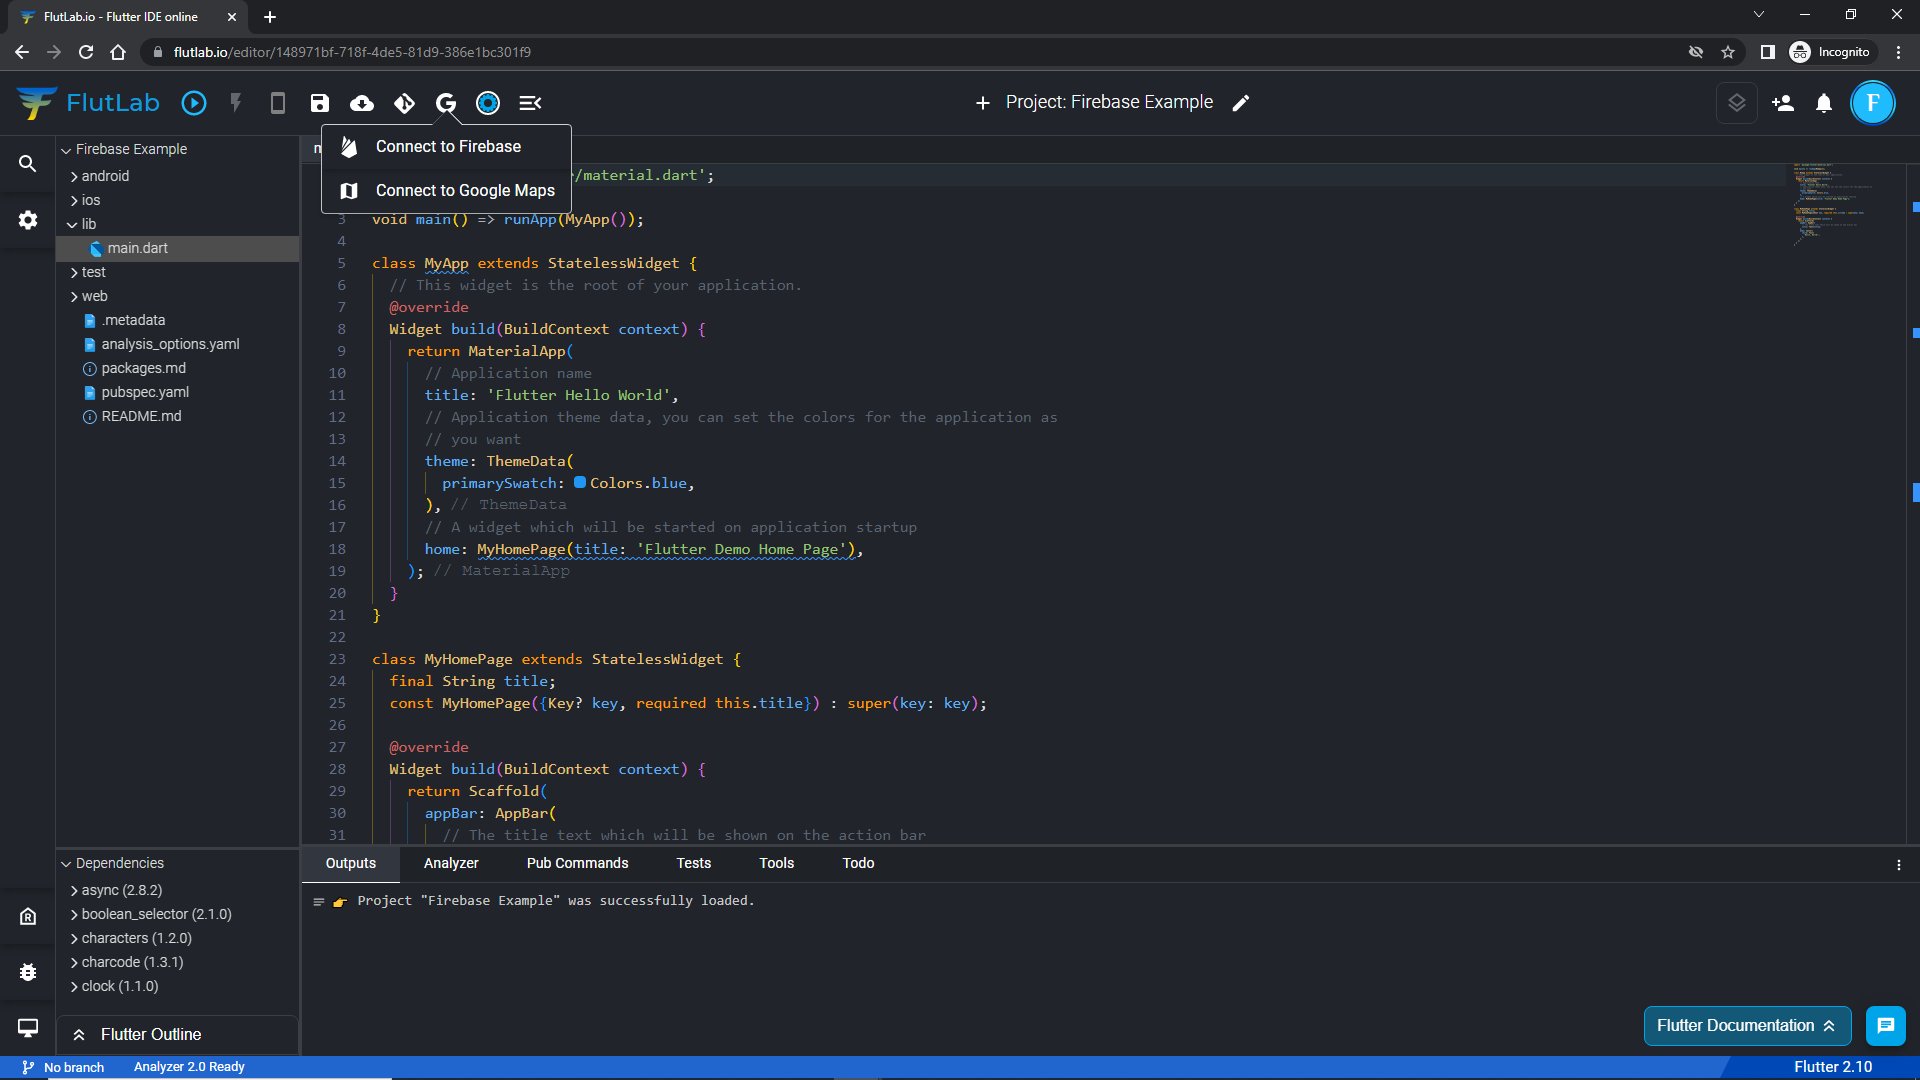
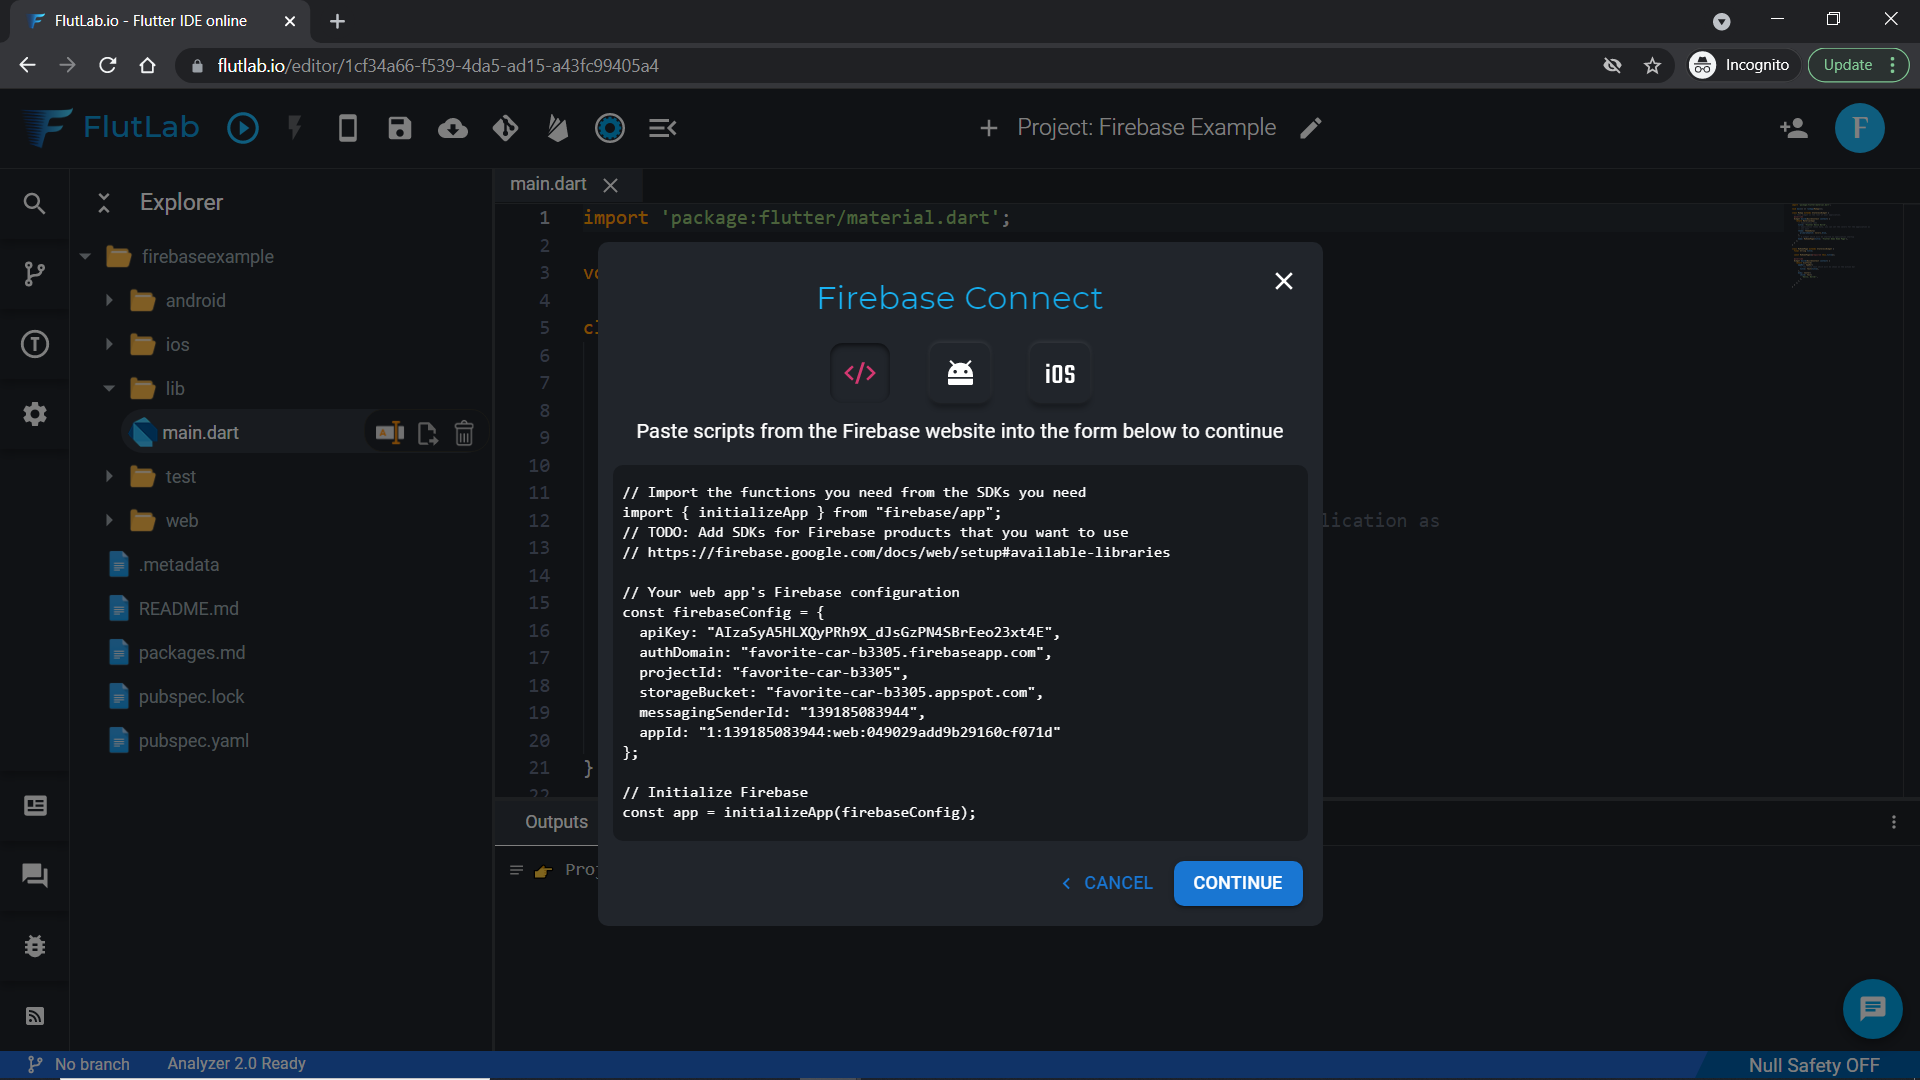
15. Click the “Connect to Firebase” button.

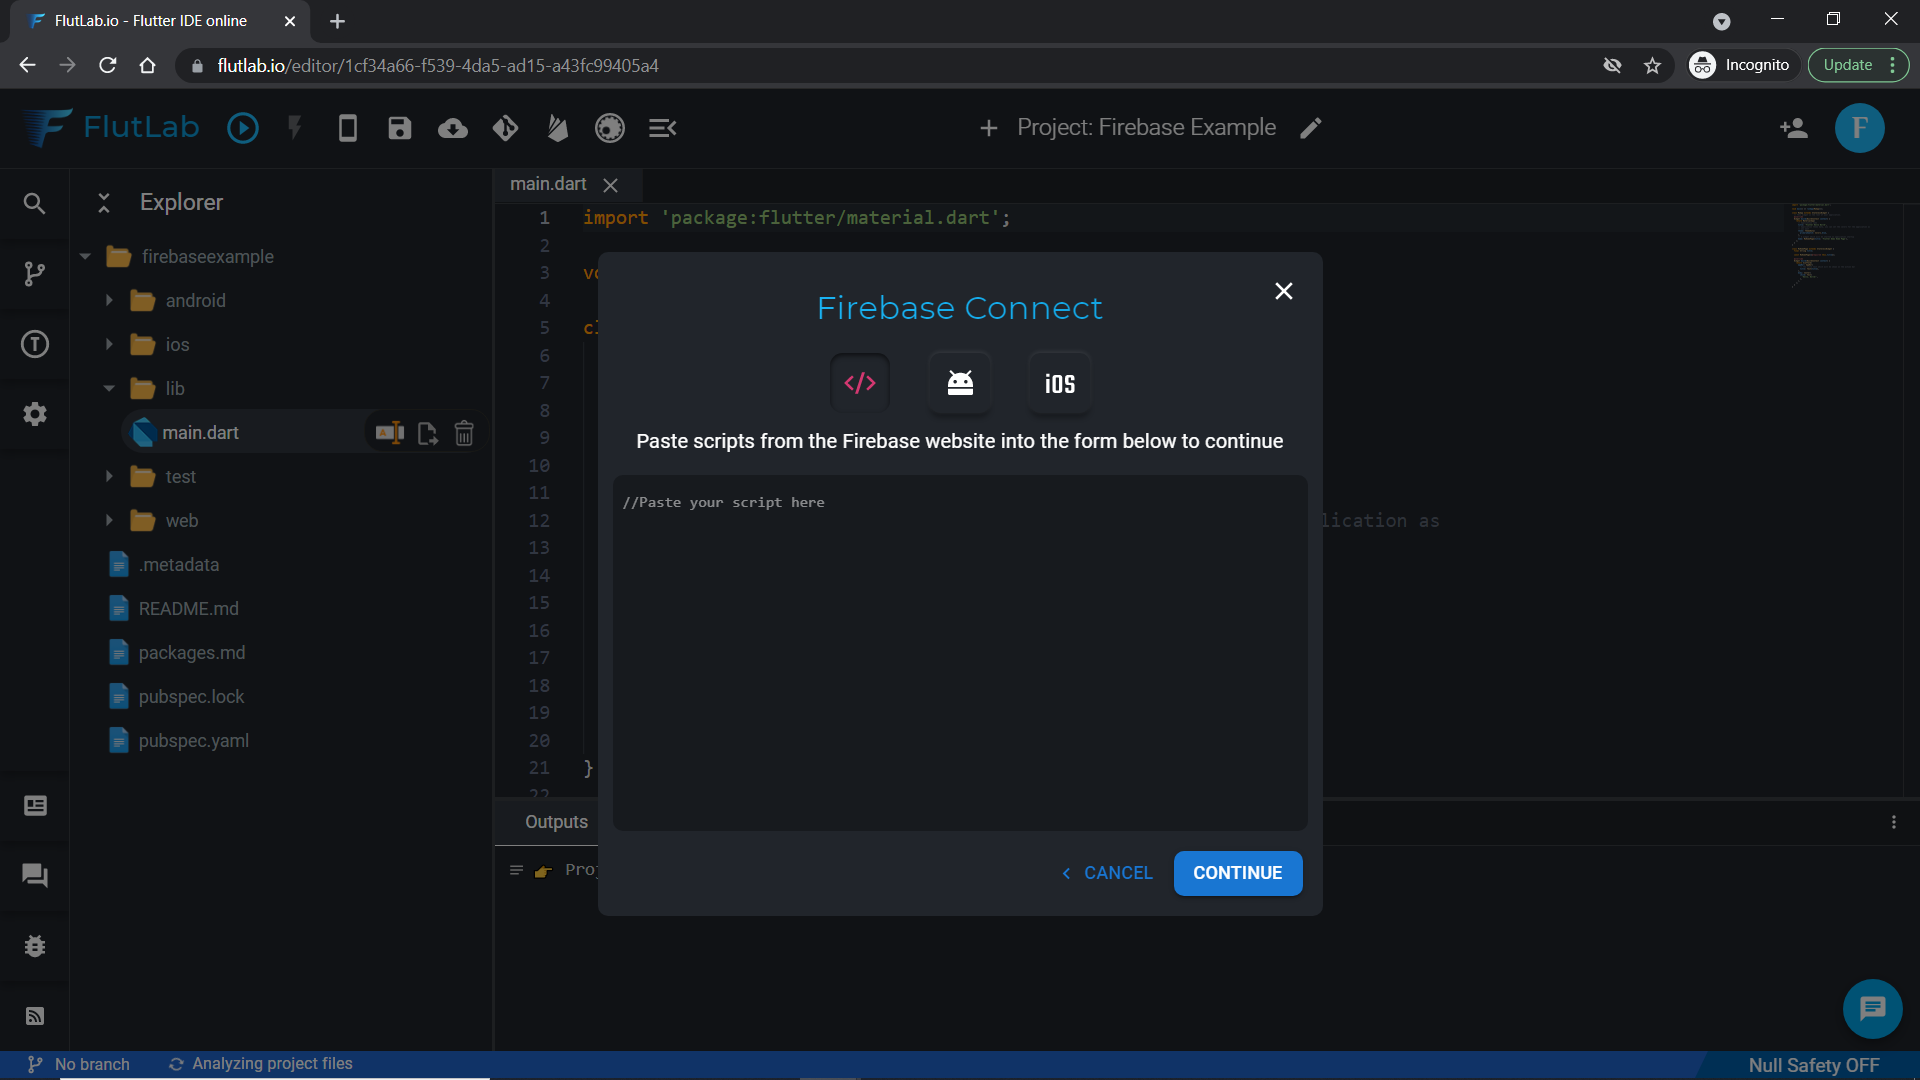
16. We are going to connect WEB Firebase.

17. You need to paste Firebase configuration to this window.

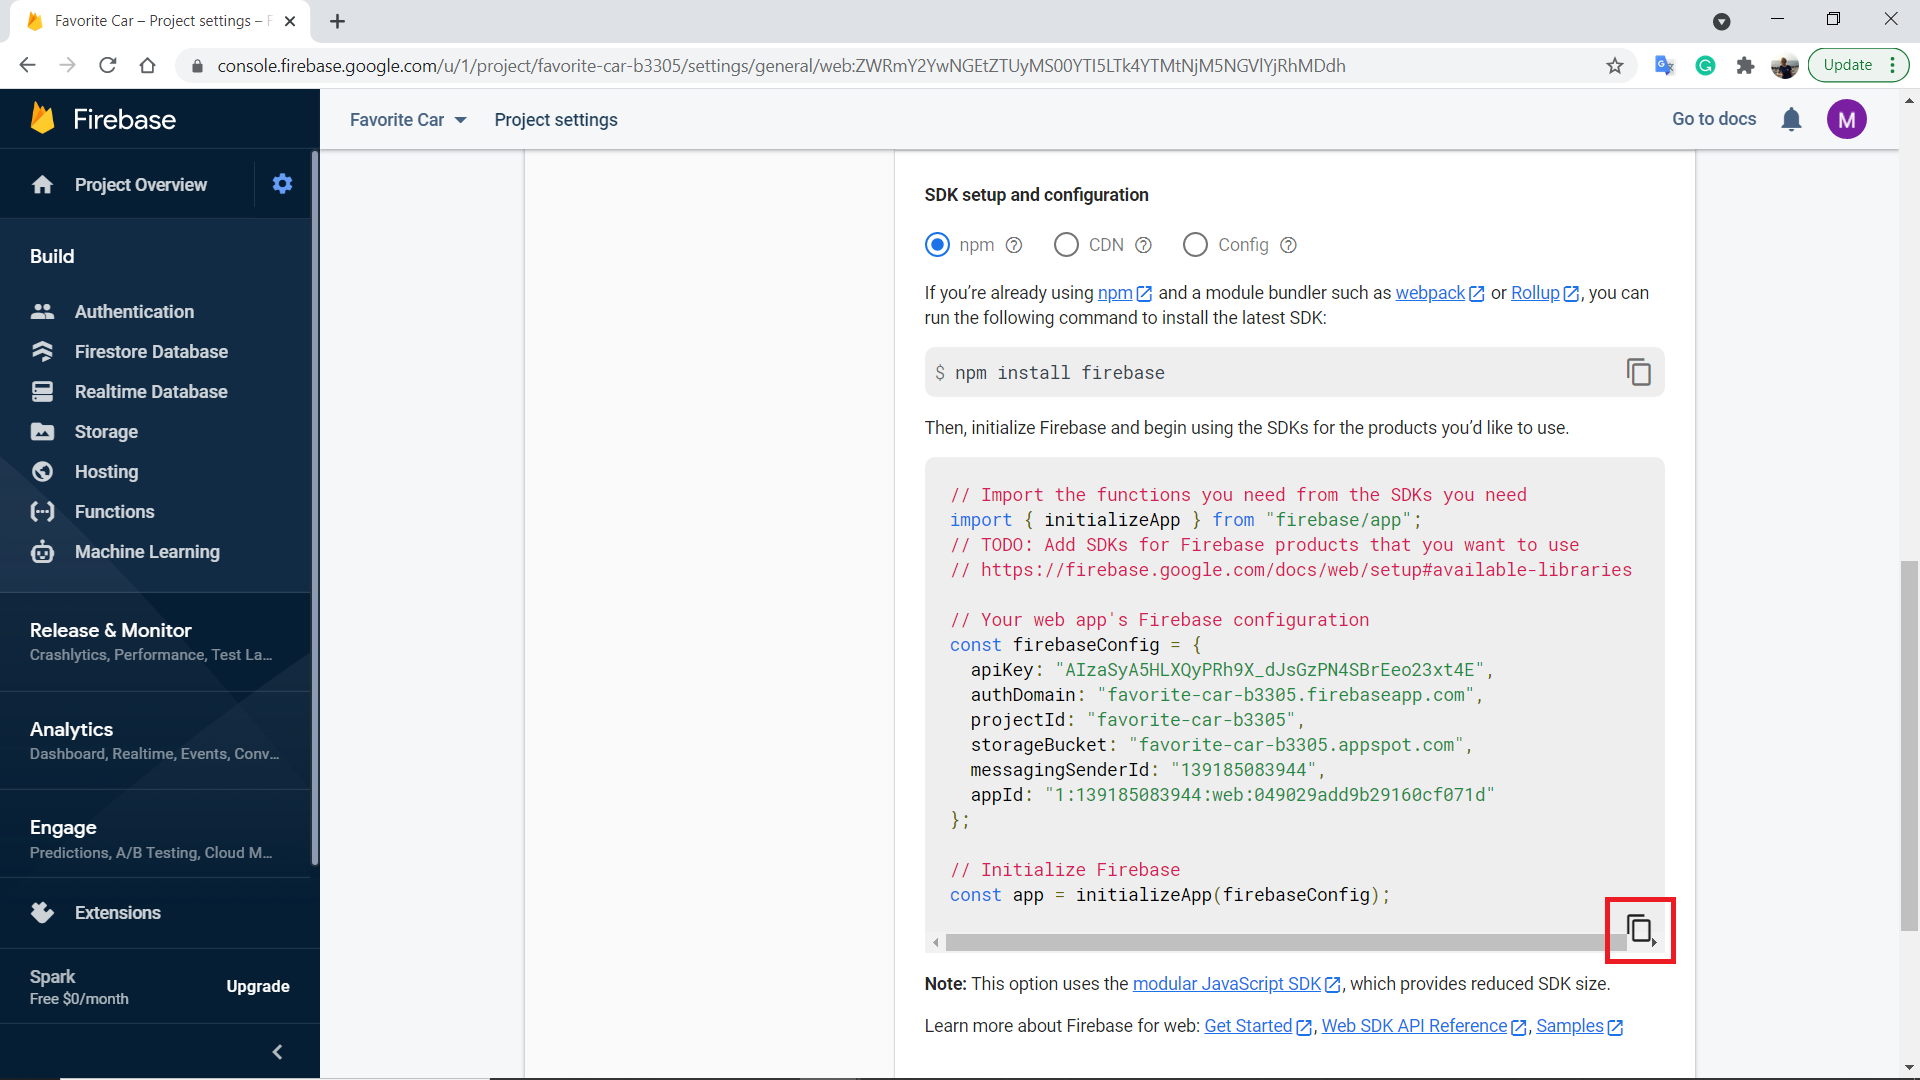
18. Back to Firebase and open “Project Overview/Project settings” in the left menu.

19. Scroll down and find “Your apps” section. Here is your Web App configuration.

20. Click “Copy”

21. Back to FlutLab, paste text to the field and press “Continue”.

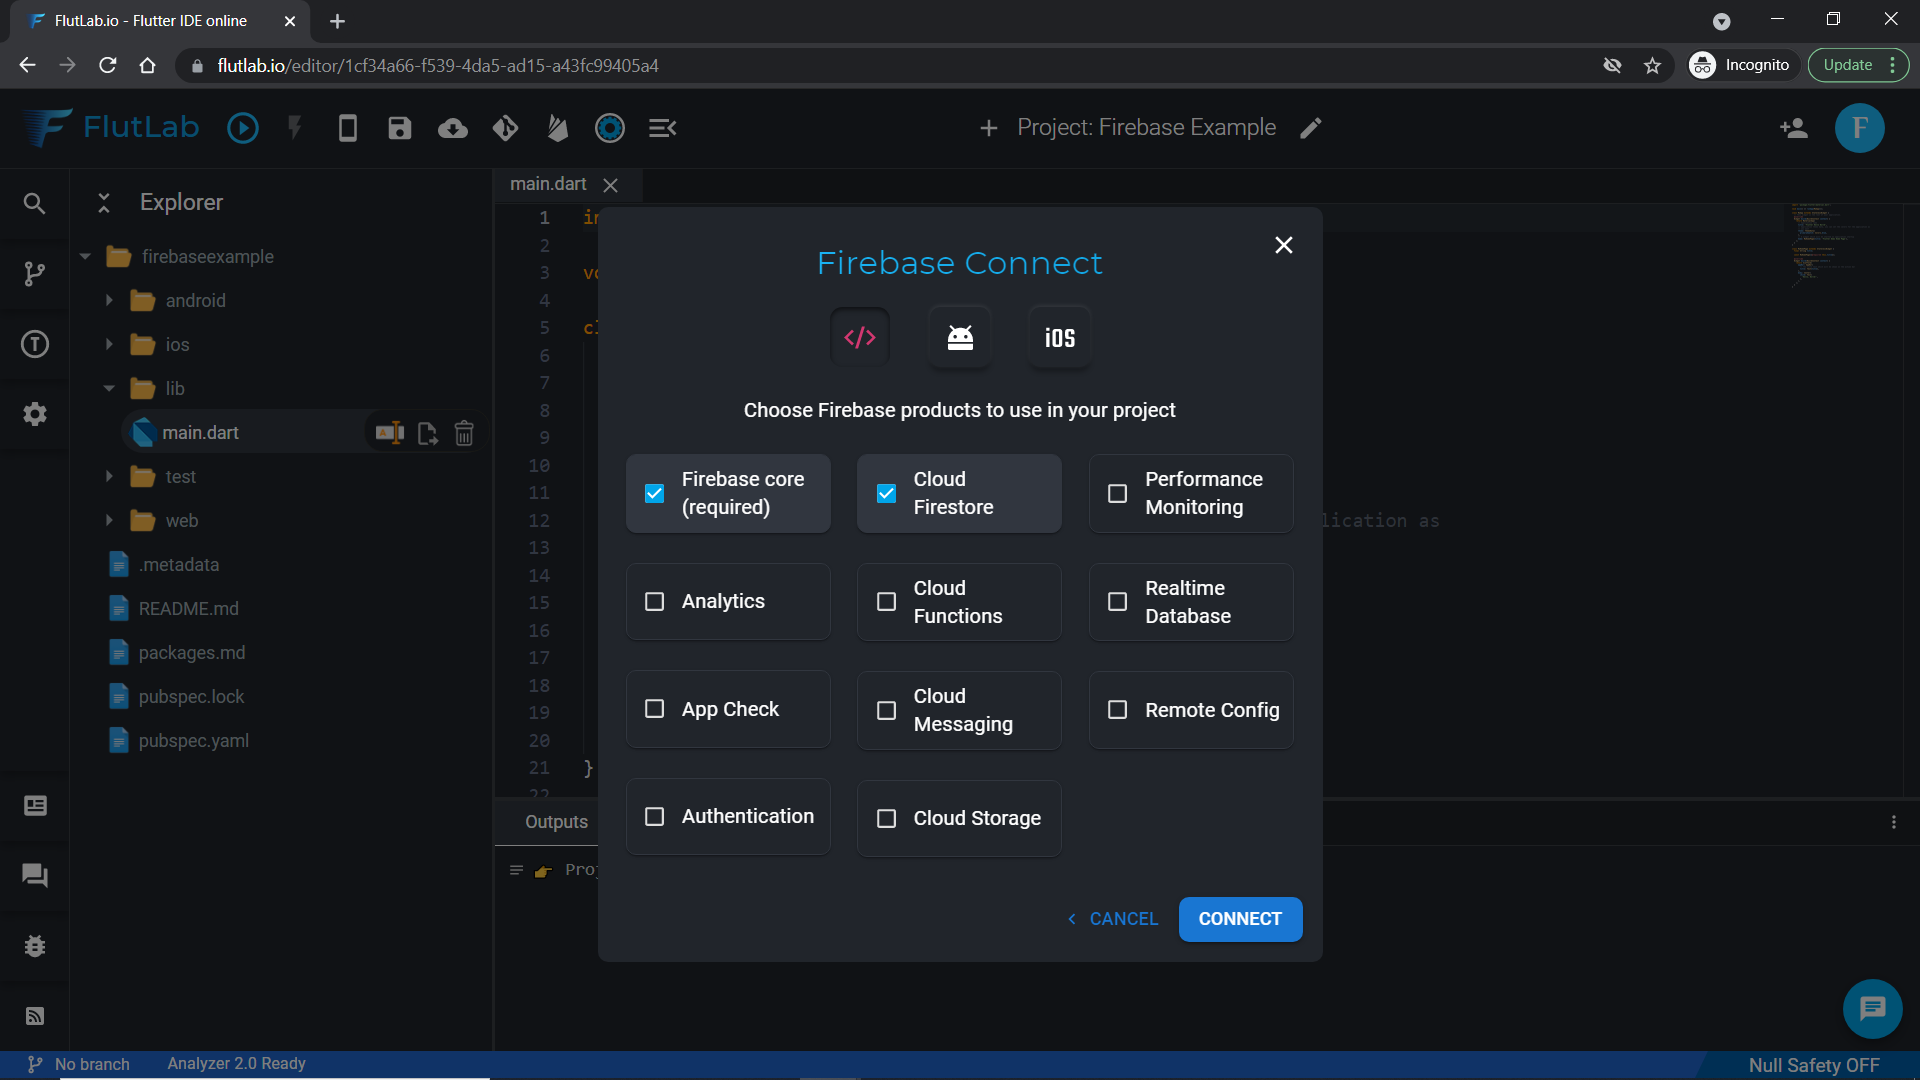
22. Select “Cloud Firestore” and press “Connect”.

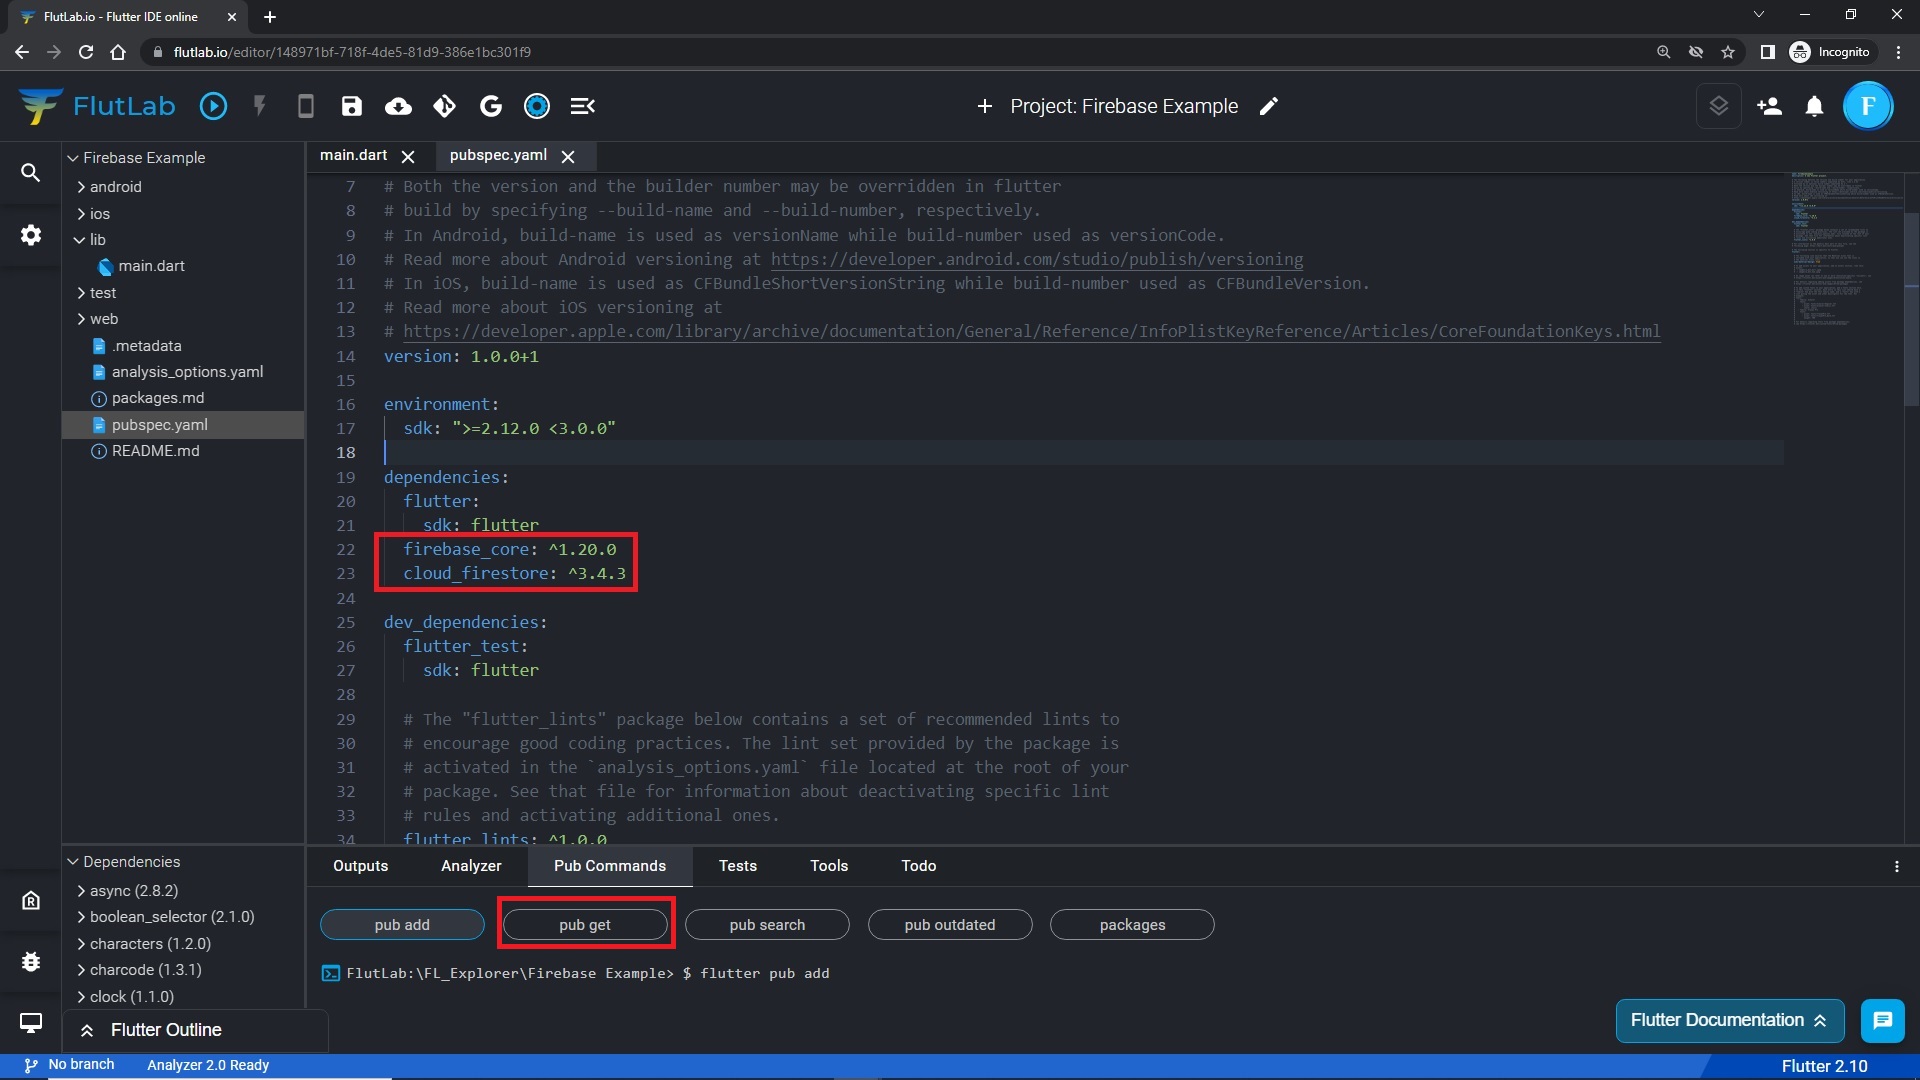
23. At that moment FlutLab will automatically add
- two packages to the pubspec.yaml file
- create /lib/firebase_options.dart file with FirebaseOptions.

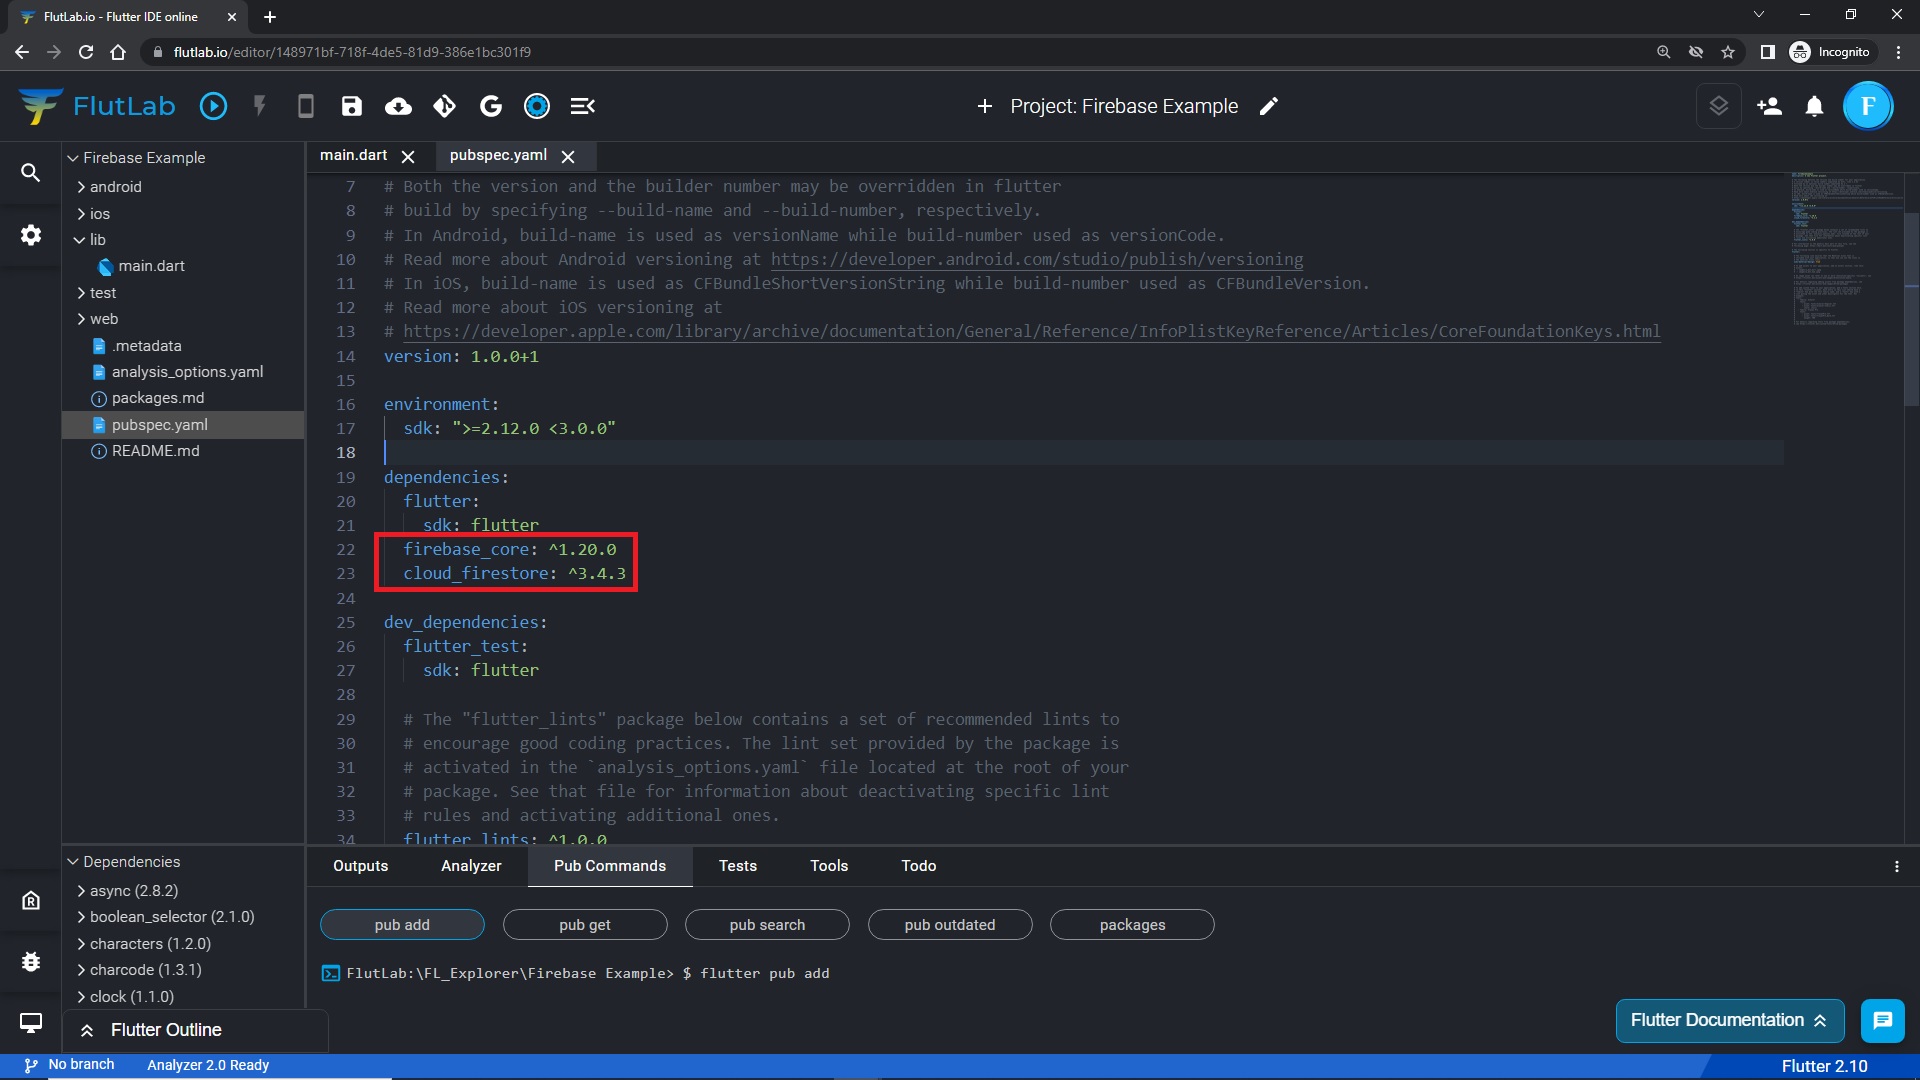
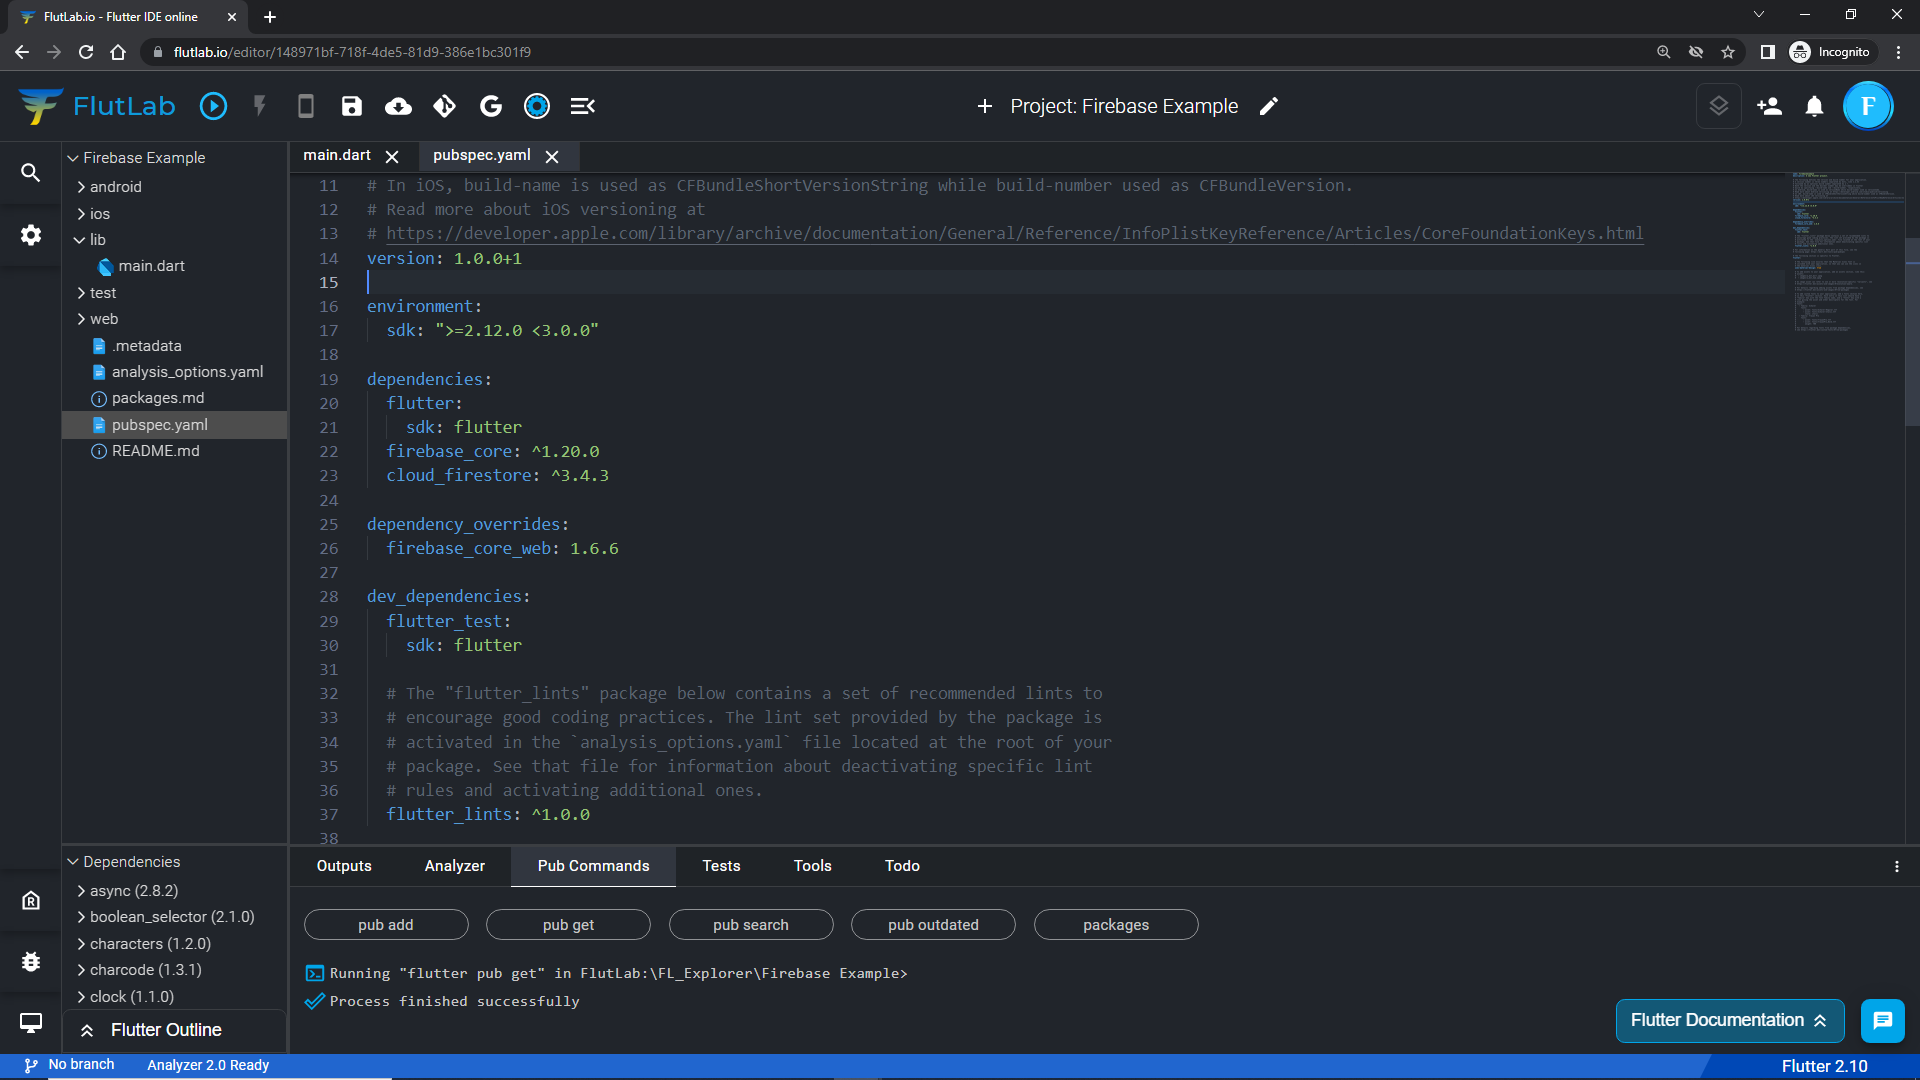
24. Click the “Pub get” button.

25. Great! It works:)

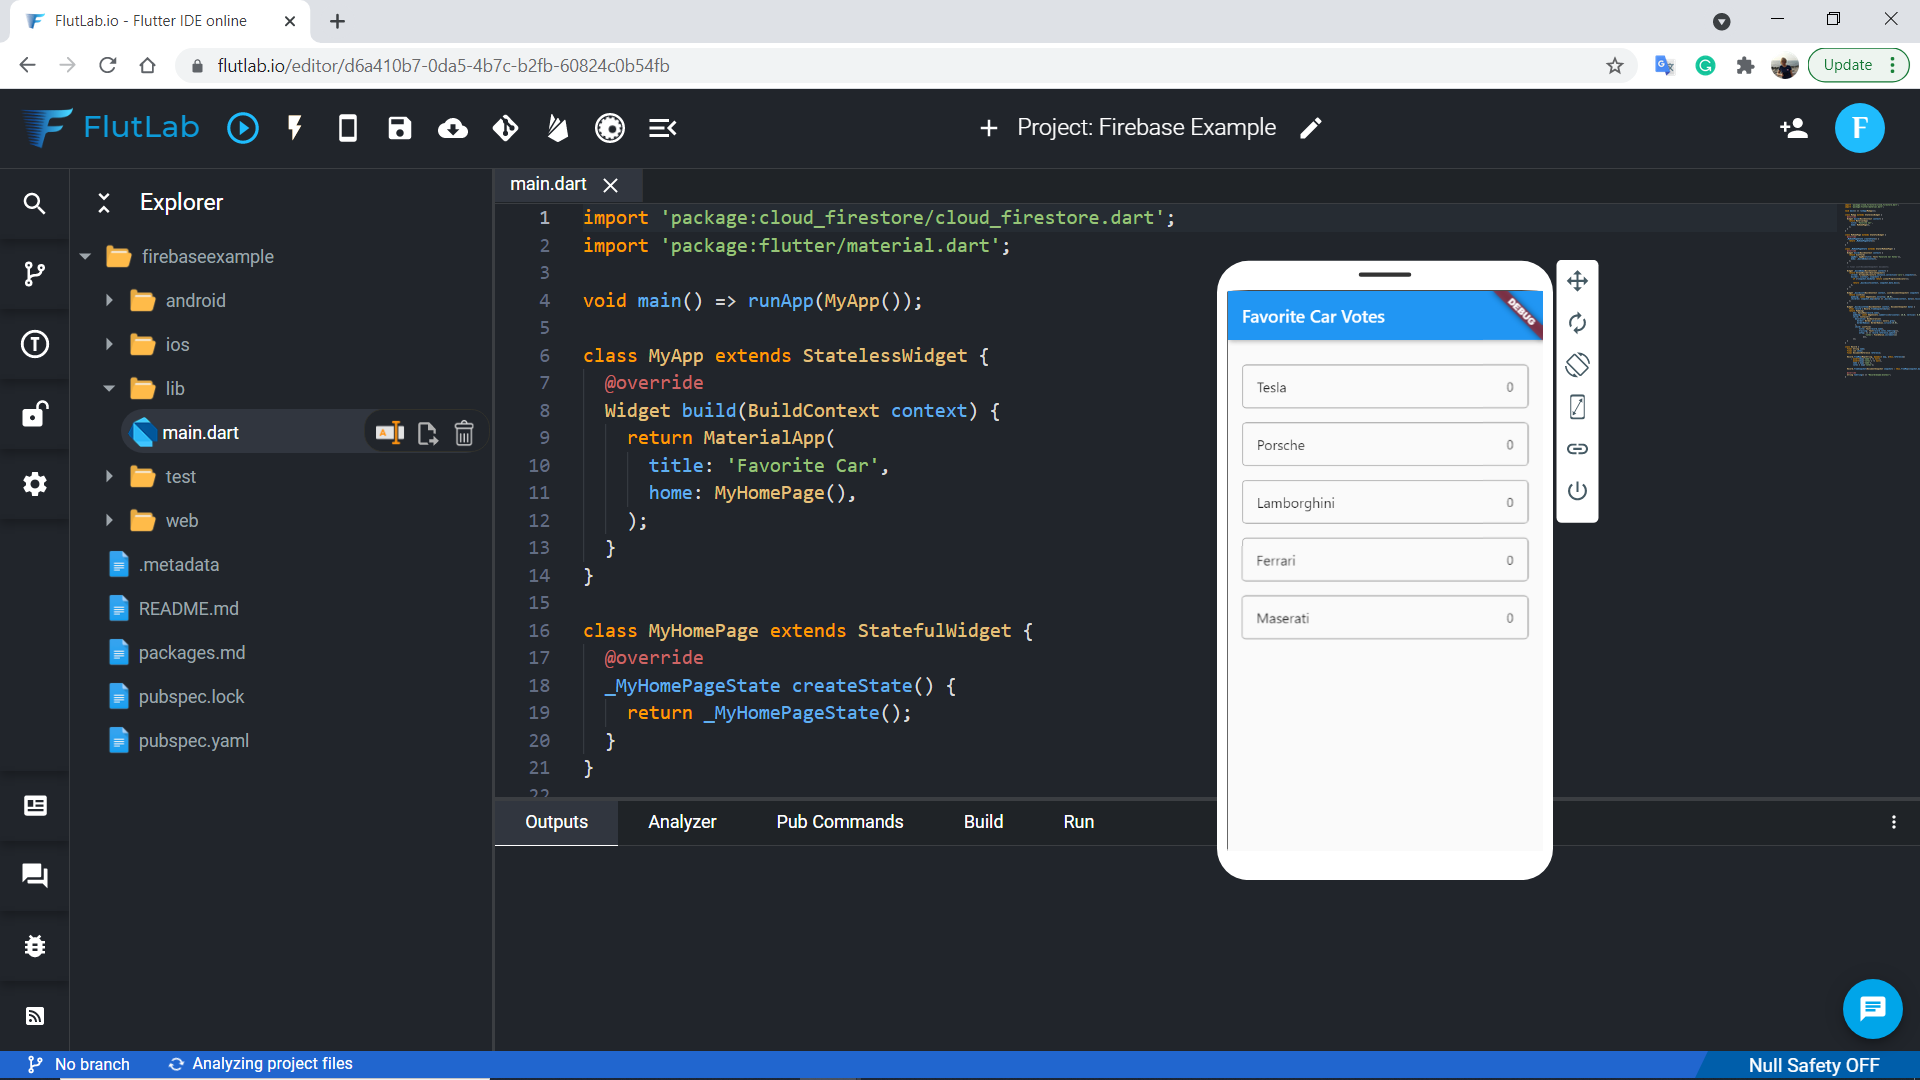
26. Open main.dart file and replace all code with the code below (Ctrl+S to save).

import 'package:cloud_firestore/cloud_firestore.dart';
import 'package:favoritecar/firebase_options.dart';
import 'package:firebase_core/firebase_core.dart';
import 'package:flutter/material.dart';

Future<void> main() async {
  WidgetsFlutterBinding.ensureInitialized();
  await Firebase.initializeApp(
    options: DefaultFirebaseOptions.currentPlatform,
  );
  runApp(MyApp());
}

class MyApp extends StatelessWidget {
  @override
  Widget build(BuildContext context) {
    return MaterialApp(
      title: 'Favorite Car',
      home: MyHomePage(),
    );
  }
}

class MyHomePage extends StatefulWidget {
  @override
  _MyHomePageState createState() {
    return _MyHomePageState();
  }
}

class _MyHomePageState extends State<MyHomePage> {
  @override
  Widget build(BuildContext context) {
    return Scaffold(
      appBar: AppBar(title: Text('Favorite Car Votes')),
      body: _buildBody(context),
    );
  }

  Widget _buildBody(BuildContext context) {
    return StreamBuilder<QuerySnapshot>(
      stream: FirebaseFirestore.instance.collection('cars').snapshots(),
      builder: (context, snapshot) {
        if (!snapshot.hasData) return LinearProgressIndicator();
        return _buildList(context, snapshot.data!.docs);
      },
    );
  }

  Widget _buildList(BuildContext context, List<DocumentSnapshot> snapshot) {
    return ListView(
      padding: const EdgeInsets.only(top: 20.0),
      children: snapshot.map((data) => _buildListItem(context, data)).toList(),
    );
  }

  Widget _buildListItem(BuildContext context, DocumentSnapshot data) {
    final record = Record.fromSnapshot(data);
    return Padding(
        key: ValueKey(record.name),
        padding: const EdgeInsets.symmetric(horizontal: 16.0, vertical: 8.0),
        child: Container(
          decoration: BoxDecoration(
            border: Border.all(color: Colors.grey),
            borderRadius: BorderRadius.circular(5.0),
          ),
          child: ListTile(
              title: Text(record.name),
              trailing: Text(record.votes.toString()),
              onTap: () =>
                  record.reference.update({'votes': FieldValue.increment(1)})),
        ));
  }
}

class Record {
  final String name;
  final int votes;
  final DocumentReference reference;

  Record.fromMap(Map<String, dynamic> map, {required this.reference})
      : assert(map['name'] != null),
        assert(map['votes'] != null),
        name = map['name'],
        votes = map['votes'];
  Record.fromSnapshot(DocumentSnapshot snapshot)
      : this.fromMap(snapshot.data()! as Map<String, dynamic>,
            reference: snapshot.reference);

  @override
  String toString() => "Record<$name:$votes>";
}

27. Press the “Build Project” button with web-build.

28. That’s how our app should look like:

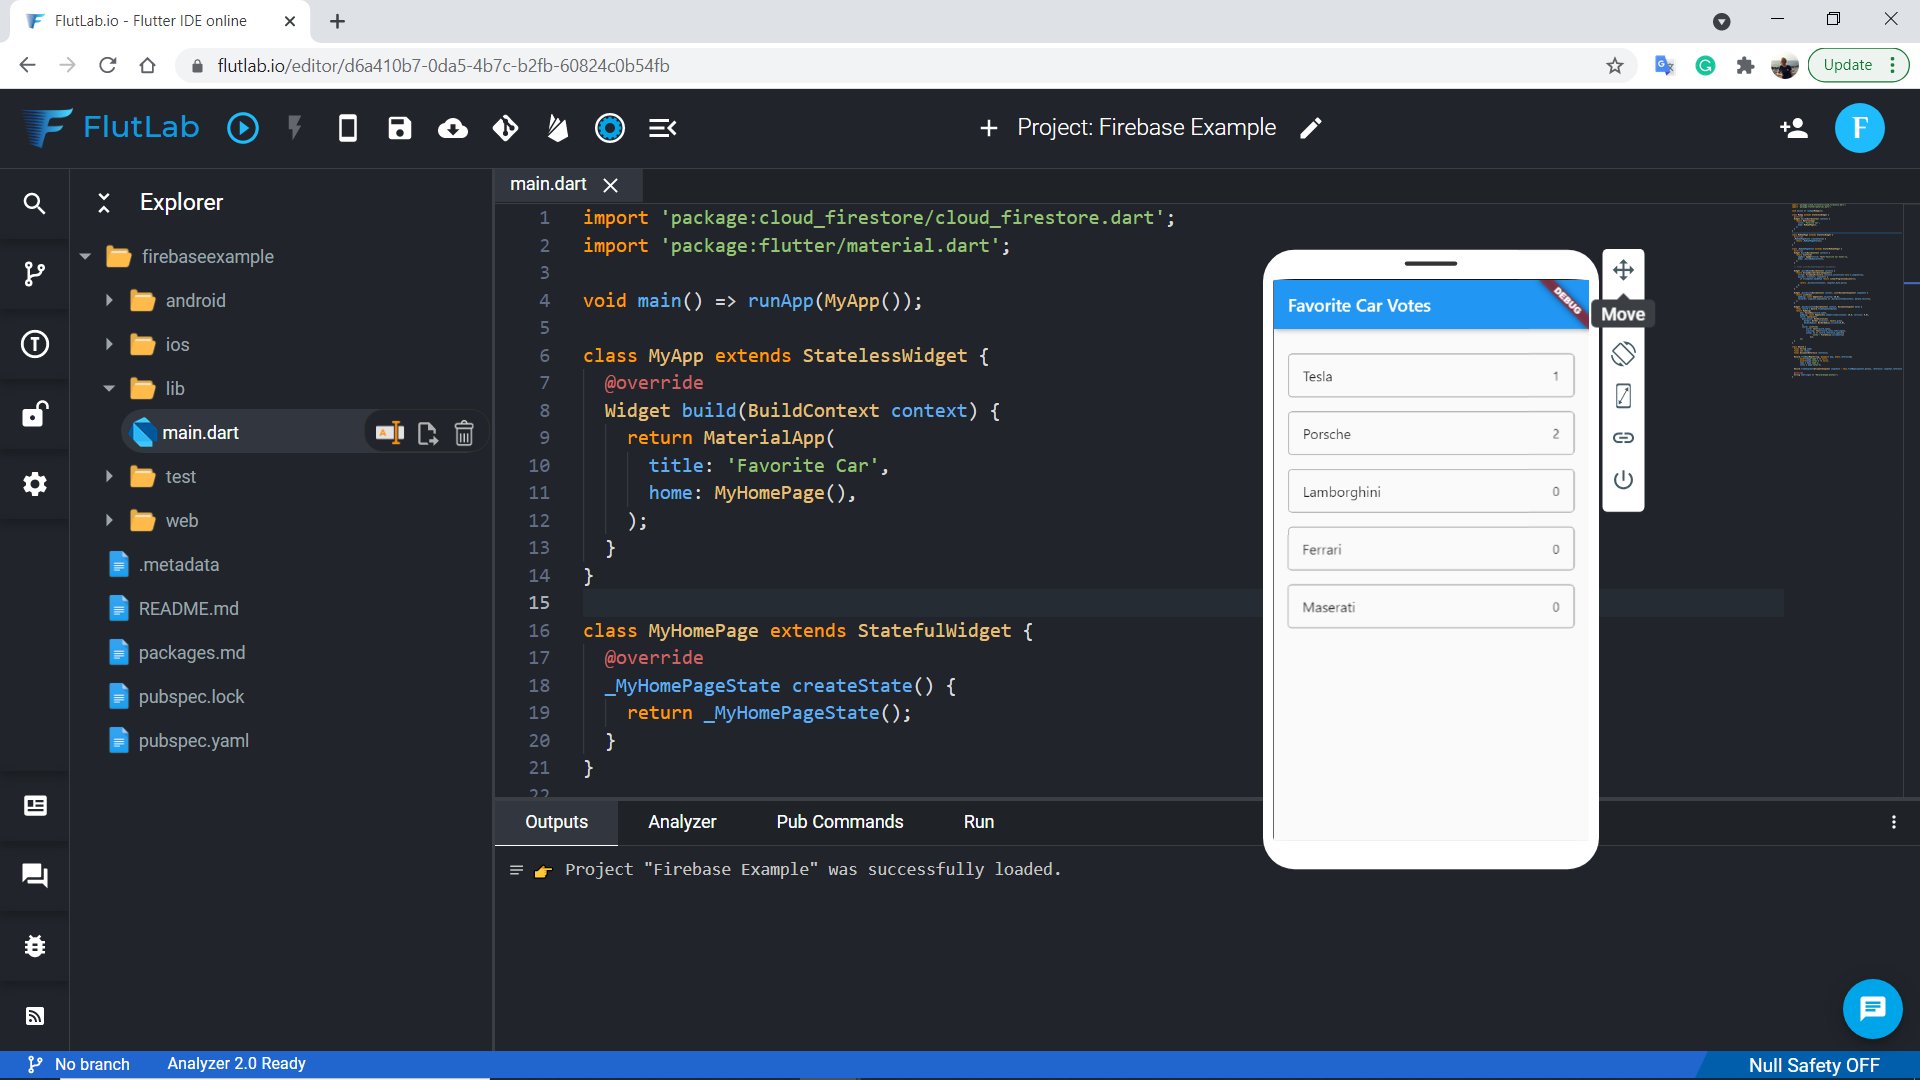
29. Let’s check how it works. Choose your favorite car.

30. Open Cloud Firestore and check how your vote is saved.