FlutLab Education Workspace for Educators
Learning to program is an exciting process that allows teachers to share their knowledge and skills with students. The best way to learn to code is to practice regularly. The teacher should assign students practical tasks that will help them consolidate their knowledge. The teacher should also provide students with regular feedback on their work. This will help students understand what they are doing right and what could be improved.
That is why the FlutLab team created the Education Workspace. When creating FlutLab Education, we consulted with teachers, students, and instructors to ensure that our product not only meets all the needs of the learning process but also makes it more efficient & collaborative.
So, let's go ...
Important! Login to FlutLab with your edu account.
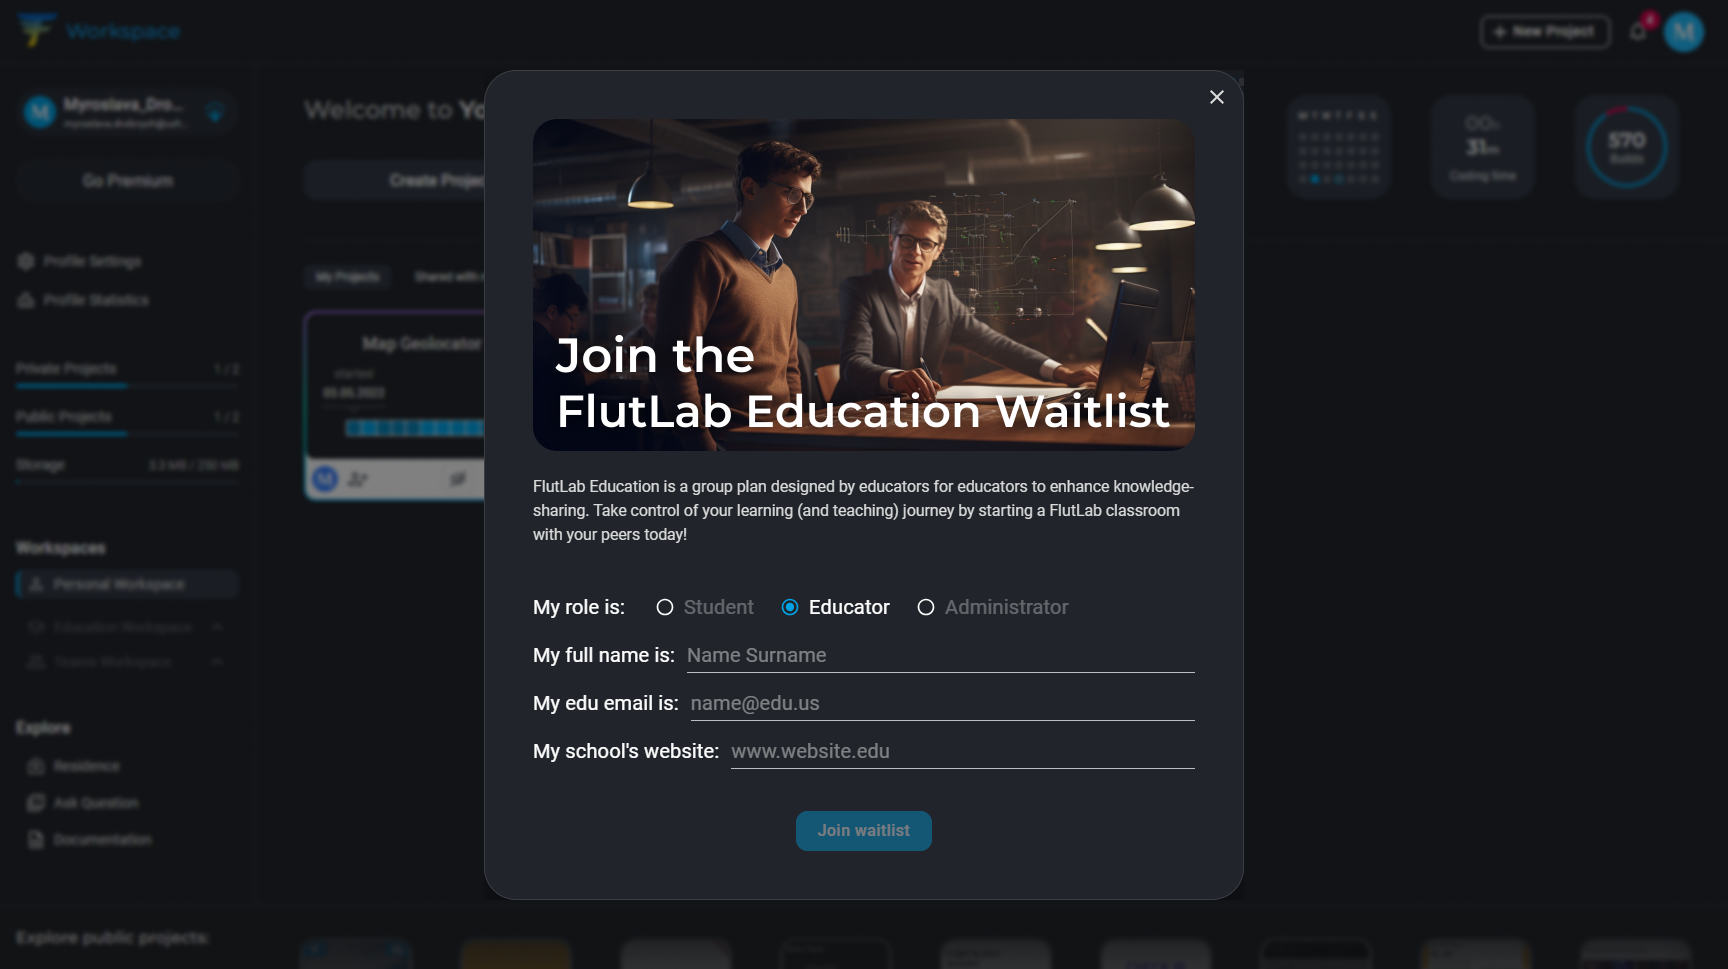
1. Your first step is to apply for the Education Workspace. Fill out a short form and wait for a confirmation letter from our administrator to your official edu email.
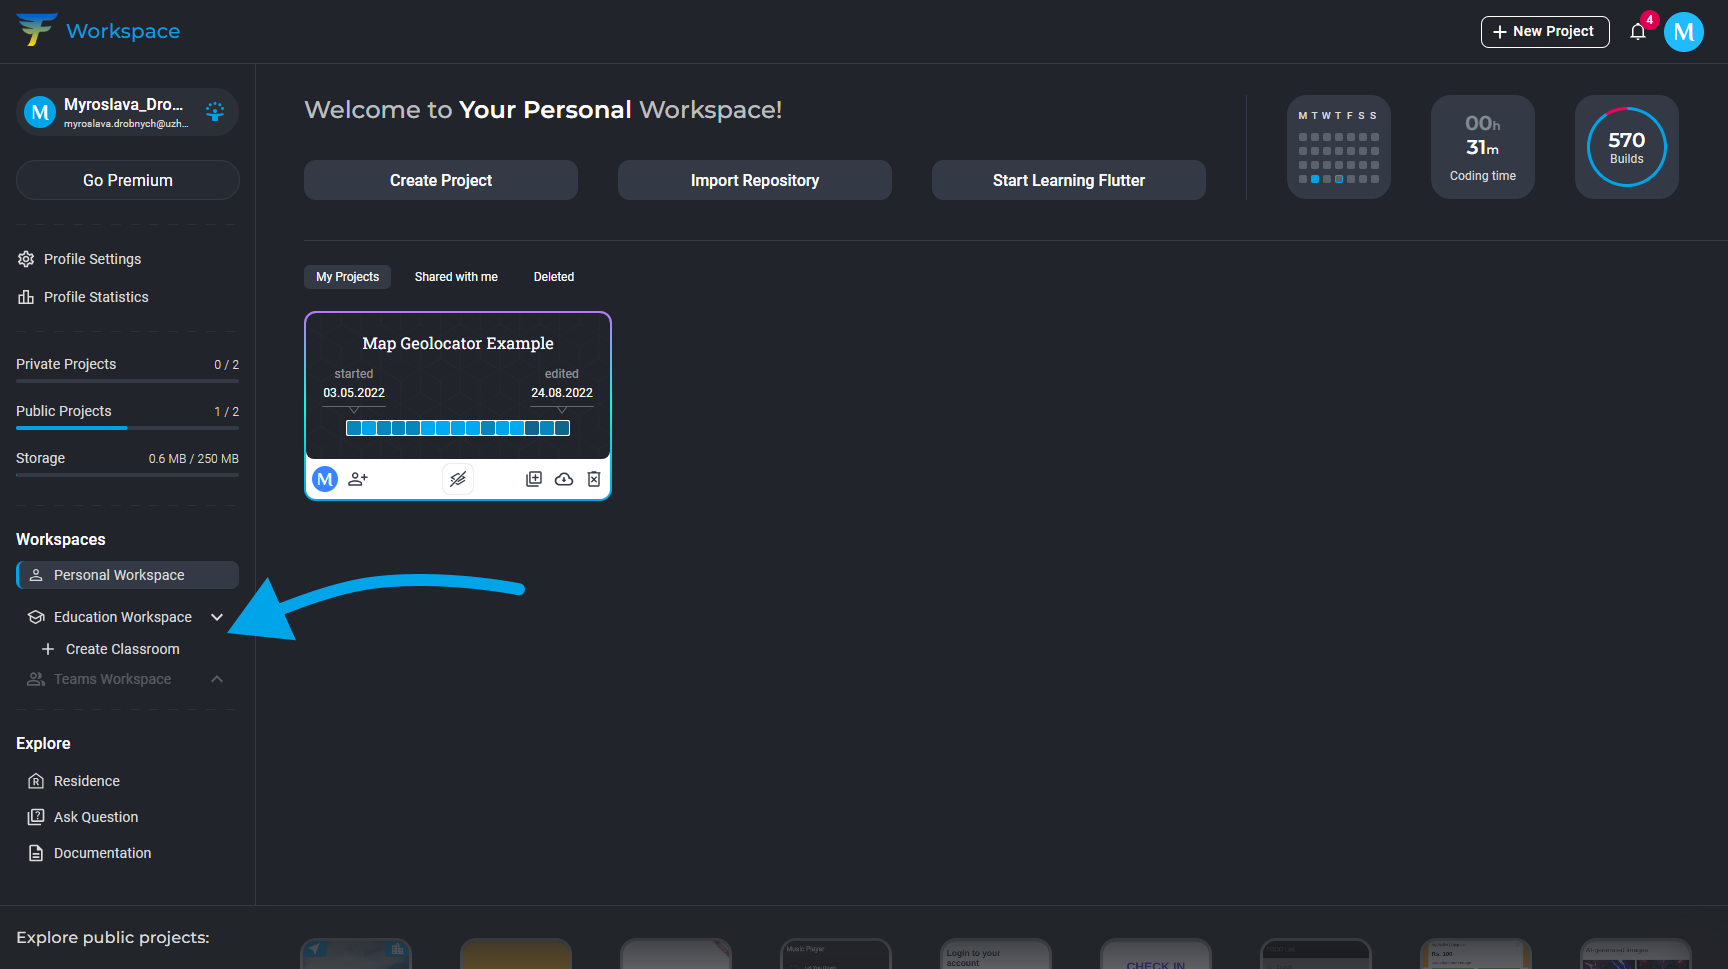
2. To start working in the Education Workspace, you need to create a Classroom. Click the Create Classroom button as shown in the screenshot.
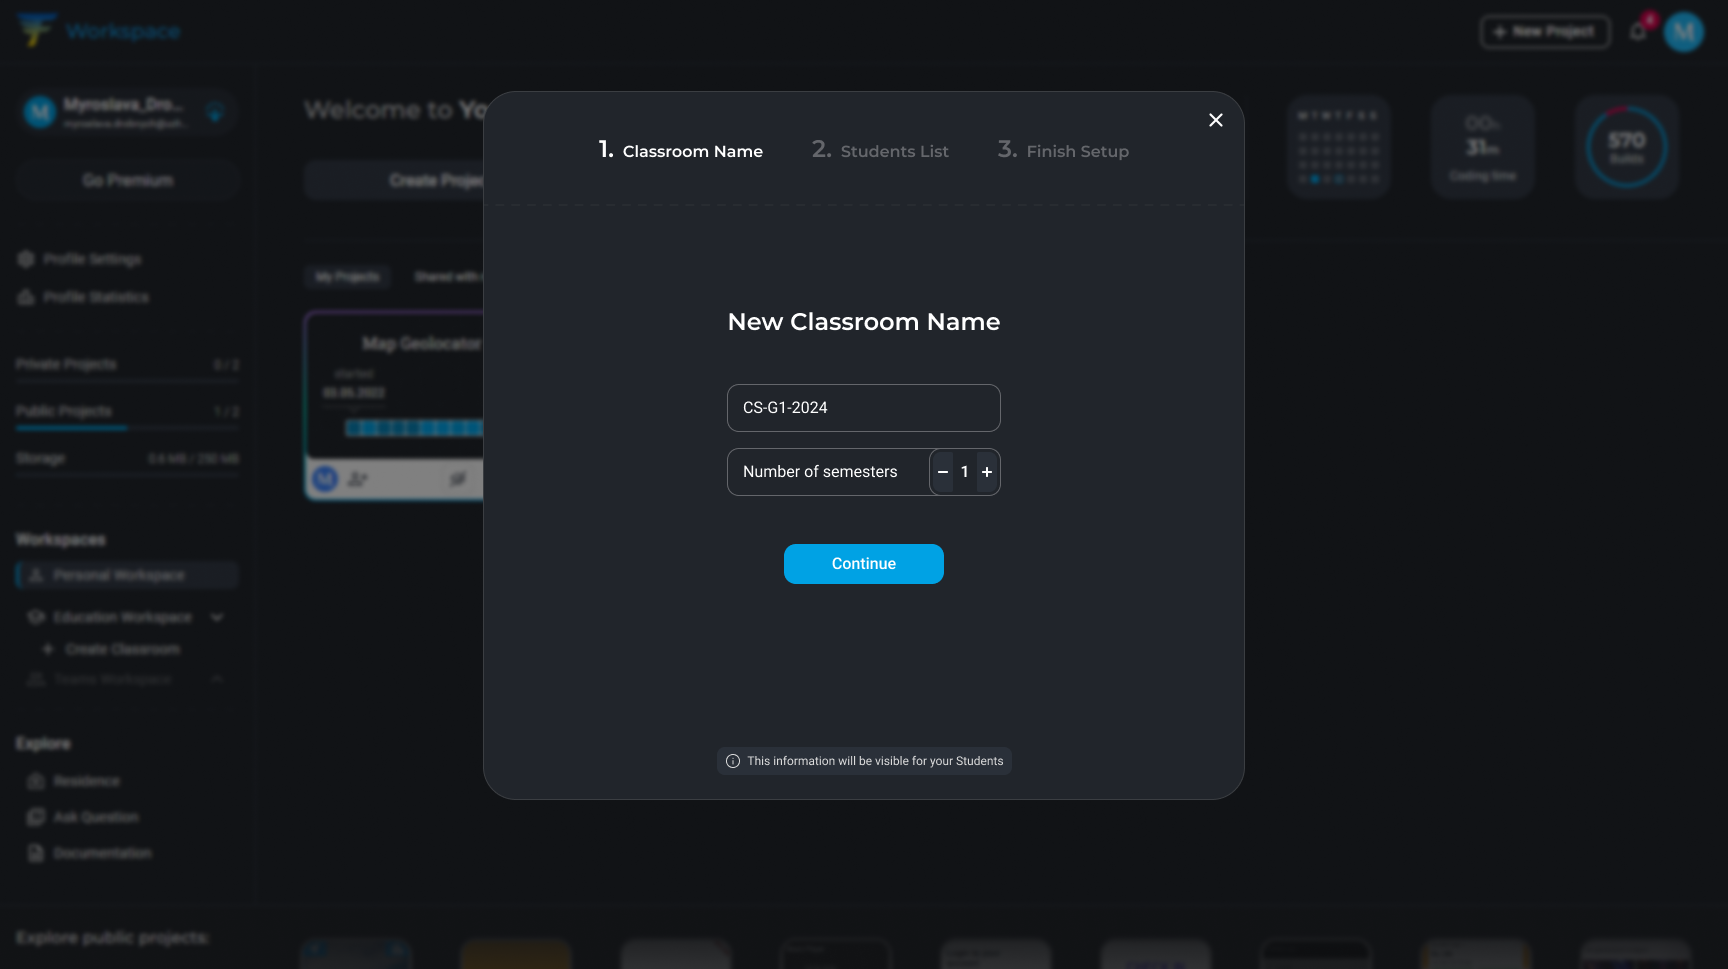
3. Enter the name of your Classroom and the number of semesters you and your group plan to study Flutter.
Please note: By default, we consider a semester to be 6 months. After the completion of this period, a new semester will automatically open if you specify >1. All projects (tasks and examples) from the previous semester will be archived and you will only have access to them upon request.
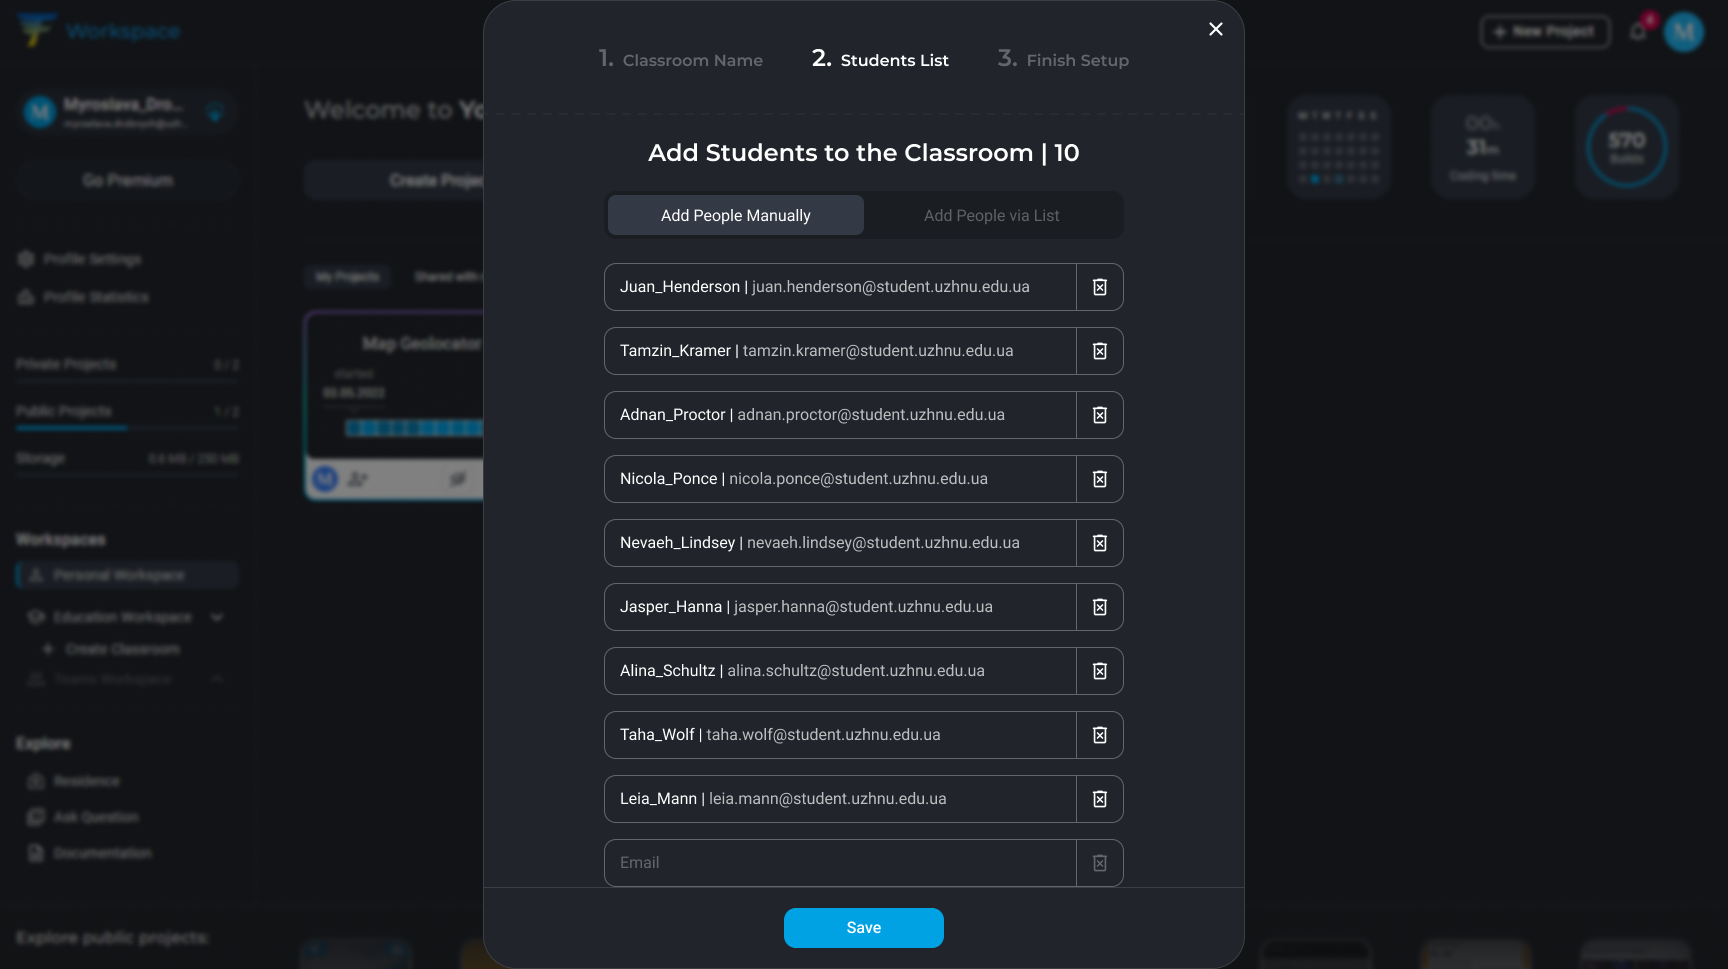
4. Add students to your group. Keep in mind that all emails you enter will receive the invitation letters to join the classroom. We recommend giving access to Classroom only to students in your group.
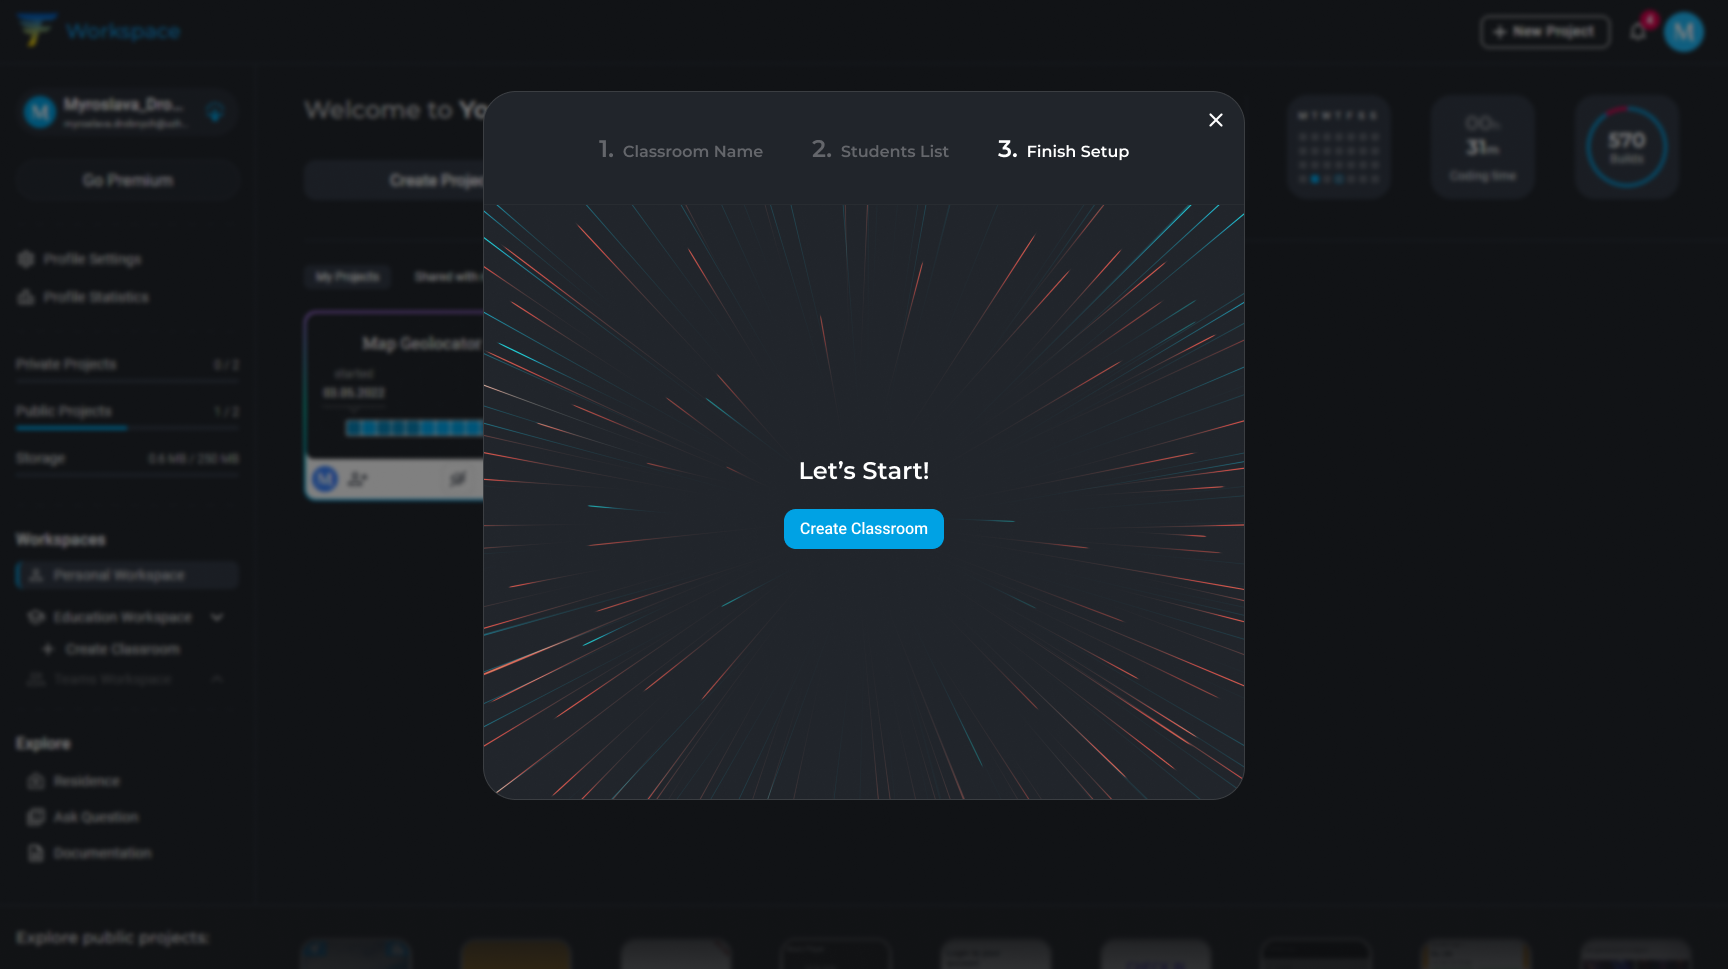
5. If you are confident in the accuracy of the provided data, press Create Classroom. Before pressing this button, you can easily switch between steps 1 and 2 to review the entered information.
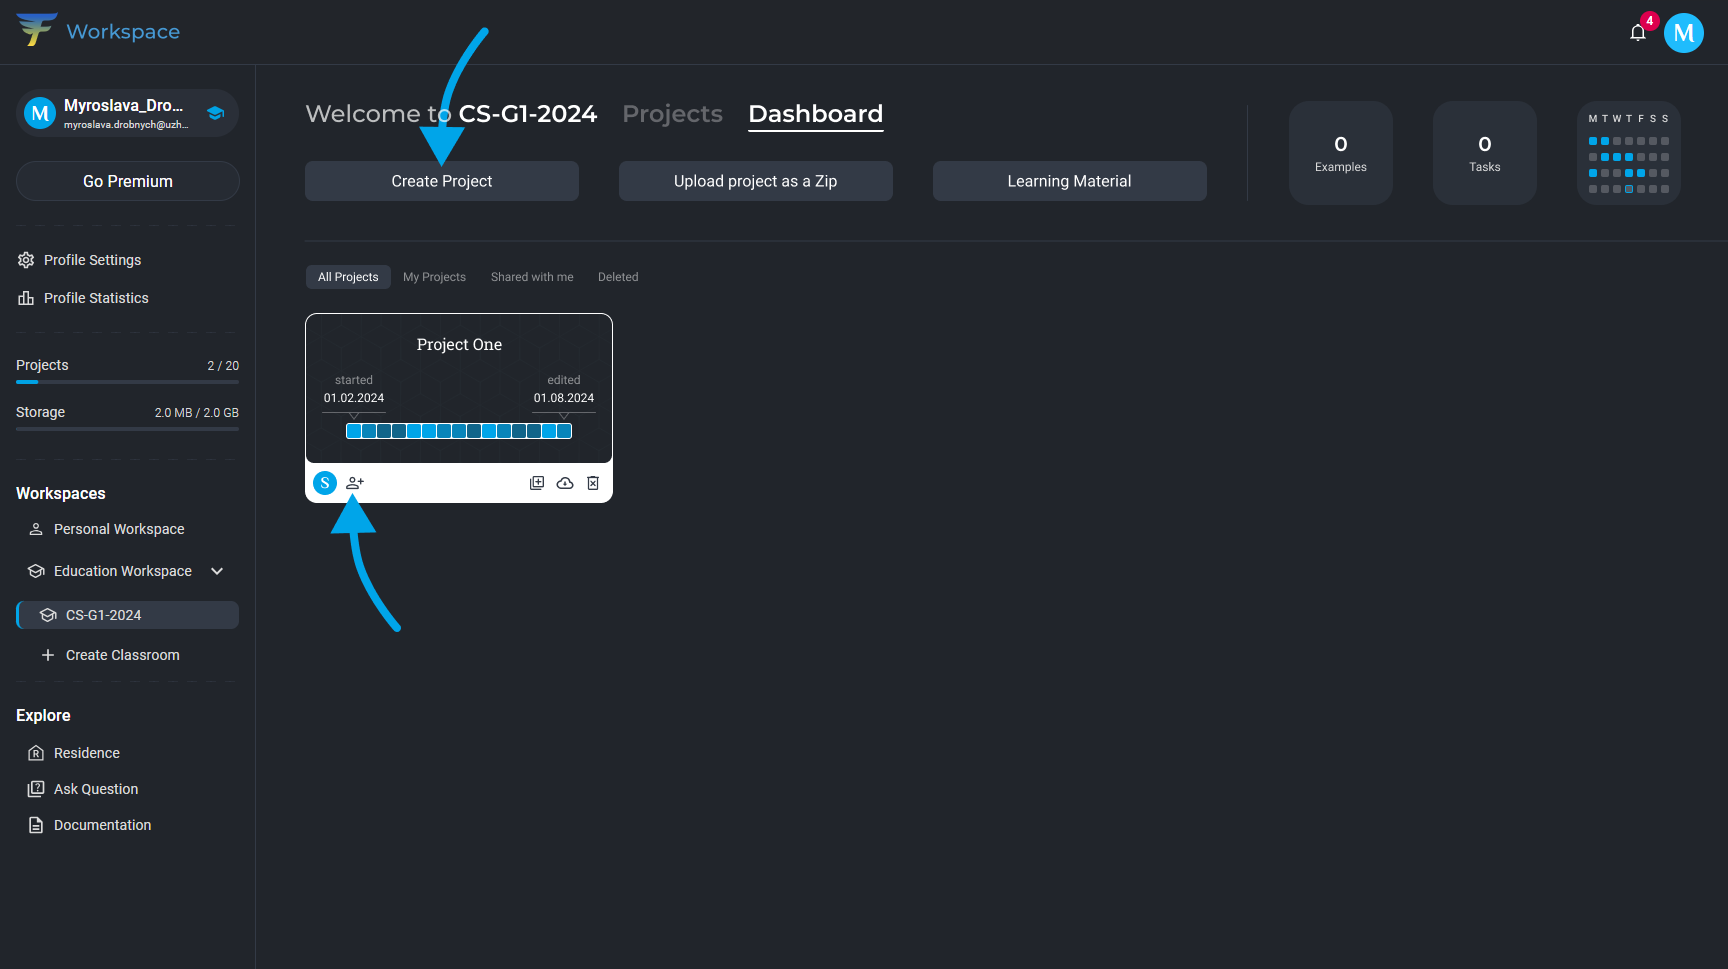
6. Click the created Classroom. At this step, you'll receive all the benefits of the FlutLab Education Program.
Pay attention to the panel on the left side. In Education Workspace, you will notice the following changes:
- The icon next to your name has changed;
- You can create up to 20 projects per semester;
- You have 2GB of storage.
The other components of the Workspace are not very different from the Personal Workspace. So, we will not dwell on them separately.
Create a new educational project and share it with your group.
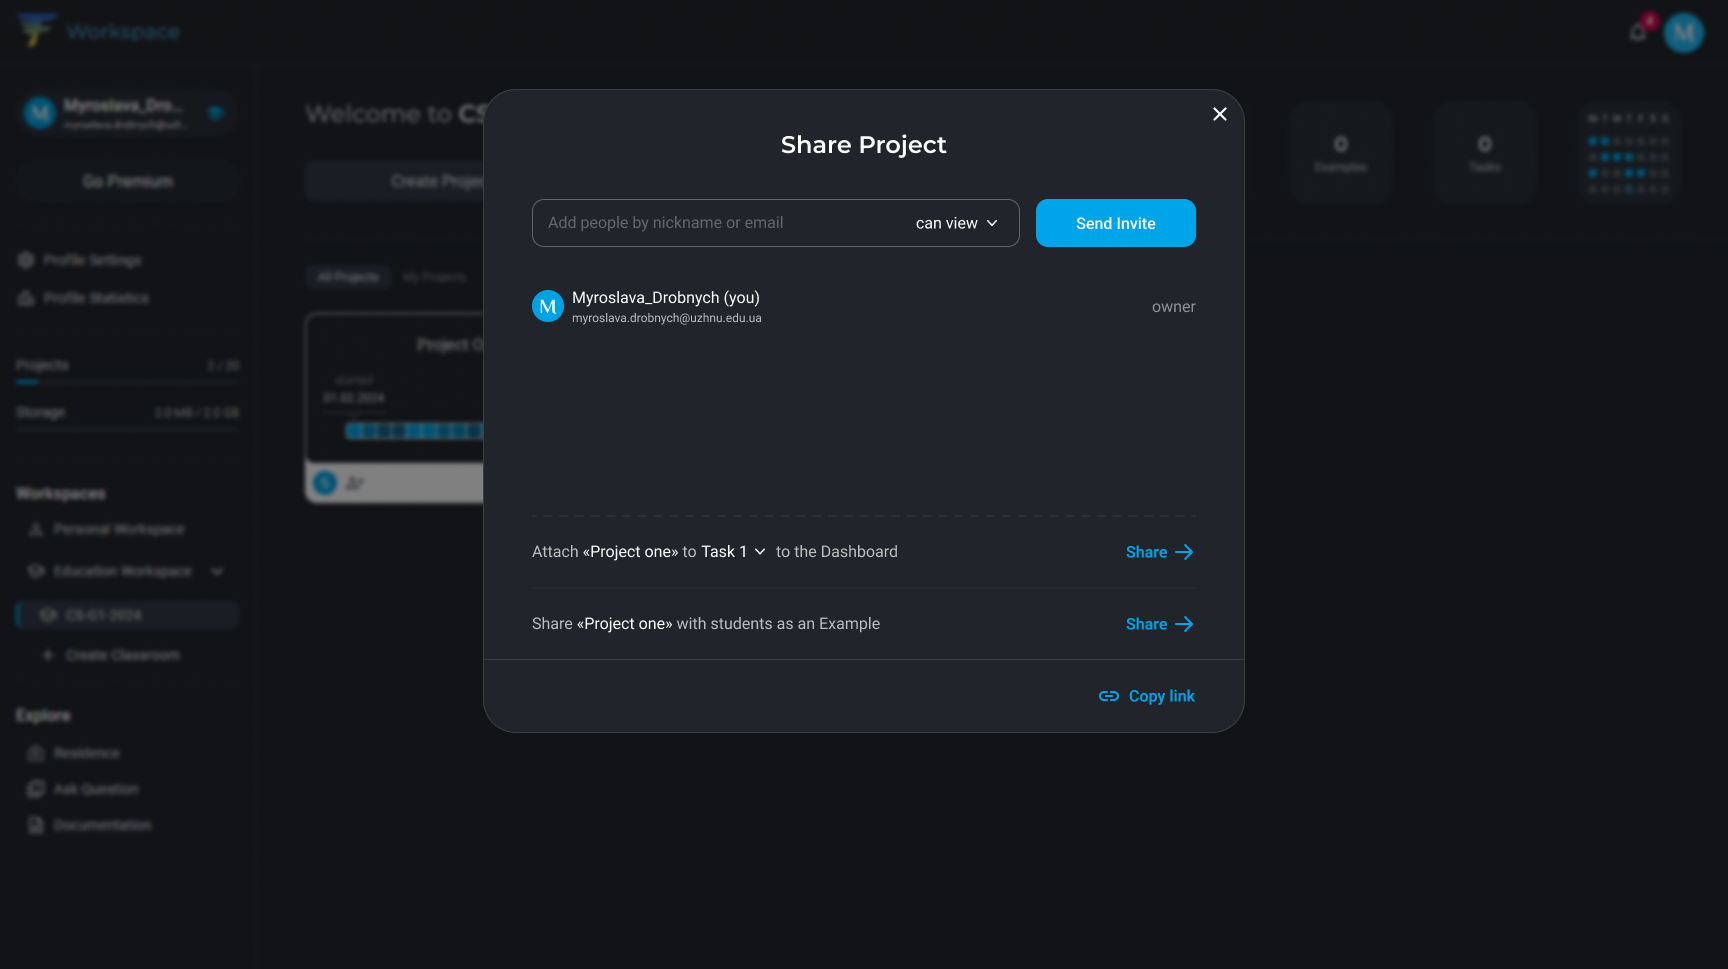
7. If you wish to share a project with the entire group in one click, you have the following options:
1. Share the project with all students as an example.
For example, if you create an application during a class, you can share it with your students. This allows them to learn from your application and see how you implemented various features. Or, you may have a ready-made application that you want to use to explain the functioning of specific Flutter components.
2. Add the project to the Dashboard as an example or template for homework/task.
For example, if you have created a template application for homework, this allows your students to easily start working on their own applications using your project as a foundation.
These features offer several advantages:
- Saves your time. You don't need to create separate projects for each student.
- Ensures consistency. All your students will use the same code, making teaching and assessment easier.
- Boosts motivation. Students will be more motivated to work on a project if it resembles a real-world application.
3. You also have the option to grant access to the project to selected students. To do this, simply enter their nicknames or email addresses in the "Add students" field.
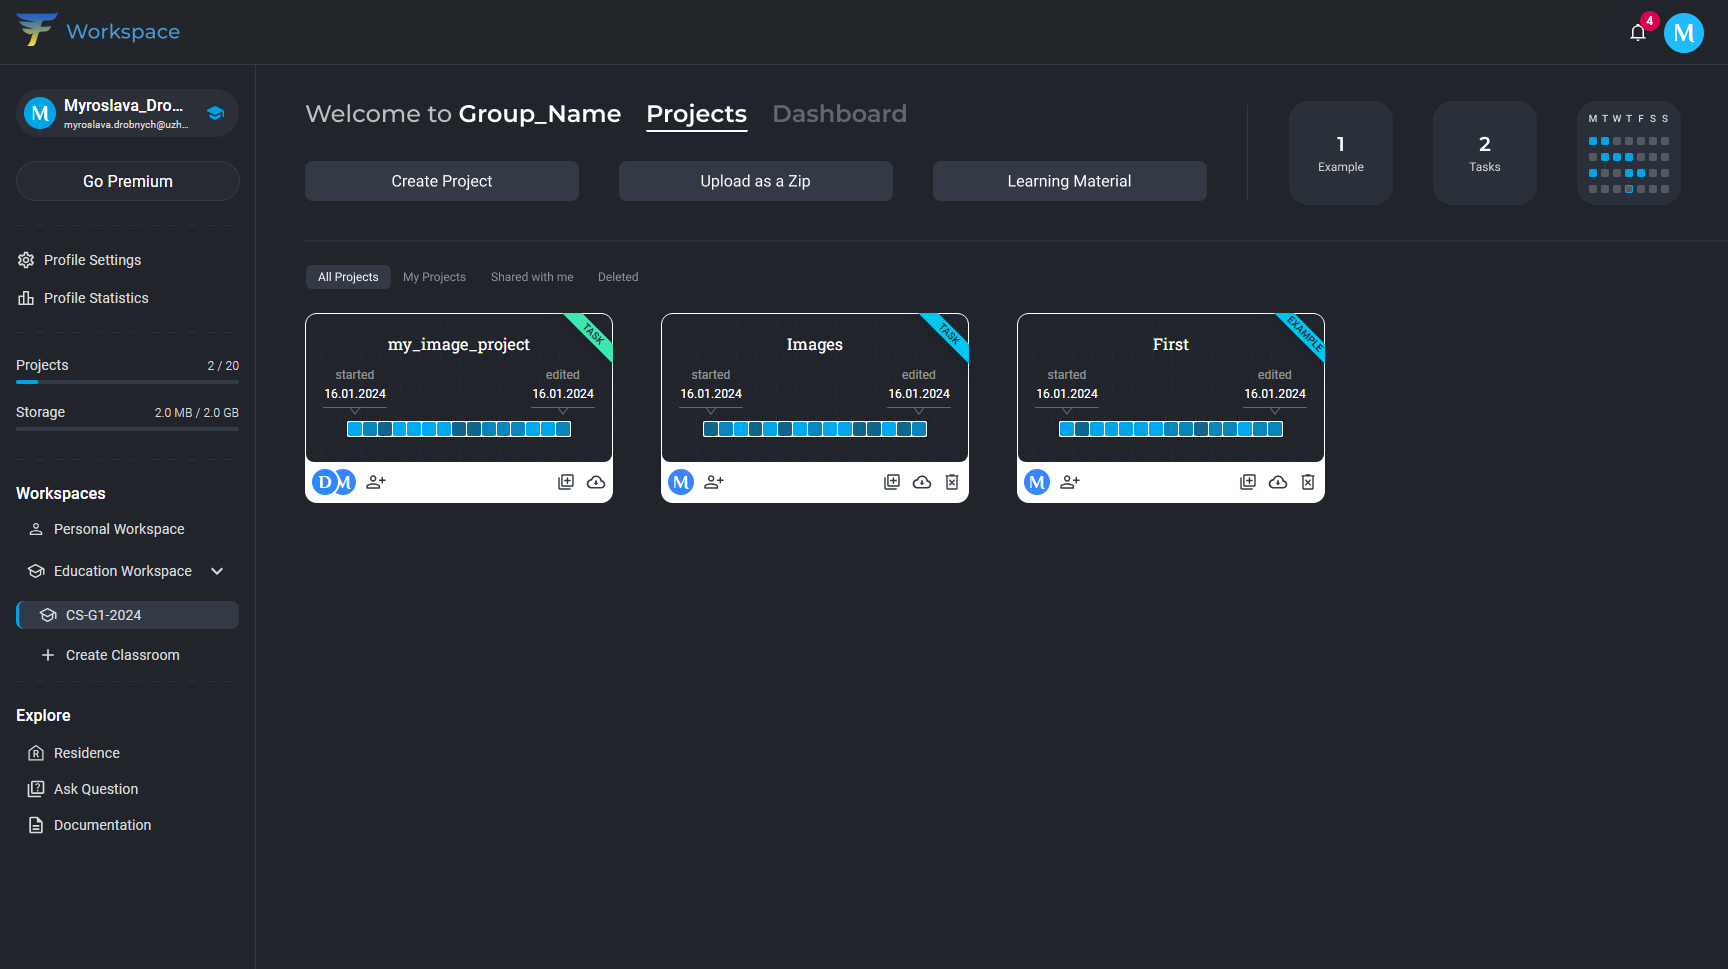
8. On the screenshot below, you can see how your shared projects will look in the Projects tab.
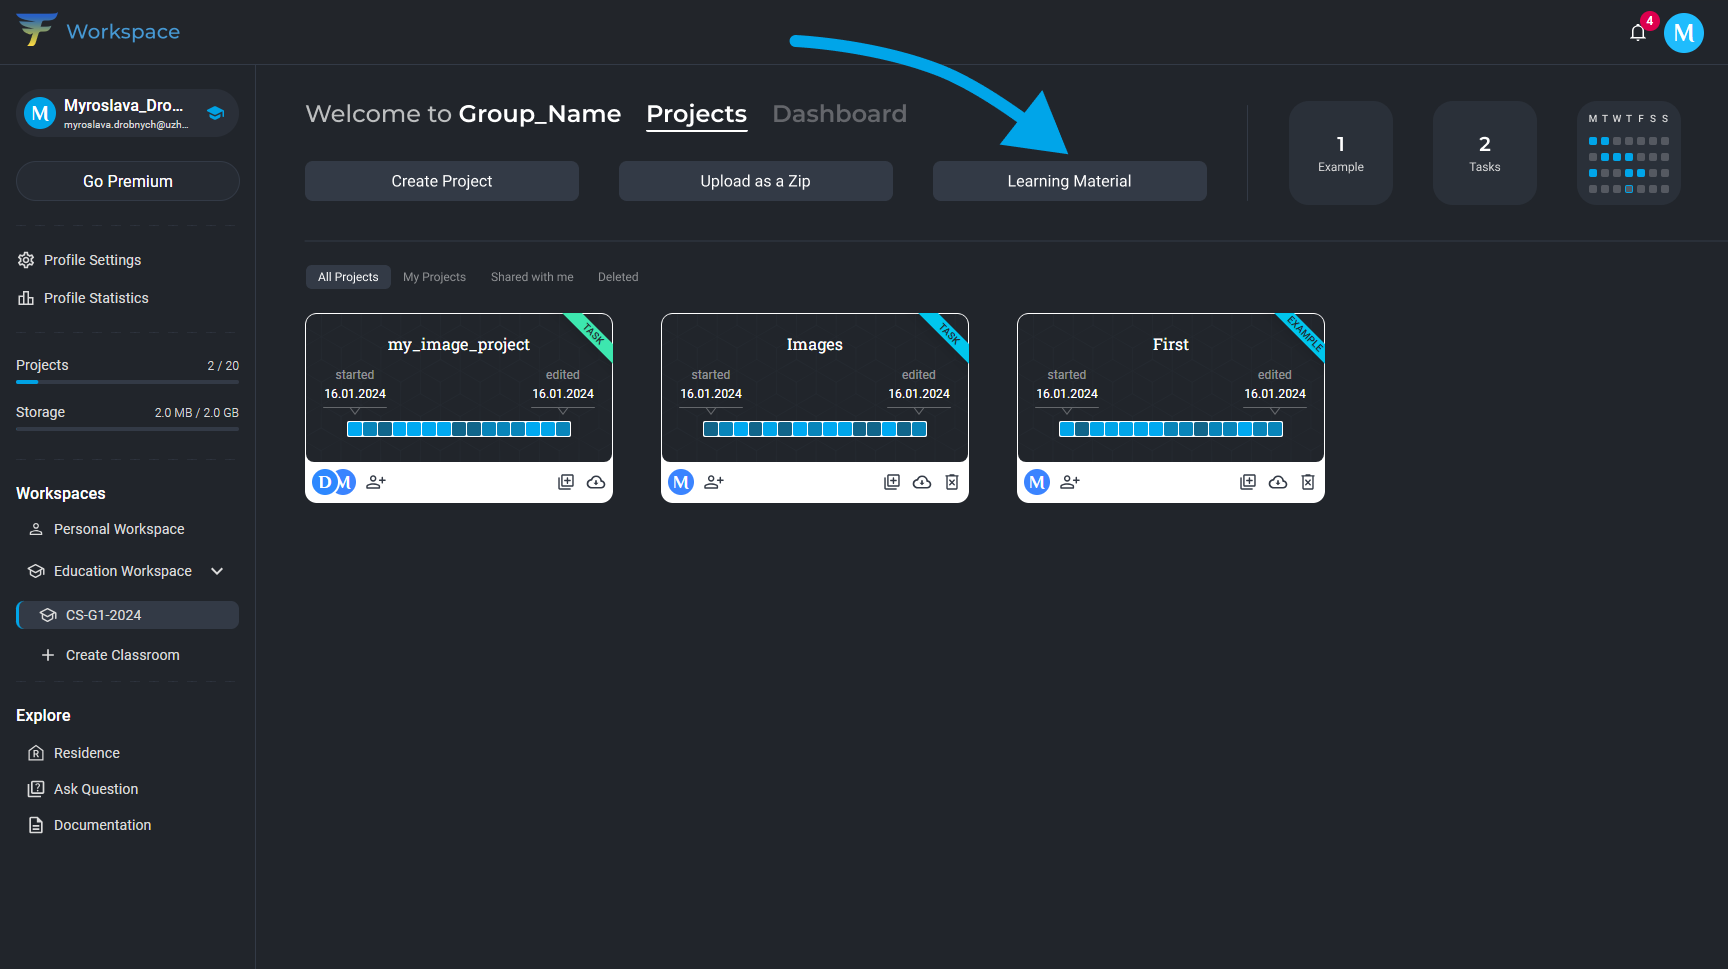
9. Typically, an instructor has a variety of educational materials for teaching. This helps students:
- Improve their understanding of the learning material. Educational materials can take the form of lectures, presentations, videos, articles, etc. They assist students in better comprehending complex topics and remembering important information.
- Develop self-learning skills. Educational materials provide students with the opportunity to independently study the material at a convenient time for them. This helps them develop self-learning skills that will be valuable to them in the future.
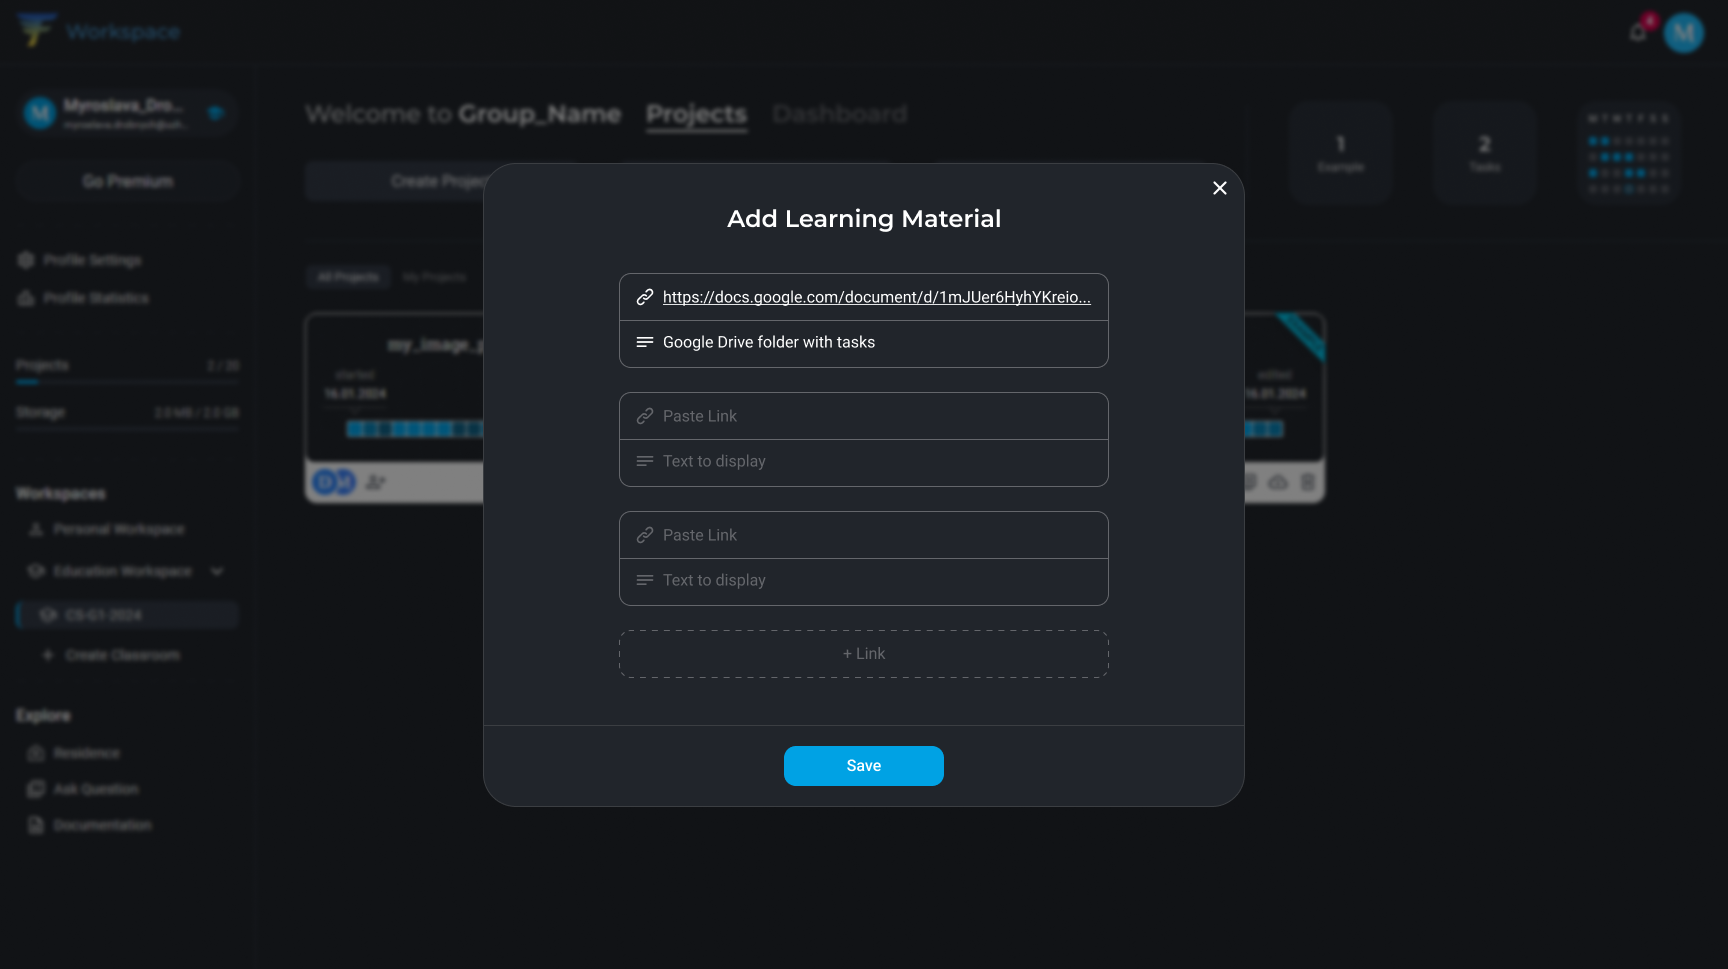
Add your educational materials by clicking the 'Learning Material' button.
10. Add links to learning materials along with their titles. This will make it easier for students to navigate through them.
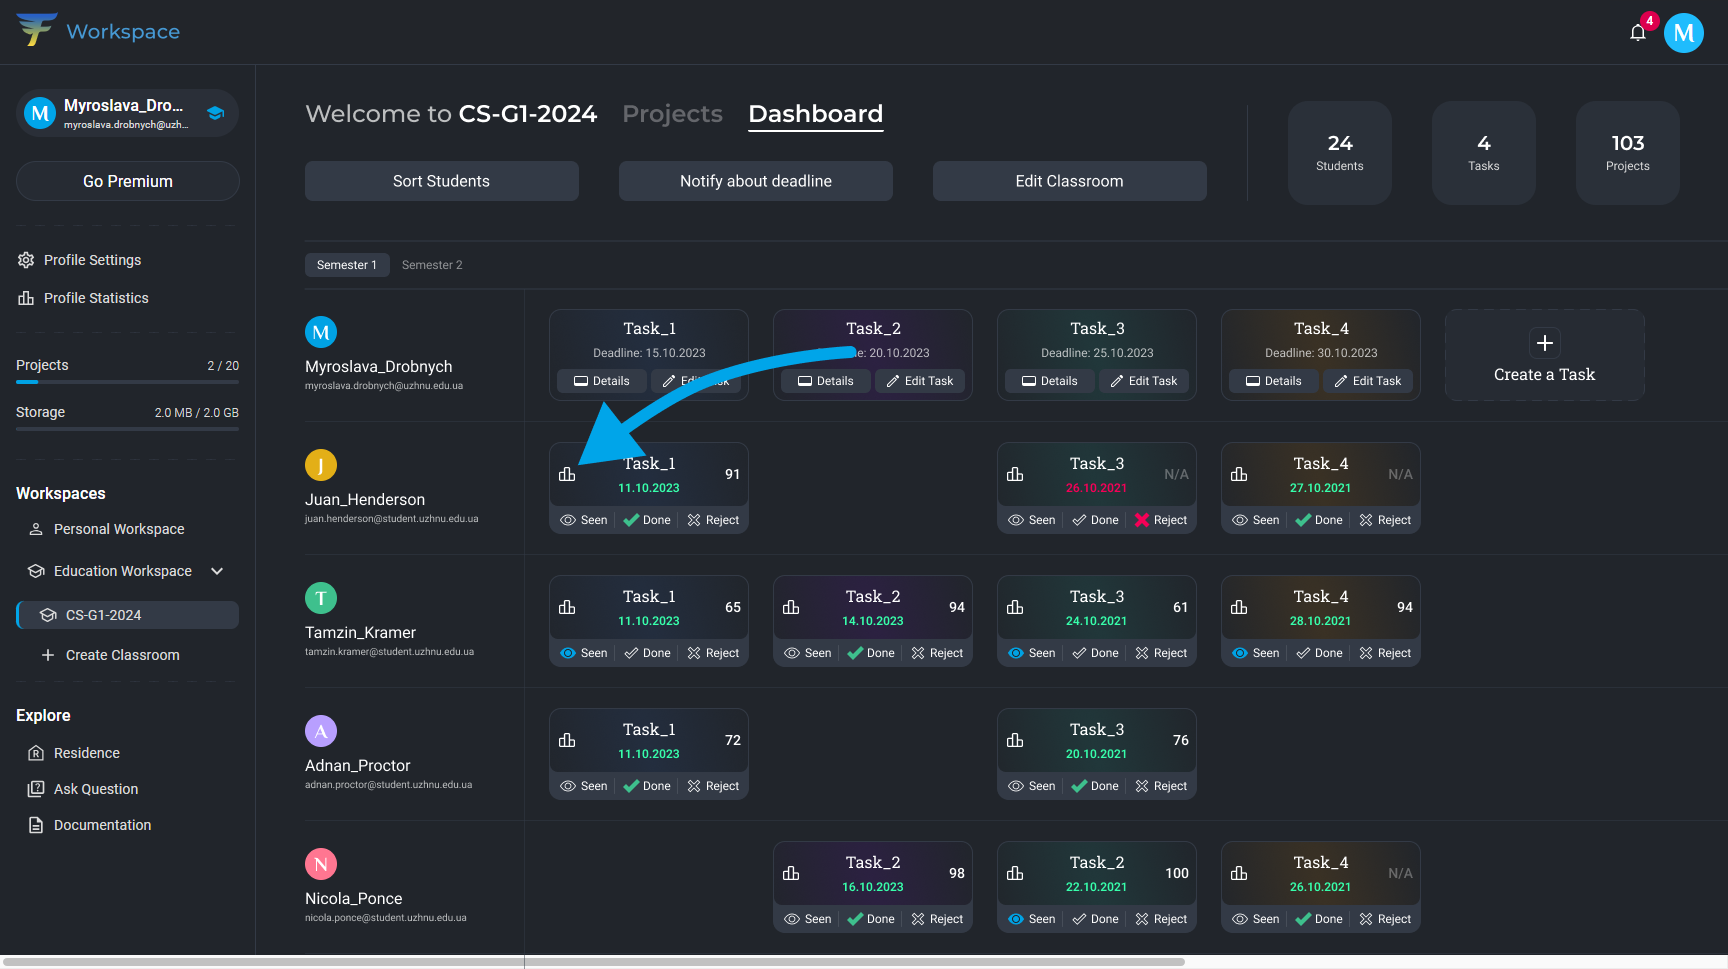
11. The Dashboard is a place where teachers and students can view information about the performance of their group.
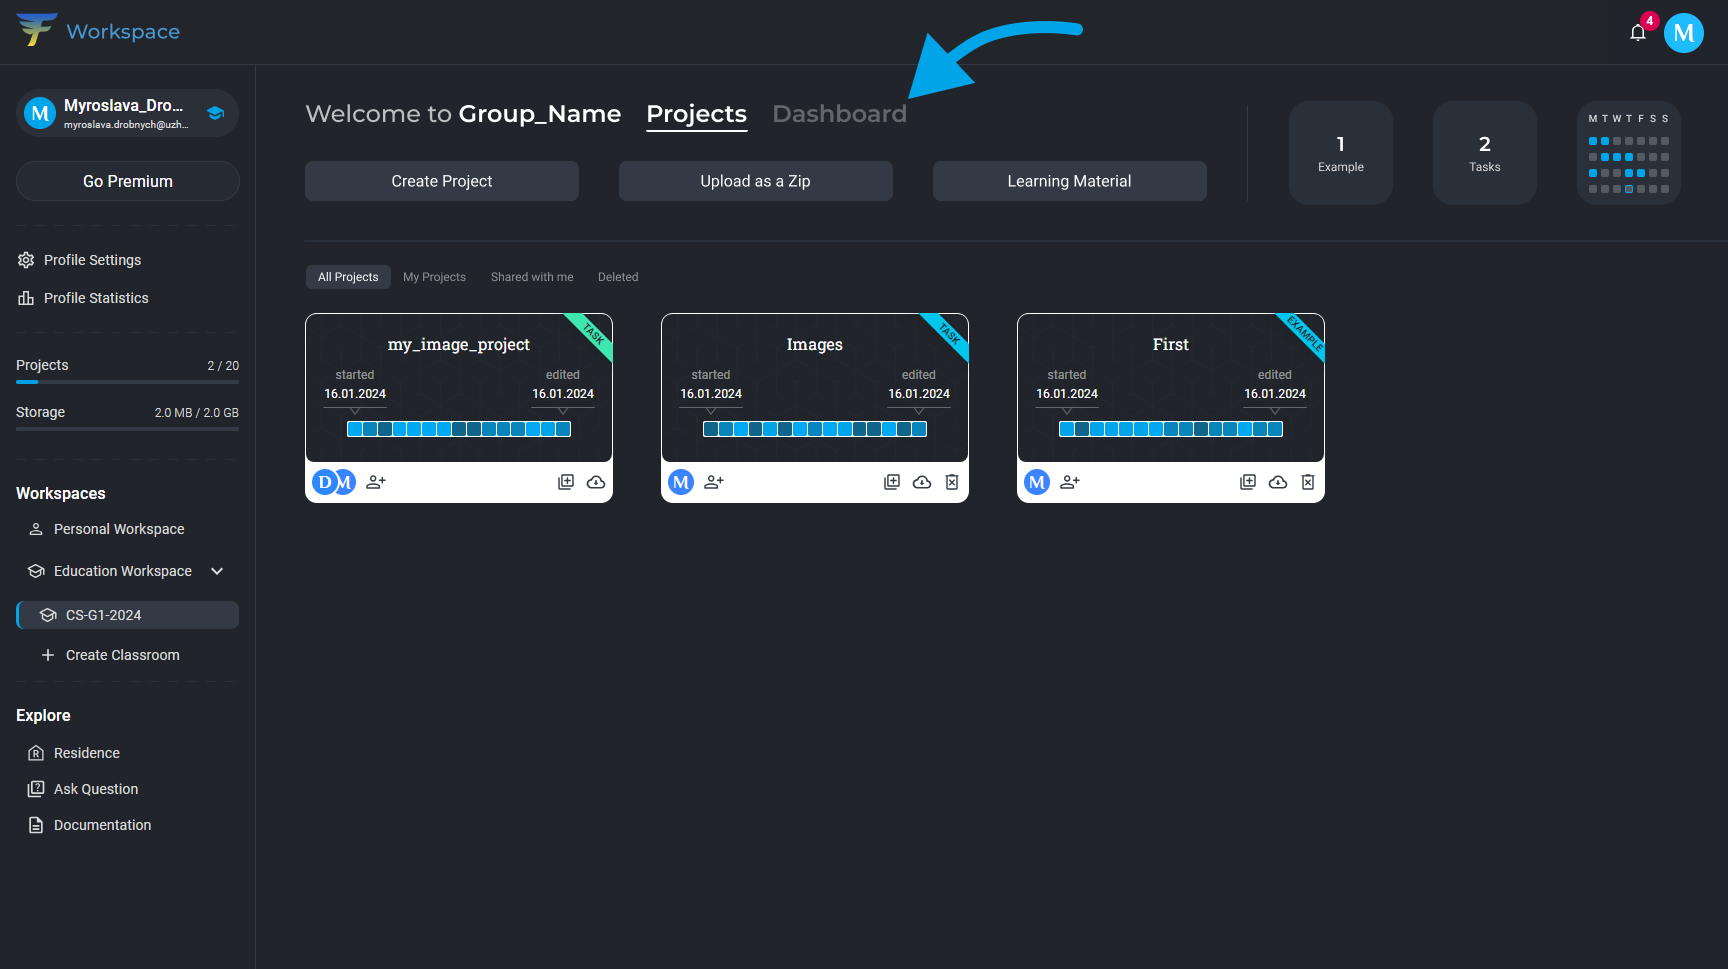
12. The Dashboard will help teachers to track students' performance and promptly identify issues. It will also assist students in visualizing their progress and effectiveness.
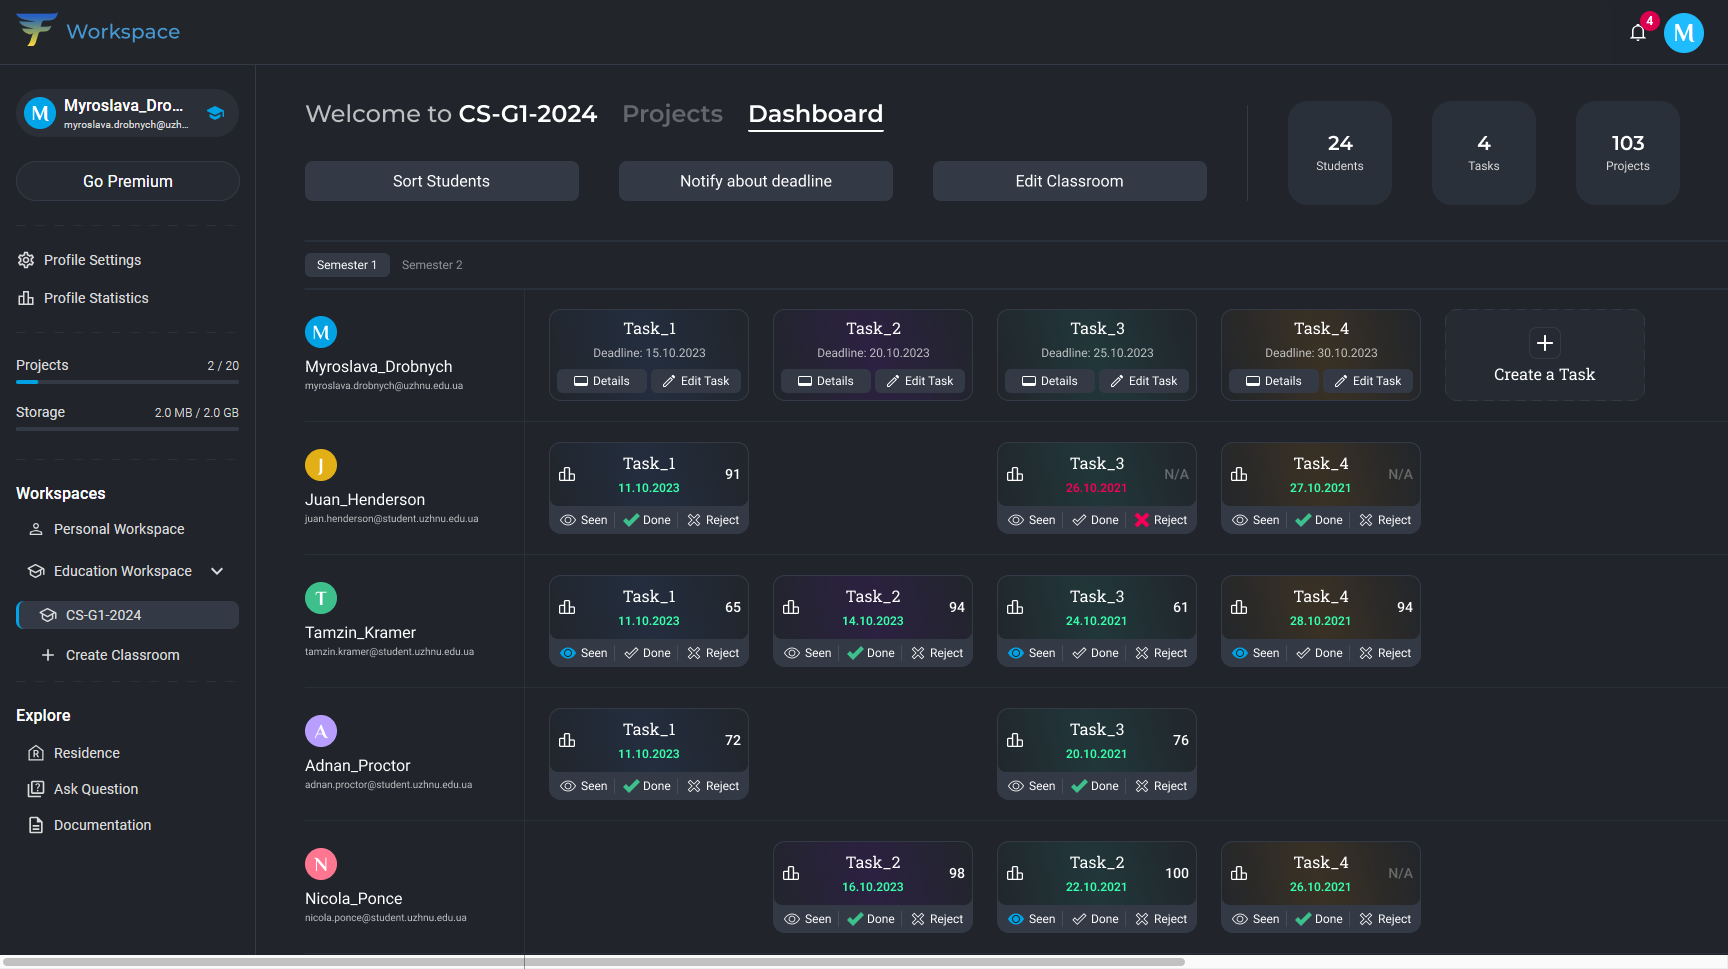
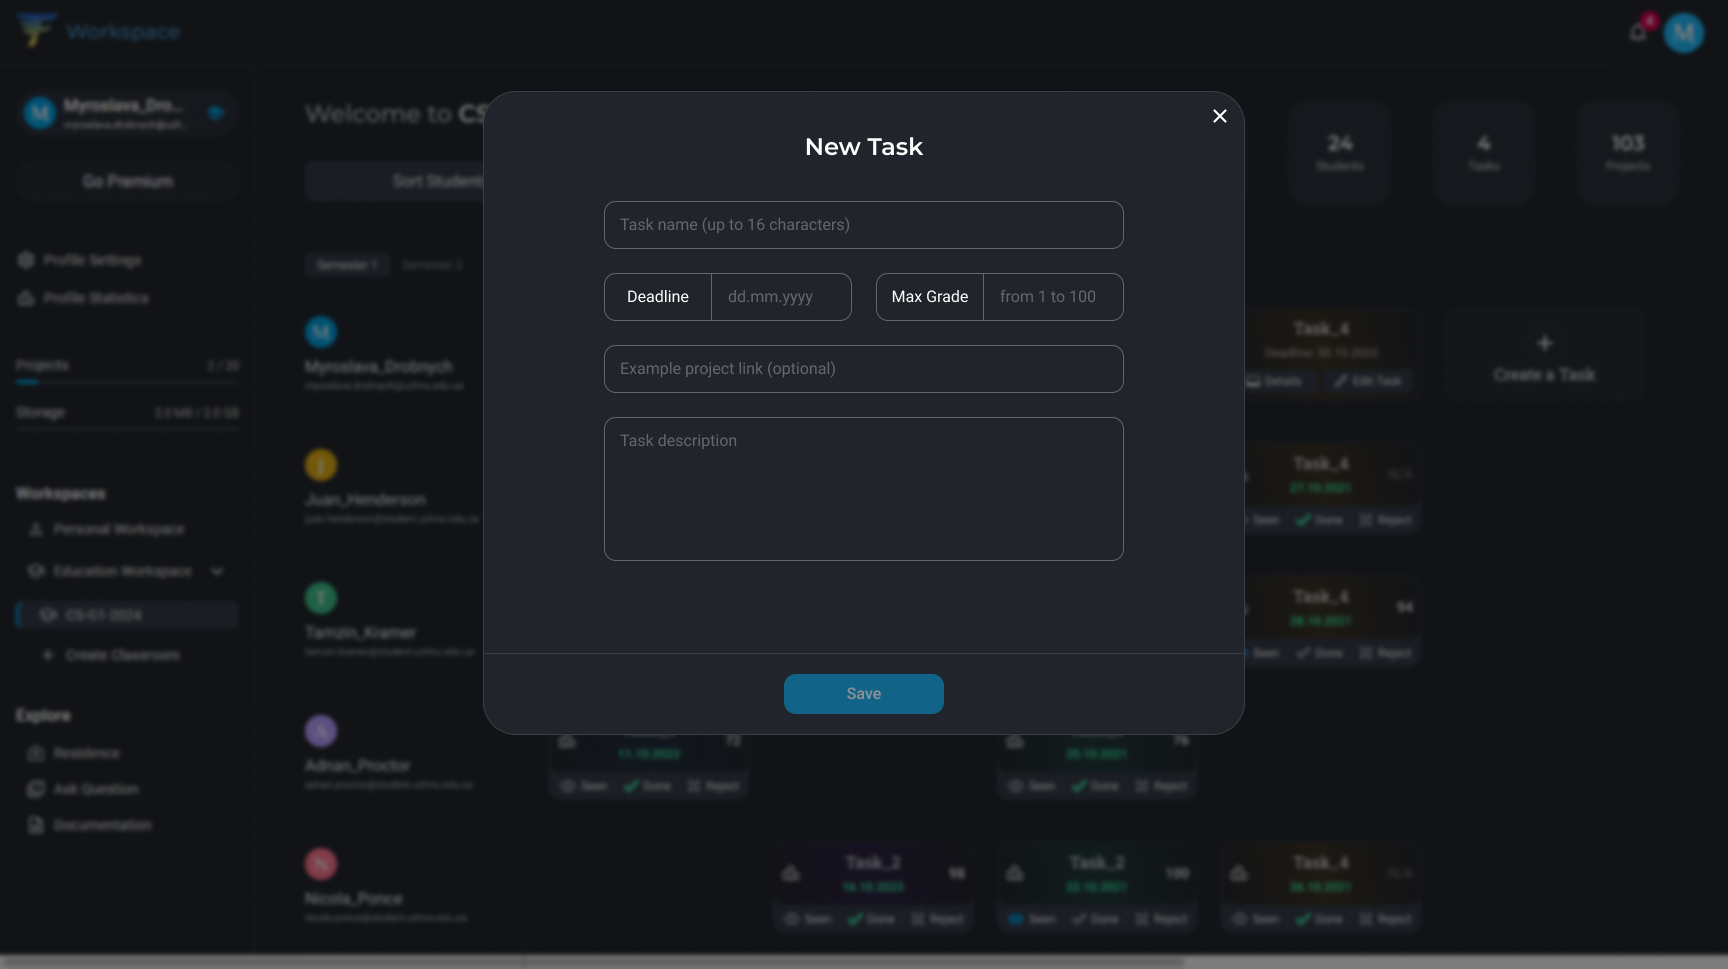
13. Start by creating assignments:
- Provide a brief title for the task;
- Set a deadline and maximum grading score for the task;
- Be sure to add technical specifications. This will help students understand what exactly they need to accomplish.
You can leave the "Example project link" field empty, but you can always attach the project to the assignment from the Projects tab.
14. Evaluate student's tasks. Students highly value feedback from teachers because it helps them to:
- Understand what they did well and what could be improved.
- Identify their strengths and weaknesses.
- Enhance their skills and knowledge.
15. After reviewing the student's project, fill in the fields:
Grade: Assign a numerical grade.
Comment: Provide feedback on the work. Instead of simply stating whether the work is good or bad, explain specifically what you liked or didn't like.
Status: Set the appropriate status:
- Seen: You have reviewed the work but allow the student to make edits.
- Done: You have reviewed the work and accepted it.
- Reject: You have reviewed the work but do not accept it.
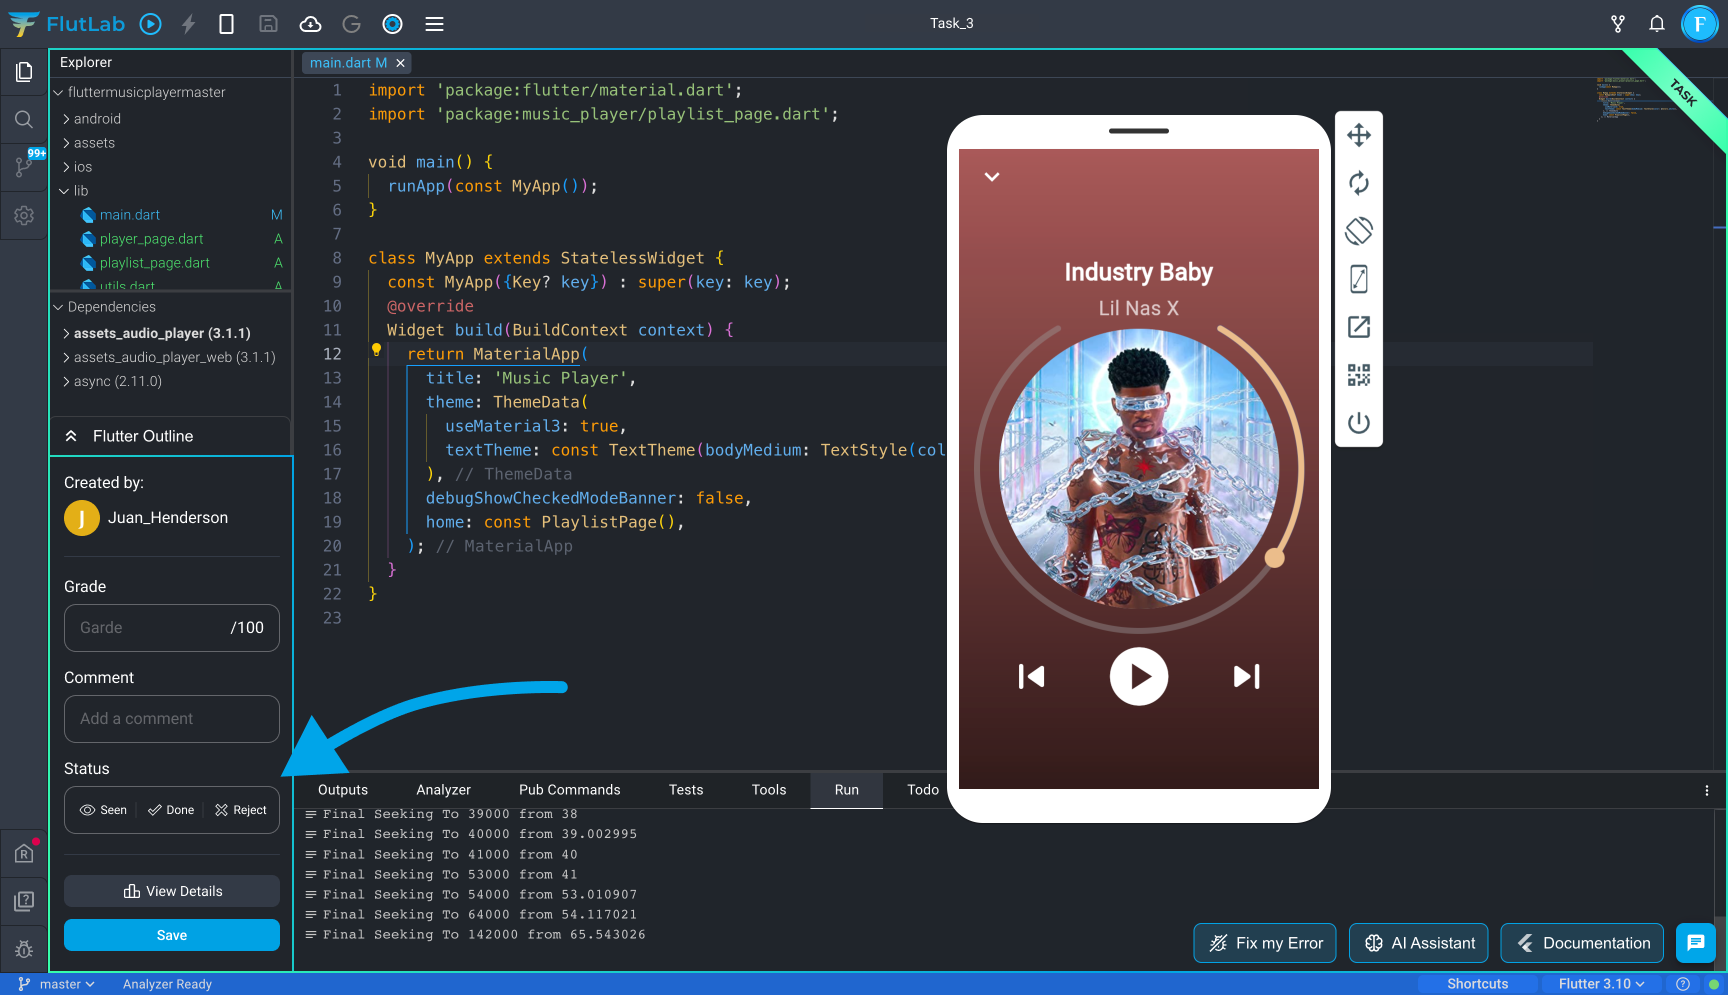
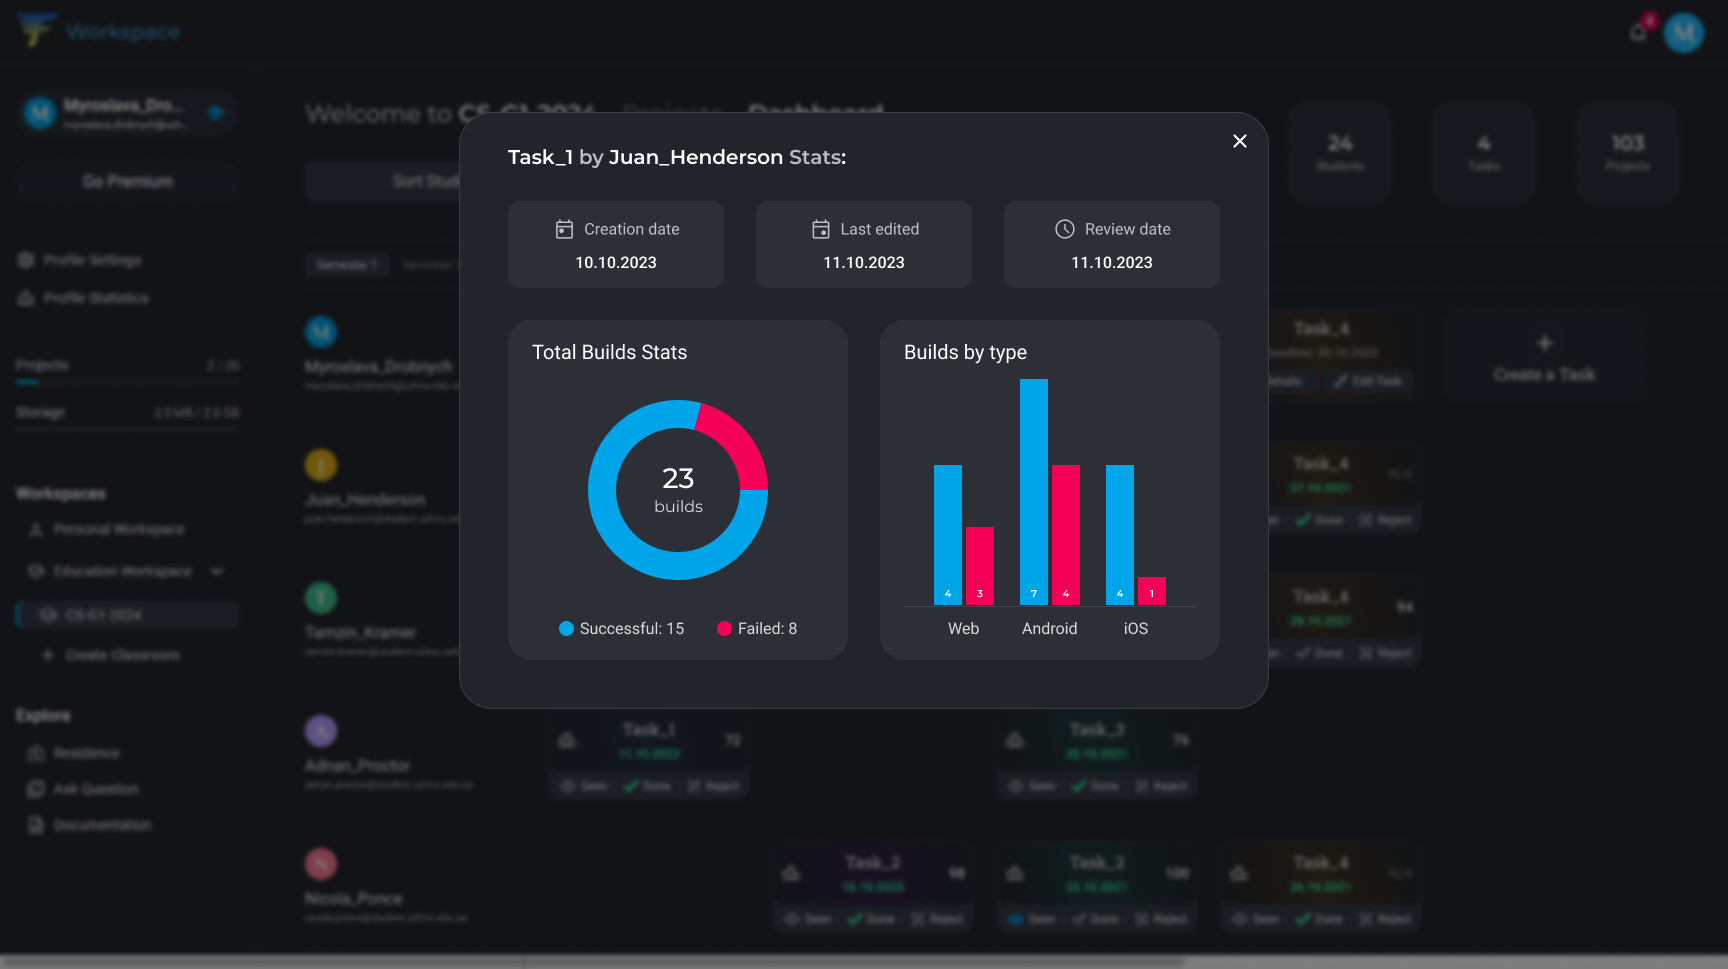
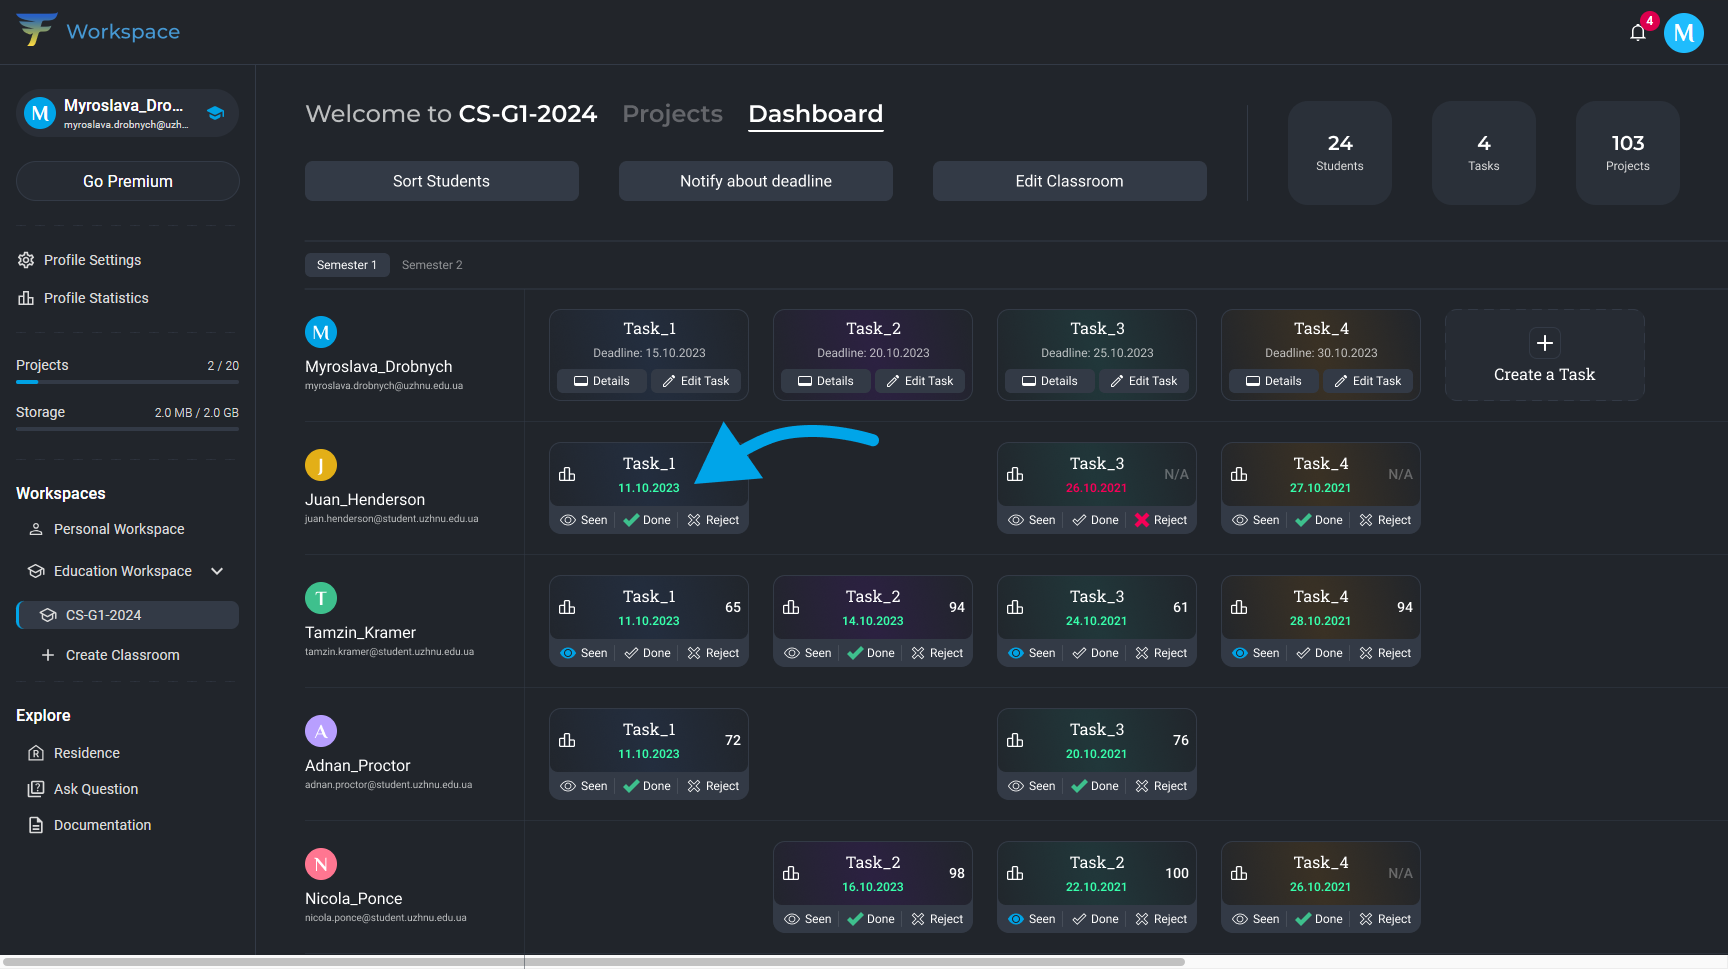
16. In the Dashboard, you can see how diligently a student worked on a project. Click the icon as indicated in the screenshot below.
17. Here you can obtain information about when the project was created and when the last edit occurred. Additionally, you can see how many and which builds the student ran during the execution of the assigned task.